Strange Characters In Emails
If you or your members are noticing strange characters in emails – especially where there should normally be a single or double quote, then these are due to what are known as “Smart Quotes”.
These special characters always show up when you copy text from a WordPress blog (some themes use these characters) or a Microsoft Word document.
Single quote:
'(correct)
`(incorrect)Double quote:
"(correct)
``(incorrect)
The single quote that works correctly is located next to the “Enter” key.
The incorrect one is located next to the “1” number key.
So copy your email text to a text editor, like notepad. Then change all single quotes to be ‘ and all double-quotes to be “ in your emails. Then put them back into DAP, and then test.
The “strange characters” issue should then be resolved.
NOTE: In a future version, we will implement an enhancement in DAP so that DAP can handle this automatically, but for now, the above solution is your only option.
DAP Login Xpress
What Is “Login Xpress”?
“Login Xpress” is a DAP feature that enables your members to be logged right into your membership site immediately upon completion of their purchase.
This is roughly how it works:
- Visitor arrives at your web site
- On your sales page, they click on any “Buy” button to purchase a Product (or Membership Level)
- They’re taken to the checkout page (depending on Payment processor being used) and they enter their payment information and hit “Submit”
- When they hit “Submit” to complete their payment, their payment is processed right away, and the buyer is immediately transferred back to your web site, in real time, and automatically logged in to your membership site, and they are taken to the “Welcome” page or “Members” page (you may choose what this page is going to be at a per-Product level)
Payment Processors That Work With Login Xpress
DAP supports this feature with the following payment processors:
- Paypal Standard (DAP-generated buttons only – will not work with Paypal-hosted buy buttons that you generate from within your Paypal account)
- 1Shoppingcart / 1SiteAutomation.com
- Authorize.net
If you use any of the payment options above, then you can set up your sales funnel in such a way that buyers are logged in right away immediately after purchase.
Payment Processors That DO NOT Work With Login Xpress (Yet)
- Paypal Website Payments Pro
- ClickBank
- e-Junkie
- WorldPay
DAP integrates with the above processors via some kind of “back-end payment notification” – similar to Paypal’s “IPN” (Instant Payment Notification). Which means the notification between the payment processor and DAP on your site only happens on the “back-end”. Which is why DAP can only deliver the login details to the buyer via an email, and cannot log them in right away (like it can do with “Login Xpress”), because the buyer’s information is available to DAP only when the payment processor sends out the IPN notification behind-the-scenes, so to speak.
So if you’re using the above processors to accept online payments, then what you need to do, is to redirect your buyers to a static “Thank You” page that has a message similar to the one below…
“Thank you for your purchase. In a few minutes, please check your email address used during purchase for your log in details to log in to the members’ area and access the product you just purchased.”
And behind the scenes, DAP would’ve already received the payment notification from the payment processor, and it would’ve created an account for your buyer, given them access to the purchased product, and sent them the “Thank-you Email” for the product(s).
DAP Plugin Framework
How To Setup Notifications/Triggers From DAP to 3rd Party APIs
We have now created a plugin framework that will allow DAP to trigger calls to 3rd party services when a user is added to a product (subscription/registration event) or when a user loses access to product (unsubscribe/unregister event).
In fact, we used the same framework to develop DAP -> Mailchimp integration in DAP 4.1.
Here’s the steps :
1) If you want DAP to trigger calls to the APIs/methods you wrote upon an addUserToProduct event or removeUserFromProduct event in DAP, then in the DAP products page – > notify plugin field, use the following format to integrate the APIs/class files. You can integrate multiple systems with DAP using this framework.
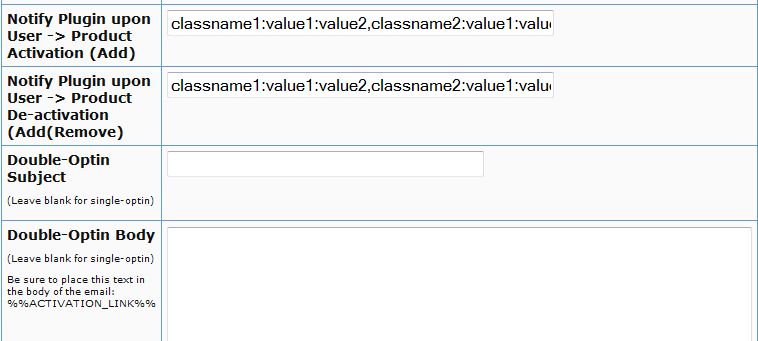
Say you want to integrate classname1 (that has the necessary APIs to register/unregister users to 3rd party service like Mailchimp ) and classname 2 (that has the necessary APIs to register/unregister users to another 3rd party service like GetResponse), then use this format in the notify plugins field above.
classname1:VALUE 1 you want to pass to the api: VALUE 2 you want to pass to the api: VALUE 3 you want to pass to the api
If you want DAP to call multiple APIs/ Classes, then just create a comma seperated list of classes that DAP should notify.
classname1:VALUE 1 you want to pass to the api: VALUE 2 you want to pass to the api: VALUE 3 you want to pass to the api,
classname2:VALUE 1 you want to pass to the api: VALUE 2 you want to pass to the api,
classname3:VALUE 1 you want to pass to the api
Whatever values (VALUE1, VALUE2.. ) you put next to the class name (all values should be “:” separated), DAP will forward those params/values to your APIs when a user is added to product or user is removed from product.
To integrate say classname1 which consists of the methods/apis to talk to your 3rd party services, create a folder called classname1 under /dap/plugins folder. Then under the classname1 folder, create a php script called classname1.class.php (just the way you notice a folder called mailchimp and under mailchimp a class file called mailchimp.class.php).
So you will have something like this:
/dap/plugins/classname1/classname1.class.php
Here’s what you need to have in classname1.class.php ( skleton class implementation ) :
< ?php
class classname1 {
function classname1() // constructor
{ }
//======== USER REGISTRATION===========
// this function is called by dap when a user is added to a product
function register($userId, $productId, $params) {
logToFile(“classname1.class.php: register(): “, LOG_INFO_DAP);
$dapuser = Dap_User::loadUserById($userId);
$email = trim($dapuser->getEmail());
$username = trim($dapuser->getUser_name());
$firstname = trim($dapuser->getFirst_name());
$lastname = trim($dapuser->getLast_name());
$data = explode(“:”,$params);
}
function unregister($userId, $productId, $params)
{
logToFile(“classname1.class.php: register(): “, LOG_INFO_DAP);
$dapuser = Dap_User::loadUserById($userId);
$email = trim($dapuser->getEmail());
$data = explode(“:”,$params);
}
}
?>
NOTE:
You MUST have same name methods (called register() and unregister() ) and the exact method signature as you see above.
You can call other methods/functions from register/unregister and/or
You can call 3rd party APIs from register/unregister methods and/or
You can include other class files.
Whatever values you pass (VALUE1, VALUE2 etc) via notify plugin, you can access those values in these methods. The values are available in the $params array.
That’s it.
You can add a test user to a product in DAP (via dap admin -> add users) and see if things work as expected.
Internationalization & Custom Messages
Last Updated: March 9, 2015
The article below applies to both of the following groups…
A) Customizing DAP’s Default Messages
Those who wish to replace DAP’s default error and success messages (like … “Sorry, No User found with the email address…” when someone is trying to use the “Forgot Password” feature, or the message “Sorry, either you have entered an invalid username/password, or you may not have activated your account yet.” which is shown when someone uses the wrong email/password when logging in to your membership site – with English text of their own choice, and
B) Internationalization
Those who wish to replace those messages with text in a completely different non-English, international language (like Spanish, Danish, French, etc).
Non-English Content
All of your content is really going to be within WordPress, which is already international-friendly, and all of your regular site content – including your sales pages, squeeze pages, member content, etc – can all be presented in any language that WordPress already supports.
DAP is also international-friendly.
DAP really has only 4 member-facing pages: Login Form, “My Content“, “My Profile” and “My Affiliate Info (everything else is within WordPress).
And all of these member pages in DAP can be customized in any non-English language of your choice. We tested with many languages like Spanish, Dutch, French, and even Chinese! Others will/should work too as long the character set is UTF-8 based.
So we’re excited to be able to help you create membership sites in multiple languages.
Non-English Emails
And what’s really cool, is that with DAP, you can also send Autoresponder & Broadcast emails in your language.
This is a very powerful feature for those who are often restricted by 3rd-party email services in sending out non-english emails.
In fact, the last time we checked, even the big-boys like Aweber don’t let you do that!
Customizing Language Files
1) Language File Setup for PHP
Open the file…
/dap/inc/language/english.php
and save the file as…
/dap/inc/language/custom.php
in the same folder.
Then you can change the english text within custom.php (last section that is not in caps – like “Sorry, no data found” in the example below) in your language, and upload it back to the same folder ( /dap/inc/content/language ) back on your site. For example…
define(“MSG_SORRY_NO_DATA_FOUND”,”Sorry, no data found.“);
becomes…
define(“MSG_SORRY_NO_DATA_FOUND”,”Désolé, aucune donnée trouvée.“);
(That’s the French translation, according to Google – blame them if it’s not right 🙂
2) Language File Setup for JavaScript
DAP also allows you to customize the JavaScript alerts and messages that pop-up for client-side validations of form fields.
Open the file…
/dap/inc/language/jsenglish.js
and save the file as…
/dap/inc/language/jscustom.js
…on your desktop. Then change the text inside this jscustom.js file and upload it back to /dap/inc/language/ folder on your web site.
That’s it!
Contents of english.php
//———- Added in v4.4 ———//
define(“AFFILIATE_INFO_PERFSUMM_SUBHEADING”,”Affiliate Performance Summary”); //used only in dap/index.php
define(“AFFILIATE_INFO_HEADING”,”Affiliate Details”); //used only in dap/index.php
define(“MSG_NO_COMM”,”Sorry, no commissions earned yet.”);
define(“USER_PROFILE_SUCCESS_MESSAGE_USER”,”SUCCESS! Your profile has been updated.”);
define(“MSG_ERROR_EMAILEXISTSVB”, “Sorry, this email id is already in use in our vBulletin Forum. Please try using a different email id.”);
define(“MSG_SUCCESS_USERUPDATE_NOVB”, “SUCCESS! Your profile has been updated, but could not register this username in our vBulletin Forum. Please contact the site admin for help.”);
define(“AUTOMATED_AUTORESPONDER_EMAIL_SUBJECT”, “New Content Available:\n%%CONTENT_NAME%%”);
define(“MSG_INVALID_PASS”,”Sorry, the password you have chosen contains special characters. Only Alphabets and Numbers allowed. Please go ‘back’ and choose a different password.”);
define(“COLNAME_EARNINGTYPE_TEXT”,”Cash/Credit”);
define(“USER_PROFILE_NEW_PASSWORD_LABEL_DAPUSERPROFILE”,”Password<br/>(only if changing)”);
//———- Added in v4.3 ———//
define(“USER_LINKS_COMINGSOON_TEXT”,”Coming Soon…”);
define(“USER_LINKS_COMINGSOON_PREFIX_TEXT”,”[In XXX day(s)]”); //do not change/remove the text “XXX”
define(“MSG_UNSUBSCRIBE”,”[In XXX days]”); //do not change/remove the text “XXX”
define(“MSG_MANDATORY”,”Sorry, all fields are mandatory. Please go ‘back’ and fill up the missing information.”);
define(“MSG_INVALID_EMAIL”,”Sorry, the email address you entered is invalid. Please go ‘back’ and enter a valid email address.”);
define(“MSG_INVALID_COUPON”,”Sorry, the coupon code you entered is invalid. Please go ‘back’ and enter a valid coupon code.”);
define(“MSG_INVALID_PRODUCT”,”Sorry, the product you are trying to sign up for is either invalid, or not authorized for free signup. Please email the web site owner and let them know about this error.”);
define(“MSG_MISSING_COUPON”,”Sorry, coupon code is a required field. Please go ‘back’ and enter a valid coupon code.”);
define(“MSG_PAYMENT_FAILED”,”Payment failed. Please contact the site admin. “);
define(“MSG_THANKYOU_SIGNUP”,”SUCCESS! Thank you for signing up. Please check your email for further details.”);
define(“BUTTON_UPDATE”,”Update”);
define(“SUCCESS_CREATION”,”SUCCESS! Your account has been successfully created! Please check your inbox for login information…”);
define(“NO_AUTH”,”Sorry, you are either not logged in, or not authorized to perform this operation.”);
define(“MSG_ALREADY_SIGNEDUP”,”It appears that you have already signed up for this. No further action is required at this time.”);//———- Added 03/22/2011 ———//
define(“MSG_ALREADY_LOGGEDIN_1″,”You are already logged in.”);
define(“MSG_ALREADY_LOGGEDIN_2″,”Click here to continue…”);
define(“MSG_PLS_LOGIN”,”Sorry, you must log in before you can view this content.”);
define(“MSG_CLICK_HERE_TO_LOGIN”,”Click here to log in”);
define(“MSG_SORRY_EMAIL_NOT_FOUND”,”Sorry, No User found with the email address “);
define(“MSG_PASSWORD_SENT”,”Please check your email. Your Password has been sent to “);//———- GENERAL TEXT ———//
define (“ACTIVATION_EMAIL_SUBJECT”, “%%FIRST_NAME%%, Welcome to %%SITE_NAME%% (Activation)”);
define (“AFF_PAYMENT_EMAIL_SUBJECT”, “%%FIRST_NAME%%, You’ve Got An Affiliate Payment”);
define (“FORGOT_PASSWORD_EMAIL_SUBJECT”, “Lost Password”);
define (“LOCKED_EMAIL_SUBJECT”, “Your account has been locked”);
define (“UNLOCKED_EMAIL_SUBJECT”, “Your account has been Unlocked”);
define (“INVALID_PASSWORD_MSG”,”Sorry, either you have entered an invalid username/password, or you may not have activated your account yet.”);
define(“SUCCESS_ACTIVATION”,”SUCCESS! Your account has been successfully activated! We have now sent you an email with your login details that you can use to log in below…”);define(“MSG_SORRY_NO_DATA_FOUND”,”Sorry, no data found.”);
define(“COLNAME_AFFID_TEXT”,”Aff Id”);
define(“COLNAME_NAME_TEXT”,”Name”);
define(“COLNAME_FIRSTNAME_TEXT”,”First Name”);
define(“COLNAME_LASTNAME_TEXT”,”Last Name”);
define(“COLNAME_EMAIL_TEXT”,”Email”);
define(“COLNAME_AMTEARNED_TEXT”,”Amount Earned”);
define(“COLNAME_DATETIME_TEXT”,”Date/Time”);
define(“COLNAME_AMTPAID_TEXT”,”Amount Paid”);
define(“COLNAME_HTTPREFERER_TEXT”,”HTTP Referer”);
define(“COLNAME_DESTINATION_TEXT”,”Destination”);//———- USER PROFILE TEXT ———//
define(“USER_PROFILE_HEADING_TEXT”,”Profile Information”);
define(“USER_PROFILE_FIRST_NAME_LABEL”,”First Name”);
define(“USER_PROFILE_LAST_NAME_LABEL”,”Last Name”);
define(“USER_PROFILE_EMAIL_LABEL”,”Email”);
define(“USER_PROFILE_USER_NAME_LABEL”,”Username”);
define(“USER_PROFILE_NEW_PASSWORD_LABEL”,”Password”);
define(“USER_PROFILE_REPEAT_PASSWORD_LABEL”,”Repeat Password”);
define(“USER_PROFILE_PAYPAL_EMAIL_LABEL”,”Paypal Email”);
define(“USER_PROFILE_PAYPAL_EMAIL_EXTRA_LABEL”,”For Affiliates Only”);
define(“USER_PROFILE_COMPANY_LABEL”,”Company”);
define(“USER_PROFILE_TITLE_LABEL”,”Title”);
define(“USER_PROFILE_ADDRESS1_LABEL”,”Address 1″);
define(“USER_PROFILE_ADDRESS2_LABEL”,”Address 2″);
define(“USER_PROFILE_CITY_LABEL”,”City”);
define(“USER_PROFILE_STATE_LABEL”,”State”);
define(“USER_PROFILE_ZIP_LABEL”,”Zip”);
define(“USER_PROFILE_COUNTRY_LABEL”,”Country”);
define(“USER_PROFILE_PHONE_LABEL”,”Phone”);
define(“USER_PROFILE_FAX_LABEL”,”Fax”);
define(“USER_PROFILE_UNSUBSCRIBE_LABEL”,”You are currently receiving product and <br/>account related emails. Uncheck to stop<br/>receiving all emails (not recommended)”);
define(“USER_PROFILE_SUCCESS_MESSAGE”,”SUCCESS! User has been successfully updated.”);//———- AFFILIATE PAGE LABELS ———//
define(“AFFILIATE_INFO_TOTALEARNINGS_SUBHEADING”,”Total Earnings”);
define(“AFFILIATE_INFO_AFFLINK_SUBHEADING”,”Affiliate Link”);
define(“AFFILIATE_INFO_YOURAFFLINKHOME_LABEL”,”Your Affiliate Link – redirects to home page:”);
define(“AFFILIATE_INFO_AFFLINKSPECIFIC_LABEL”,”Affiliate Link To Specific Page:”);
define(“AFFILIATE_INFO_AFFLINKSPECIFIC_EXTRA_TEXT”,”To link to a specific page, just add the text "&p=<insert_url_here>" to the end of your affiliate link, like this: (no "http://" in the 2nd link at the end – should start with "www")”);
define(“AFFILIATE_INFO_TEST_TEXT”,”test”);
define(“AFFILIATE_INFO_PAYMENT_DETAILS_SUBHEADING”,”Payment Details”);
define(“AFFILIATE_INFO_EARNINGS_DETAILS_SUBHEADING”,”Earnings Details”);
define(“AFFILIATE_INFO_TRAFFIC_STATISTICS_SUBHEADING”,”Traffic Statistics”);//———- USER LINKS PAGE TEXT ———//
define(“USER_LINKS_YOUCURRENTLYHAVEACCESSTO_TEXT”,”You currently have access to “);
define(“USER_LINKS_PRODUCTS_TEXT”,” product(s).”);
define(“USER_LINKS_ACCESS_START_DATE_TEXT”,”Access Start Date”);
define(“USER_LINKS_ACCESS_END_DATE_TEXT”,”Access End Date”);
define(“USER_LINKS_DESCRIPTION_TEXT”,”Description”);
define(“USER_LINKS_LINKS_TEXT”,”Links”);
define(“USER_LINKS_NOLINKSFOUND_TEXT”,”No links found.”);
Contents Of jsenglish.php
//New entry MSG_EMAIL_INVALID added on 07/14/2011
var MSG_EMAIL_INVALID = “Sorry, email id must of a valid format, may not be blank or contain any special characters”;var MSG_MISSING_INFO = “Please enter missing information…”;
var MSG_ENTER_EMAIL = “Please enter your email address before we can email you the password”;
var MSG_ENTER_PASSWORD = “Sorry, the password field may not be empty”;
var MSG_PASSWORDS_MISMATCH = “The two Passwords don’t match. Please try again…”;
var MSG_PASSWORD_INVALID = “Sorry, password contains invalid characters. Please choose from numbers and alphabets only.”;
var MSG_UPDATING_PROFILE = “Please wait… Updating User Profile …”;
var MSG_OPTOUT_WARNING = “WARNING: If you uncheck this box, you may not receive emails relevant to the product you have purchased. Are you sure you still want to Unsubscribe?”;
var MSG_NO_SPECIAL = “Sorry, no special characters allowed”;
Other links….
To customize the DAP Stand-alone Login form, click here.
To customize the DAP Login/Logout widget, click here.
To customize the DAP default Error Message with the ‘Lock’ image, click here.
DAP IPN Script Generator – 3rd party Shopping Cart integration
While DAP already supports a large number of shopping cart systems and payment providers, if you wish to integrate DAP with one that we don’t support yet, then you can custom create DAP integration for any 3rd party shopping cart providers that support Instant Payment Notification (IPN) via HTTP POST to 3rd party scripts.
NOTE: While you’re welcome to use the documentation below and develop your own custom integration with any payment processor that supports IPN, during development if you need our support, then we charge an hourly fee if you want help with your code.
Instant Payment Notification (IPN)
Instant Payment Notification (IPN) is basically a message service provided by a shopping cart service or payment processor, that enables them to notify third-party systems like DAP about events related to Payment transactions. You can use it to automate membership sign-ups and cancellations, and extend membership access (for recurring products).
Paypal pioneered the concept of IPN, and different systems may have a different name for it (for eg., ClickBank calls it “INS – Instant Notification Service”). But they all essentially mean the same.
So, using IPN, the cart/processor notifies DAP when a payment-related event occurs. Typically, these events represent various kinds of payments. The notification includes info about the buyer’s email id, product name purchased, product price, payment status etc.
And you can use the DAP IPN Generator script below to generate a PHP script that can receive (and understand) the IPN notification from your cart/processor.
DAP – IPN Script Generator
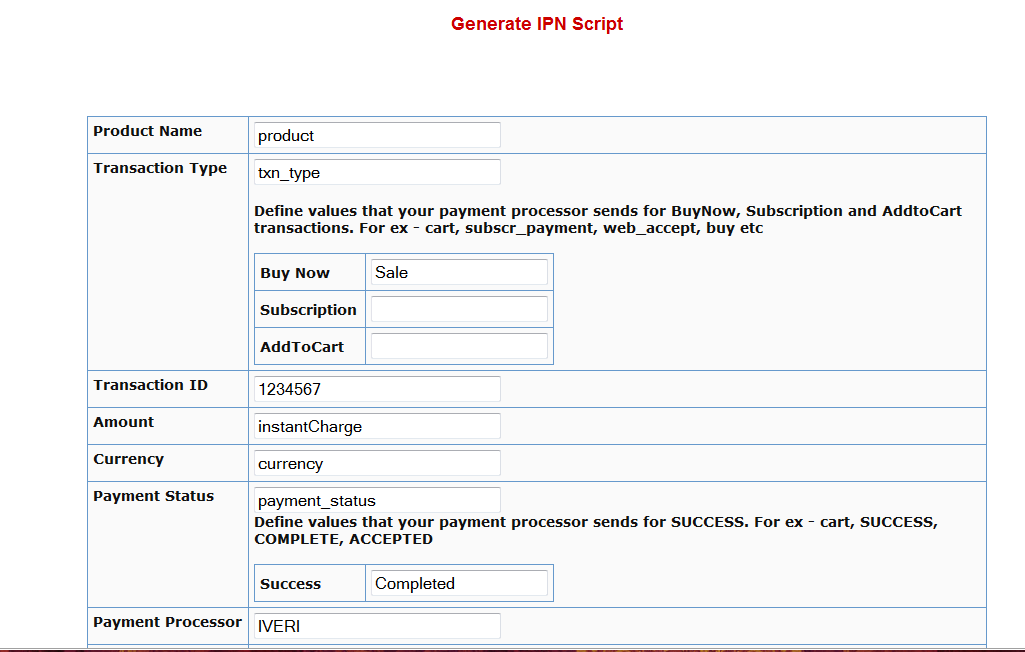
DAP provides the ability to generate an IPN Script/handler for any 3rd party shopping cart that support IPN. Once the script is generated, upload it to the dap folder on your site and update the shopping cart IPN URL settings with the URL to this script.
1) Go to DAP Admin > Setup > Generate IPN Script
2. Fill in the boxes with the exact TAG NAME / FIELD NAME that your shopping cart sends for each of the fields listed there.
Say that in the IPN notification, your shopping cart sends the product name in the tag/field called item_name. Then you need to enter item_name in the product name text box.
The transaction type indicator tells DAP what type of transaction it is… whether it’s an add-to-cart or buy now or subscription type of transaction. The tag name itself goes into the Transaction Type text box but the actual value for each type (buynow, cart, subscription) goes into the text boxes that say BUY NOW, Subscription, AddToCart.
In the text box in the picture above, the value of ‘Sale’ is an example value that a shopping cart might send to identify a ‘buy now’ transaction/button. Check your shopping cart’s IPN documentation and make sure you fill in the right values in each of the text boxes in the dap generate ipn page.
3. After filling up all the text boxes, hit the ‘Generate IPN’ button. It will open a small window with the actual dap IPN script.
Copy the whole script and put it in a file and lets say you call this file – dap-IPN-script.php.
Upload this file to the dap folder on your site.
4. Go back to Generate IPN Page in your DAP admin panel.
Now click on the ‘Test IPN Script’ button at the bottom. It will bring up a form where you can fill in actual values (you can give this form to your shopping cart provider so they know what fieldnames/tags to send to dap ipn handler/script). In the IPN URL text box, put in the full URL of the IPN Script you generated in step 3 (for ex – http://yoursite.com/dap/dap-IPN-script.php).
Run the test. It will simulate a real purchase transaction by a buyer and show you how DAP automatically manages the creation of membership account upon successful purchase.
Protect Entire Blog
If you, for some reason, need to protect your ENTIRE blog from “non-logged in users” – meaning, any part of your blog (menus, sidebars, widgets, etc), including the un-protected pages, should be seen only by someone who is already logged in – be it a free user or a paid user, then here’s how you do it…
- Go into your WordPress Admin, click on Appearance > Editor
- Make sure your current theme is selected in the drop-down towards the right/top corner.
- Click on “Header” (header.php) of your theme.
- Enter the following text right towards the very top of that file.
<?php
include_once “./dap/dap-config.php”;if( !Dap_Session::isLoggedIn() ) {
header(“Location: /dap/login.php”);
exit;
}
?>
The only thing you need to make sure is that you have the path to the dap-config.php correct.
If your blog is in the root, then use the code above as is.
If your blog is in a sub-folder, then replace line in red above, with the line in red below…
include_once “../dap/dap-config.php”;
That’s it!
WARNING
Please remember that if you do this, then you must use the default DAP login page /dap/login.php , and you won’t be able to put the login form within WordPress.
The reason for this, is that the protection code is being applied at the theme level, and the protection will also apply to all WordPress pages and posts – and if you put the DAP login form inside a WP page, then that page will also get protected from everyone, and no one will even be able to get to the login form in order to log in. That makes your site impossible to log in to, which of course makes no sense.
Troubleshooting Login Errors
Problem: When you go to http://YourSite.com/dap/ , you get redirected to a "Page Not Found – 404" error page.
Solution: This is happening because in DAP Config, you probably set up an invalid URL to be the default login page. So do this:
- First, log out of DAP by going to http://yoursite.com/dap/logout.php (manually type that in to your browser)
- Now log in to DAP via DAP's special login page – http://YourSite.com/dap/login.php
- Go to "Setup > Config > Advanced" screen
- Then where it says "Location of your login page (eg., if using WordPress). Should start with a forward slash (`/`)" – enter a valid URL there. Before entering any URL there, visit the URL separately in a separate browser tab (or window) and make sure you can actually get to it, and that it has a login form there. Then put that URL in to the above field, and click on "Update".
- Now in a separate browser (totally different browser) where you are not logged in to DAP or WP, try to go to http://YourSite.com/dap/ and see if it redirects to the right page. If not, revisit the steps above, and double check the login URL, that's all.
Creating A Ready-Made Affiliate Toolbox
You already know that DAP has a built-in affiliate program, and everyone who joins your site (or gets a free or paid account) is automatically made into an “Instant Affiliate”.
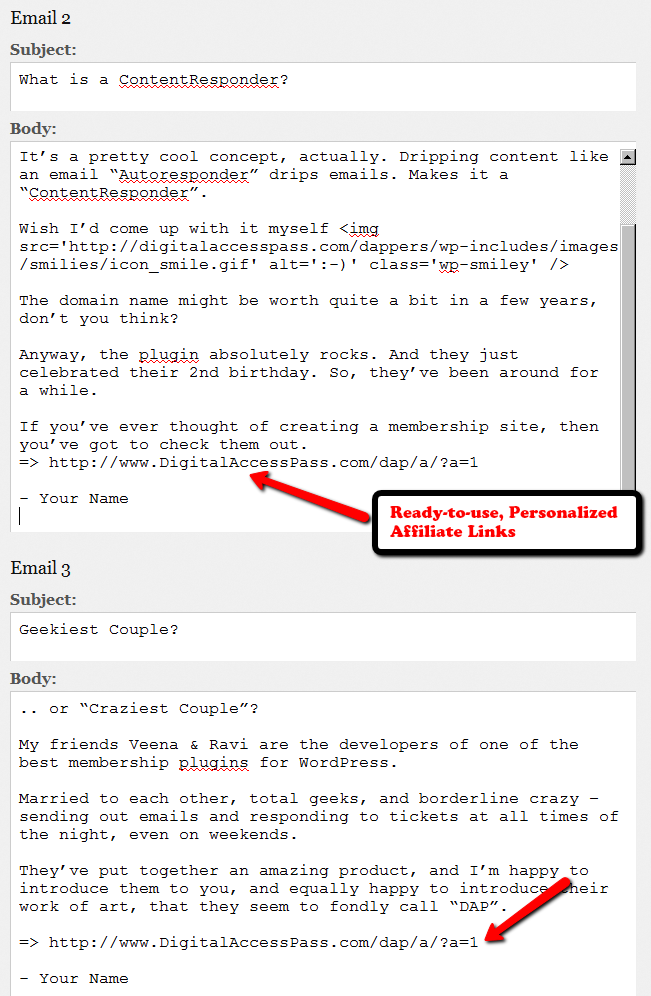
DAP also lets you create an Affiliate Tool Box for your affiliates, with ready-to-use banners, emails, subjects, signatures and text links – all with their own personalized affiliate link embedded into it already.
So all they have to do is copy, paste, and hit send.
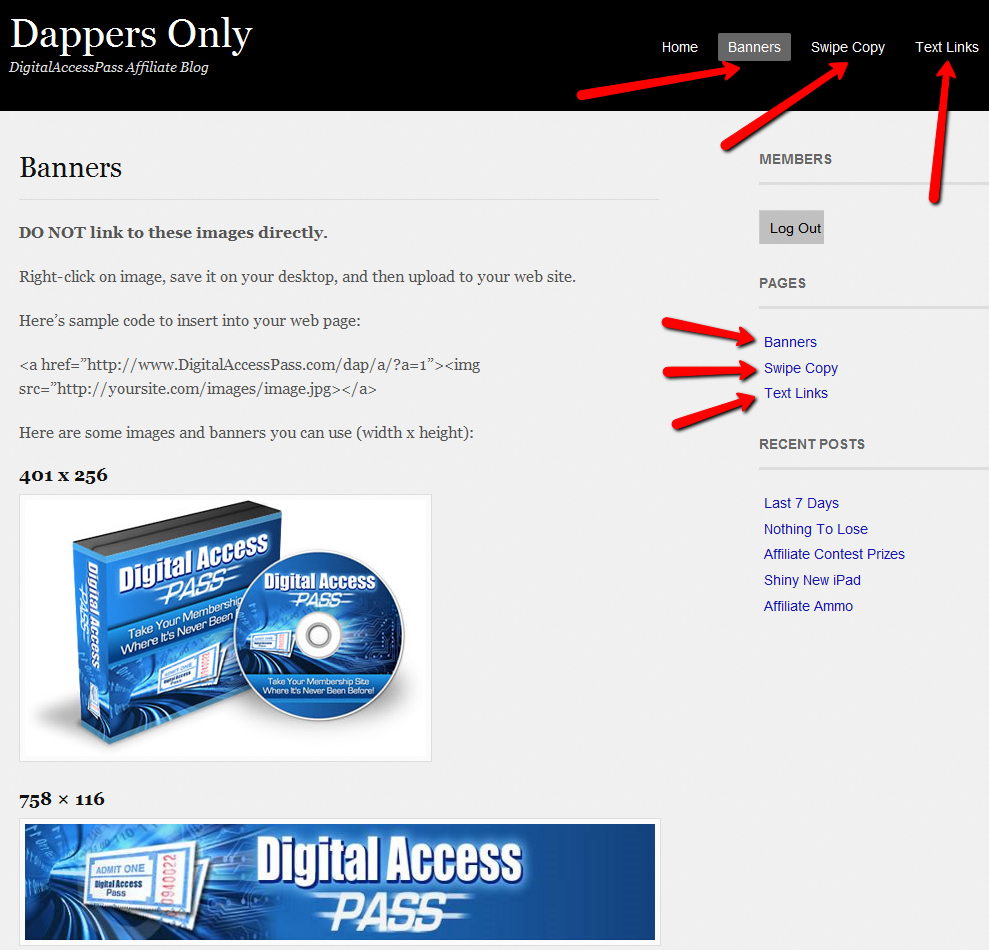
See the sample screen-shots below that show what our own affiliate tool box looks for DAP affiliates who wish to promote DigitalAccessPass.com to others.
Banners
Email Copy
Text Links
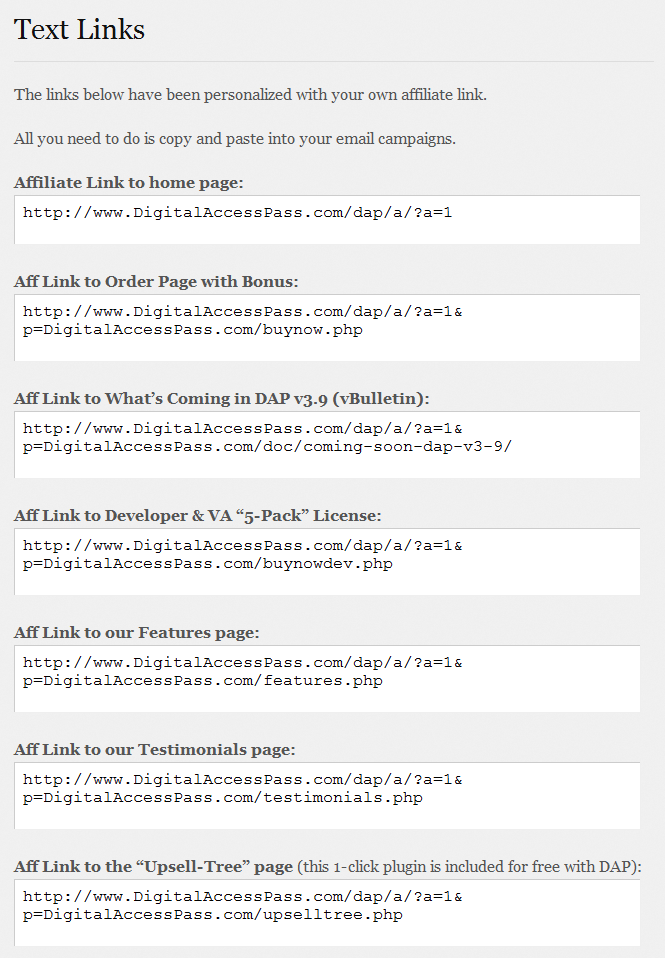
How To Create The Affiliate Tool Box
Create as many different pages you want on your blog – like “Banners”, “Email Swipe Copy” or “Text Links”.
Or create just one big page for all of this – like “Affiliate Tool Box”.
Download this text file which has all of the ready-made HTML code that you need to insert into the WordPress pages.
Feel free to modify the text as required, and be careful not to delete any of the special characters that are in there just for the formatting.
=> Download Sample Affiliate ToolBox Code
DAP As A Global Content + Affiliate Hub
DAP can only protect content on the same domain where it is installed.
So, if you install DAP on SiteA.com, then DAP can only protect content (blog posts/pages and files) on SiteA.com.
If you install DAP on subdomain1.SiteA.com, then DAP can only protect content (blog posts/pages and files) on subdomain1.SiteA.com.
DAP on SiteA.com cannot protect content on SiteB.com.
DAP on SiteA.com cannot protect content on subdomain.SiteA.com.
Similarly, DAP installed on subdomain.SiteA.com cannot protect content on the main domain, SiteA.com
Now, let’s say you own a network of web sites, some sell a product, some sell a membership course, some sell a physical product, and some just exist to build a list.
So let’s say you have 10 sites in all.
And you want someone who’s an affiliate on Site A, to be an affiliate for all ten, and be able to get commissions if the person he referred goes on to purchase a product from any of your 10 web sites.
Yup, DAP can handle that. And here’s how…
Configuration #1
Summary: Parent.com has DAP. Your sales pages are all on different sites, like ChildA.com, ChildB.com and ChildC.com. But all buy buttons point right back to the main DAP site (Parent.com) and that’s where all buyers from all child sites are eventually added to, regardless of where the sale was initiated from. So all members are actually created on Parent.com, and that’s where everyone would log in to access the member content.
1) Install DAP on your main “Parent” site where you have all of your content that needs to be protected/delivered. Make sure all of your content for all of your sites is on this main “Parent” (hub) site.
2) You can then have multiple “Child” sites – completely different domains from your parent site – which are basically just “sales page only” sites. Of course you can have a wordpress blog on each of them and have as much content as you want. Just put the main content to be delivered on the Parent site.
2A) On each of these child sites, you can use any DAP-supported payment processors to sell your products. So for eg., on one “child” site, you can use ClickBank, on another, you can use Paypal, on another you use e-junkie, etc.
3) All buyers end up with an account on your “Parent” site, which is where they get to access their content too. You can set up multiple blogs on one site for different look & feel for all of your various products, and deliver content from the specific blog for the specific product. DAP can support multiple blogs on one site, so that’ll work fine.
4) Since all of your actual products are on one DAP installation, your affiliates can use the same affiliate link for promoting all of your “child” sites. Which means, anyone buying any product across your network, will result in a commission for your affiliate
5) Since all of your users are in one database, email marketing also becomes extremely simple. You can send autoresponders & broadcasts all from within DAP
6) And anyone purchasing any product across your entire network, instantly and automatically becomes a “global” affiliate – which means they can straightaway start promoting any of your web sites. So if your parent site is Parent.com, and you have 3 child sites called childA.com, childB.com and childC.com, then your affiliates’ global affiliate link would be:
http://Parent.com/dap/a/?a=1234
Now if they wanted to promote childA.com, they just use the redirection feature of DAP like this:
http://Parent.com/dap/a/?a=1234&p=www.ChildA.com
Or if they want to point to a specific page on childA, they can do this:
http://Parent.com/dap/a/?a=1234&p=www.ChildA.com/specificpage.php
or
http://Parent.com/dap/a/?a=1234&p=www.ChildA.com/blog/specific-post/
Plus we’re coming up with a “N”-tier affiliate program in 4.0, which will make it even more powerful when you club it with the ‘global’ concept explained above, as every new member becomes a global affiliate, and will also get multi-tiered commissions across ALL purchases across ALL of your child sites.
DAP now supports Coupon codes – which again means your global affiliate will be able to use coupon codes for any product across your network. So the extensions are unlimited, and the possibilities are infinite.
Configuration #2
Summary: There’s only one site – Parent.com. That’s where DAP is installed. All child sites and content for those sites, are created in “sub-folders” on the same Parent.com site.
Parent.com has “dap” in its root folder.
Parent.com/site1/ is a blog for Site 1 which has all of the content for whatever is being sold on Site 1. Sales page can be the root of the “site1” blog itself, or in a separate WordPress Page on that blog.
So you will have one blog per site, each installed as a separate WP installation, in sub-folders of Parent.com.
Parent.com/site1/
Parent.com/site2/
Parent.com/site3/
Parent.com/site4/
Each of the above blogs should have their own copy of the “DAP-WP-Livelinks” plugin.
But only one installation of the “dap” folder itself. DAP is in root.
Parent.com/dap/
The blogs must be in sub-folders of the main domain – they may not be in sub-domains.
So, in a nutshell…
- DAP enables to you have one, large, global “store”.
- This is also your content and affiliate hub, while unifying and standardizing content delivery for all of your products,
- This gives your members a “Single Sign-on” facility, where if they log in to your “Hub Store”, they basically never have to log in again
- All of the content can be made available from one “Content Delivery” site
- Your affiliate program goes “Global” – which means if you’re an affiliate for one site, you can promote all sites and all products in the network using just one affiliate link. Which will help you recruit more affiliates, and help get them excited about promoting your network sites.
| what i wish to do is have a central dap install, that looks after all my sites and affiliate programs, of course i would like different site members to access the down load they bought in they same style of the site they bought i would like different site members to access the affiliate programs that they enrolled in affiliate program , but also let them taste my others, so each product wold have its own tools affiliate links, my current set up is a hep desk in my root folder, as that is generic name which will work for all my products,i wold then like to deliver products within this system so each has its own download pages , in its own styleall im asking is do i need 10 wp blogs to do this or just one or none can blogs and pages be sub-domains or only folders ( you answered this in your last post )thanks for your help |
|||
|
|||
Customizing User-facing CSS
Starting DAP v3.8, there is a file in the folder dap/inc/content/ called userfacing.css
Copy (not rename) it to a file called customuserfacing.css
Basically you are adding the word “custom” at the beginning of the file name.
Feel free to customize the CSS, and then upload it back to the same folder on your site.
This CSS file only impacts certain user-facing sections, like the User Links page, User Profile page and Affiliate Details section.

