This is the page that displays all of the member profile fields. When your logged-in members view this page, they’ll find all their profile information (for ex- email, password, address fields, custom fields etc) displayed on this page. They can also update their profile information on this page.
Watch this video to see how-to create member-facing pages in DAP
Steps to create a Member Profile Page
1. Login to your WordPress admin dashboard.
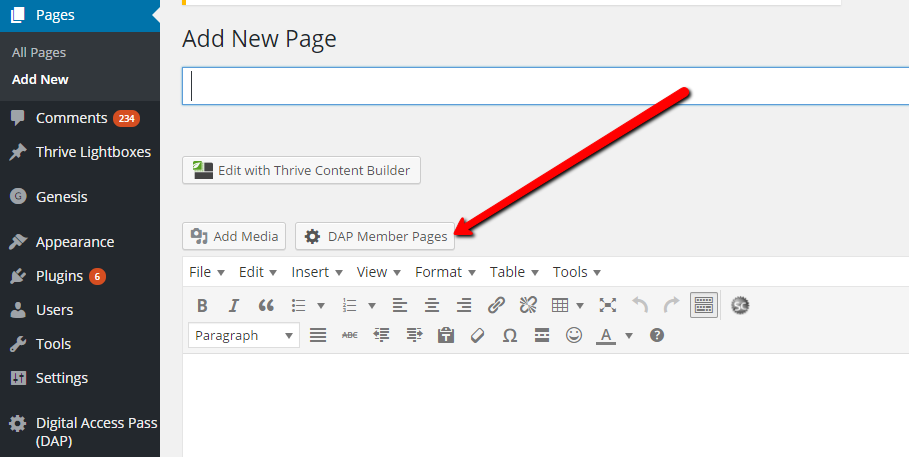
2. Create a new WordPress Page. Say you call it “My Profile”.
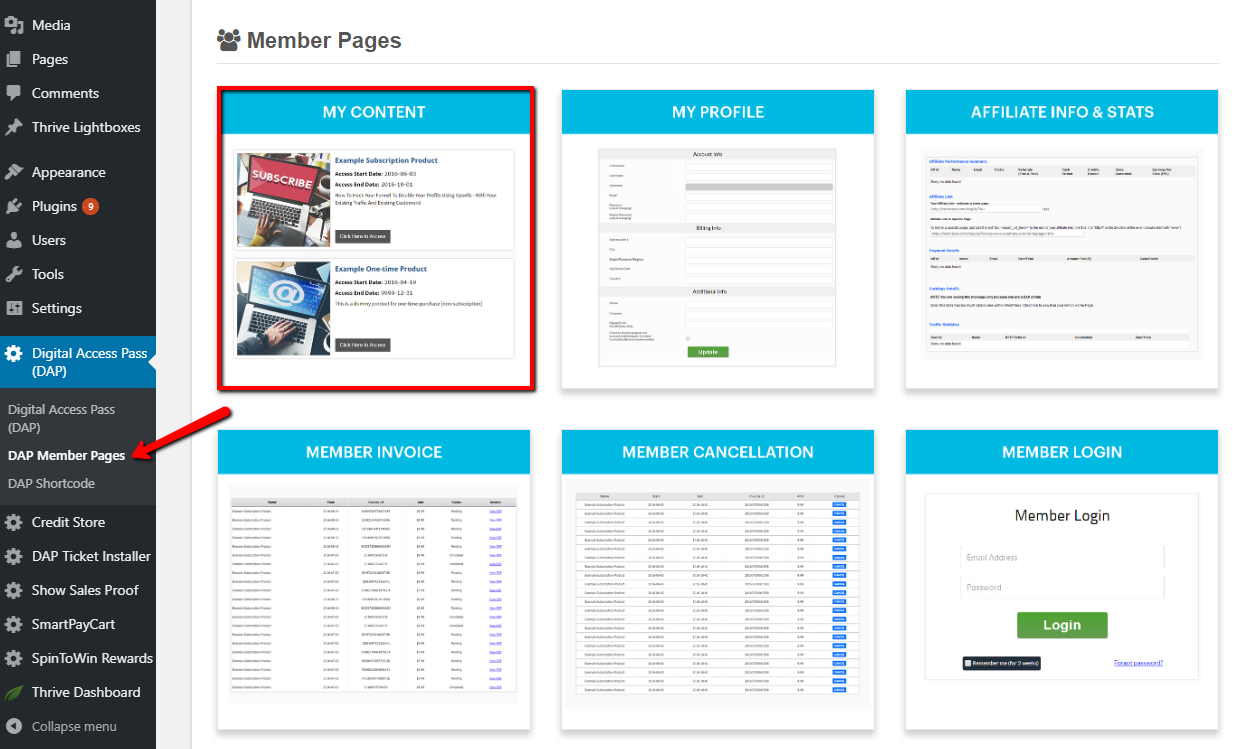
3. Now click on the “DAP Member Pages” button.
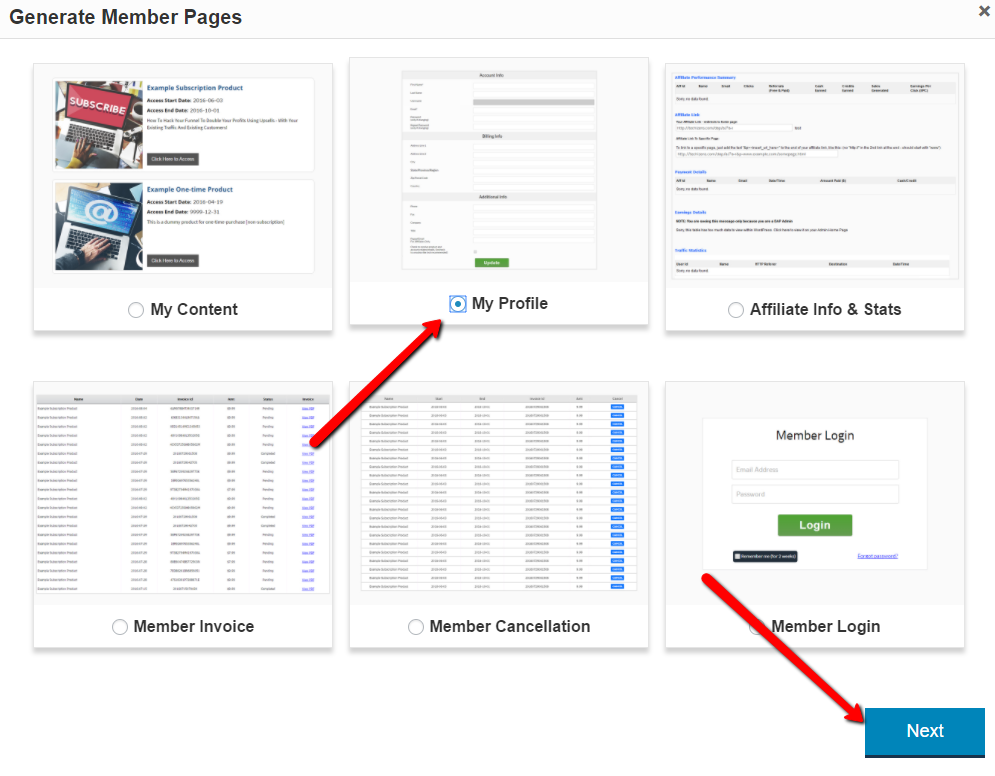
And then select “My Profile” and click on Next.
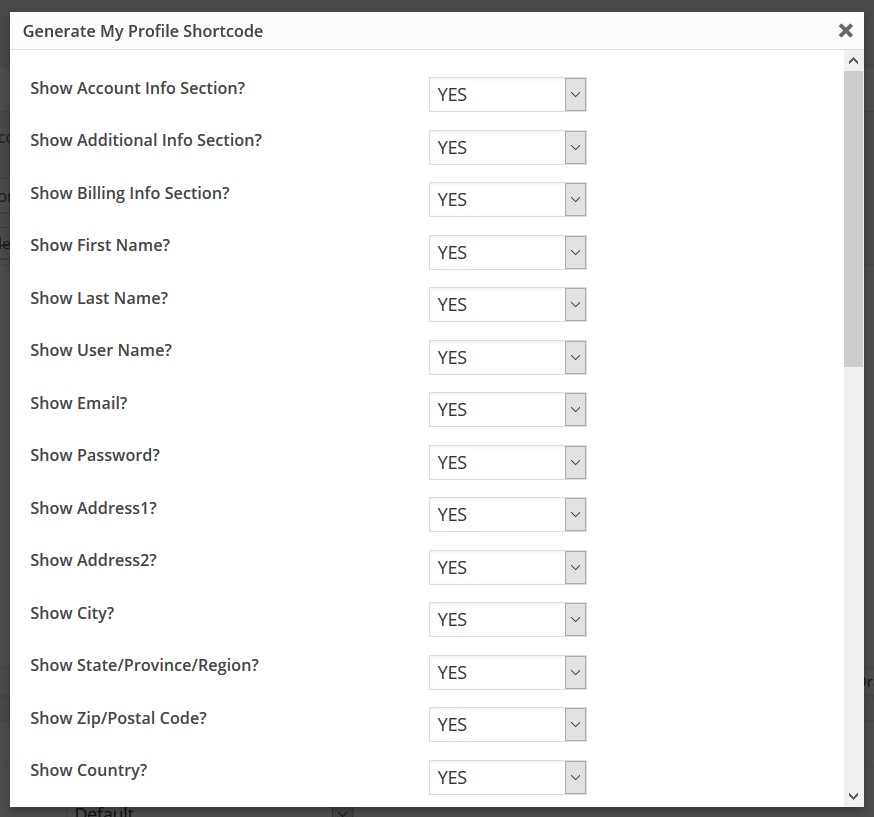
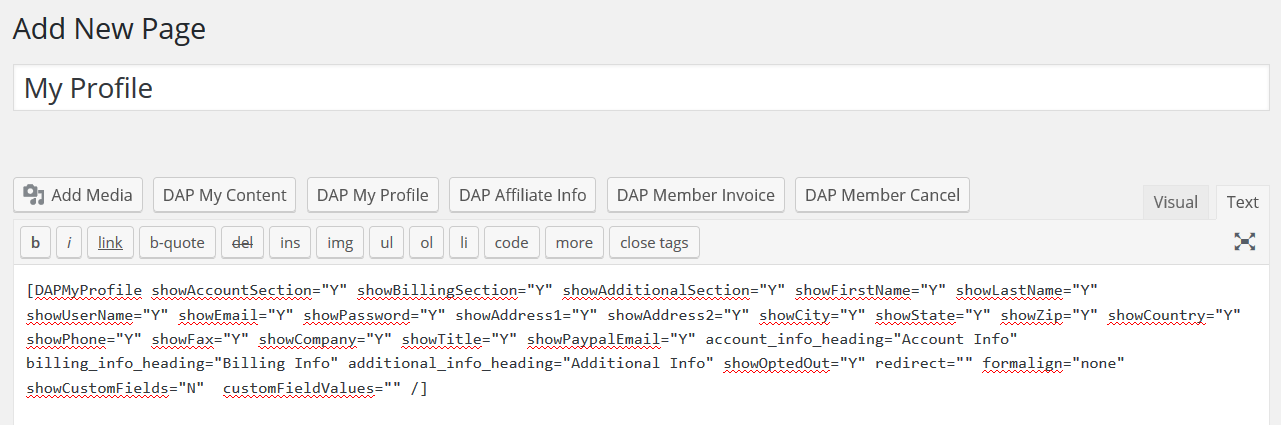
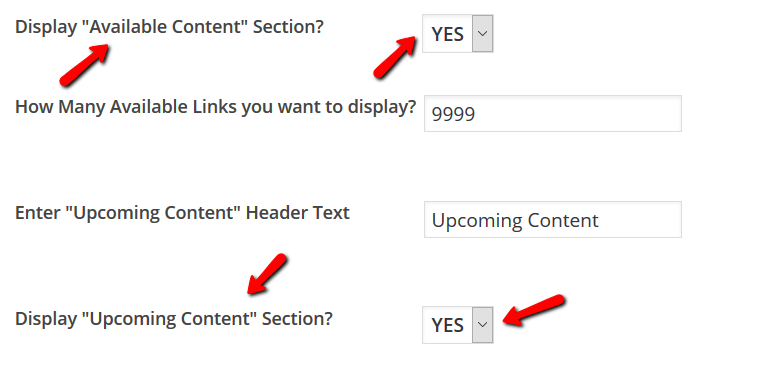
4. It’ll bring up an editor window where you can configure the fields that you want to display on the profile page.
Just set the fields that you don’t want to display on the profile page to “NO”.
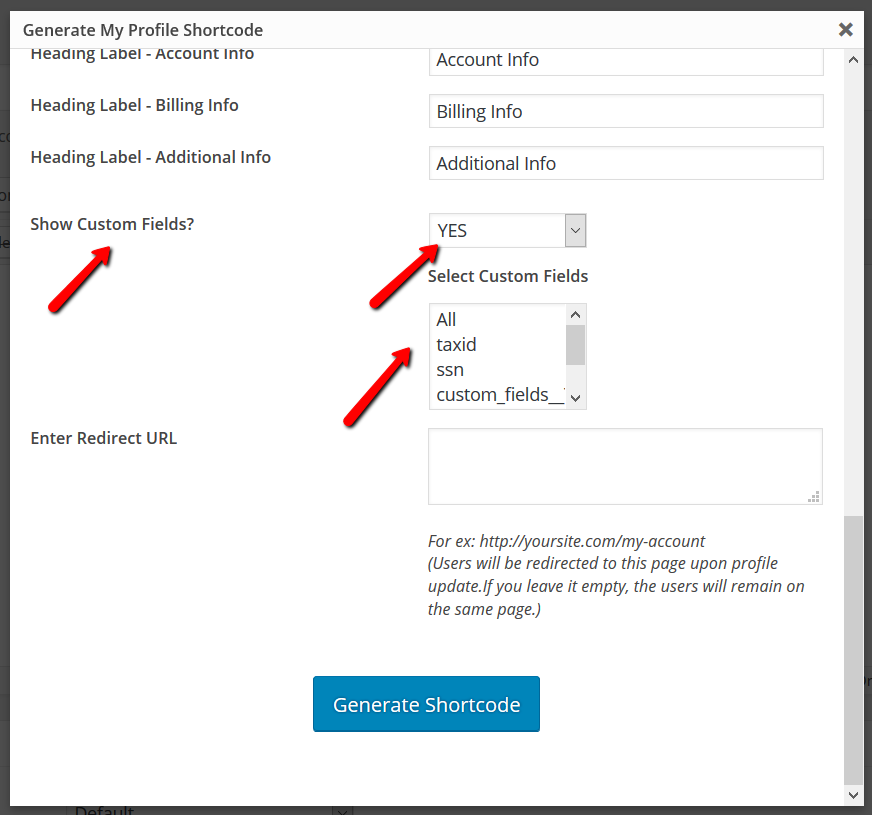
5. You can also select the custom fields that you to display.
6. If you enter a “Redirect URL” in the editor , your members will be redirected to that page after they update their profile.
If not, they will remain on the same page.
7. Click on the “Generate Shortcode” button to generate the [DAPMyProfile] shortcode.
8. You can now publish the page.
Say you’ve already created a parent page called “Members” or “Member-Home” or “My Account”, you can just add the newly created “My Profile” page as a sub-page under the parent.
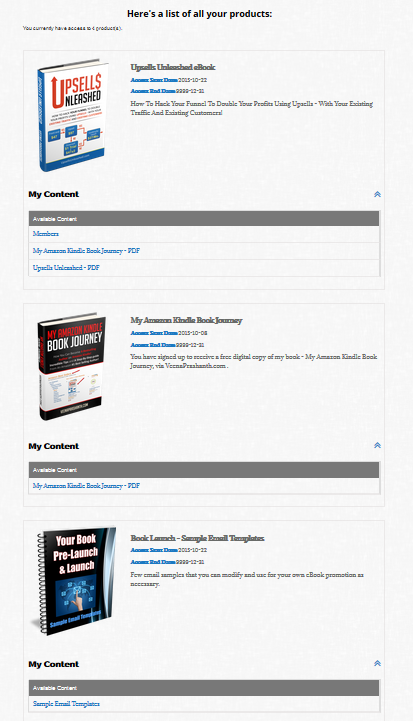
This page will display a list of all the purchased products (and the available content under each product) to the logged-in member. You can customize what you want to show on this page.
Watch this video to see how-to create member-facing pages in DAP
Here're the steps to create "My Content" Page.
Login to your WordPress admin dashboard.
Create a new WordPress Page. Say you call it "My Content".
Now click on the "DAP Member Pages" button.
Next click on "My Content" to create a MyContent shortcode.
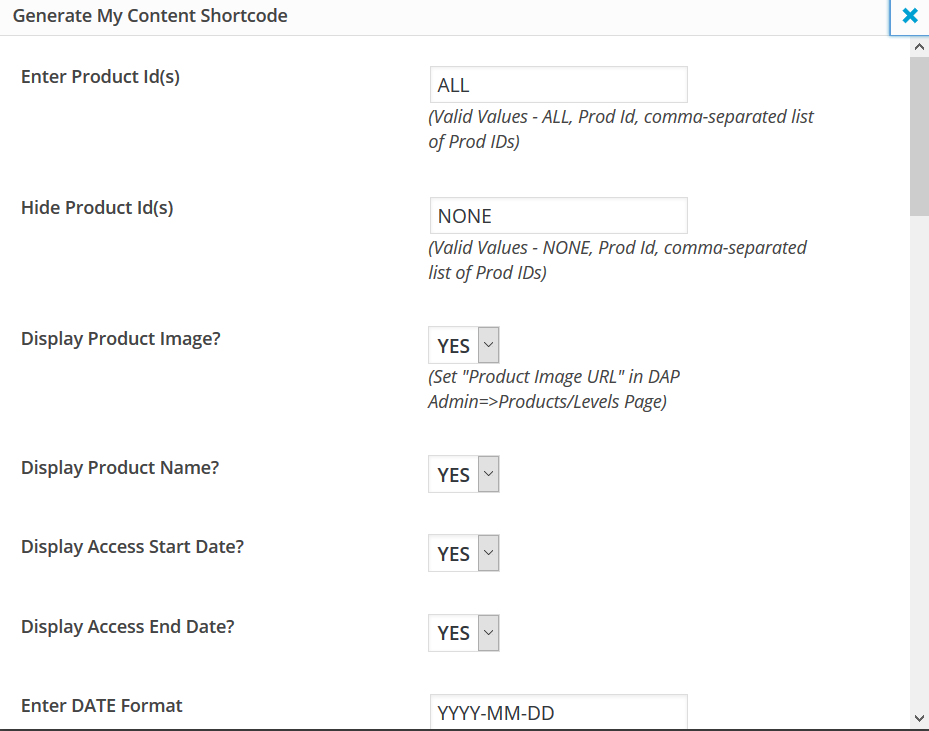
It'll bring up an editor window where you can select a MyContent template, customize style and messages, and also configure the fields that you want to show/hide on your MyContent page.
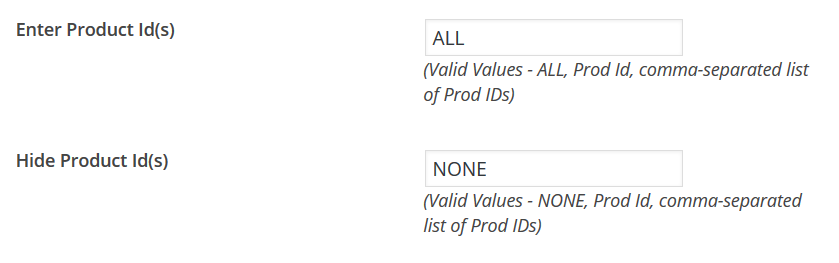
If you want the "My Content" page to only show certain products, you can enter a comma-separated list of product Ids and the "My Content" shortcode will restrict the list to just those products.
If you want the My Content to display all products (that the logged-in member has access to), then set it to ALL (default). You can also hide specific product Ids by entering a comma-separated list of Ids in the Hide Product Ids field.
You can configure the "My Content" shortcode to just display the basic product details (and not the individual pieces of content that belongs to each product).
Now when a logged-in member visits the MyContent page, DAP will automatically display a list of all their products (free & paid) and all the available content under each product. Here's an example:
DAP comes with an easy to use shortcode editor that'll allow you to create member-facing pages like "my profile", "my content", "my invoice", "my affiliate links & stats" etc) with the click of a button.
You can create a login page for your members using the [DAPLoginForm template="template5"] shortcode. After you create a login page using the DAPLoginForm shortcode, enter the URL of the login page in DAP admin => Setup => Config page => Login URL field.
You can create a "My Content" page for your members using the [DAPMyContent] shortcode. This page will list all the products and the content links that are available to the logged-in member.
You can create a "My Profile" page for your members using the [DAPMyProfile] shortcode. Your members can update their profile details (for ex - name, email, password, address etc) on this page.
You can create a "My Receipts/Invoice" page for your members using the [DAPShowTransactions] shortcode. It'll list all the payment transactions and a link to the invoice (pdf).
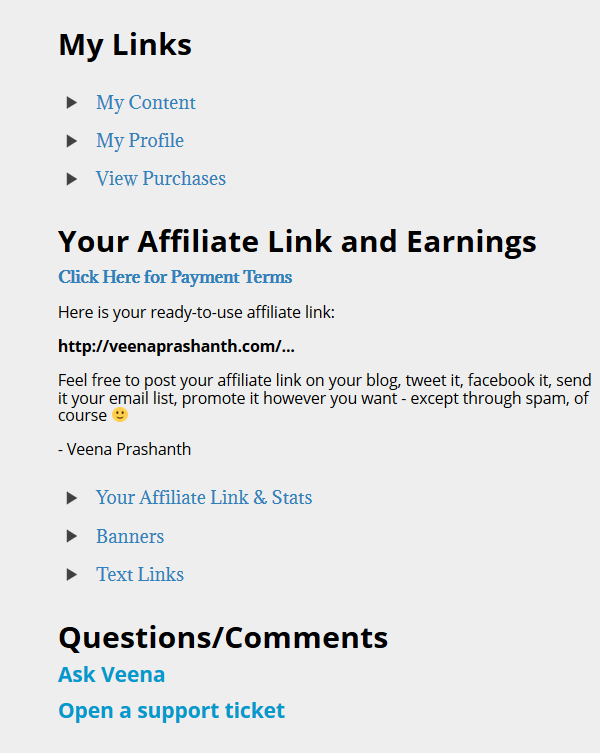
Your logged-in members will find their unique affiliate link and their affiliate commissions/stats on this page. You can use the [DAPAffiliateInfo] shortcode to create this page.
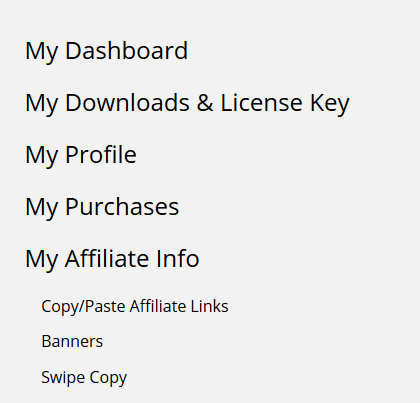
After you create these individual pages, you can organize them however you want. You can add the pages to the main menu, add it to the sidebar navigation, or just add all the links (my content, my profile etc) on say a page called "Members" or "Member-Home" and send the users to this page upon login.
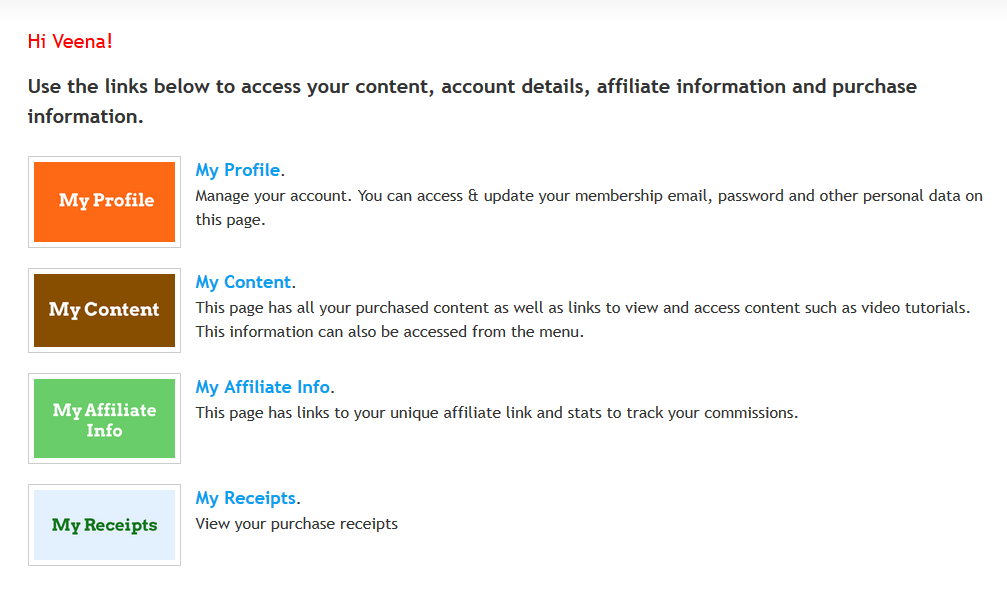
Example 1: Organize it all on a Page
Create a page (say you call it Members or Member-Home). You can add links to all the member pages on this page as you can see in this example:
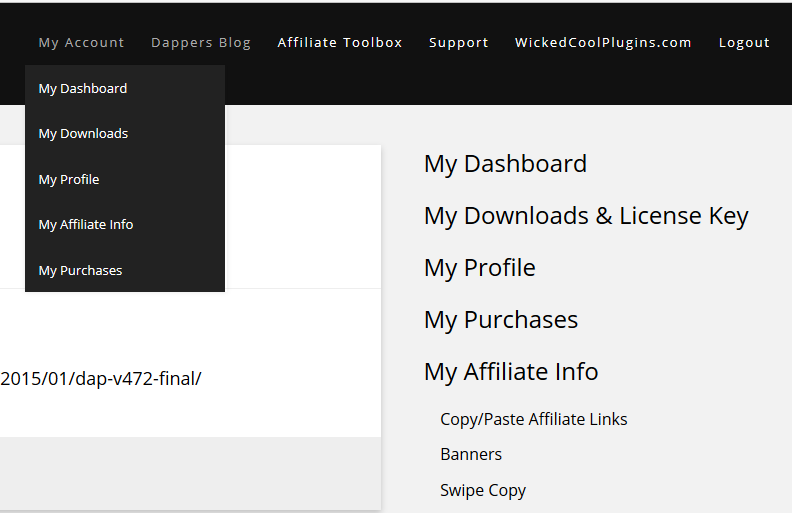
Example 2: Add all Member Pages to the Menu
Add "Members" or "My Account" to your main menu. Add links to each individual member pages under it. You'll find an example of this when you login to your members area on DigitalAccessPass.com.
Example 3: Add Member Pages to sidebar navigation
Example 4: Link to Member-Facing pages from your Members Home page
b) If the easy installer does not work due to permission issues on your server, you can use FTP to upload the files:
=> Download latest version of livelinks from your members’ area on our site, unzip it and upload it to the WP plugins folder on your site (/wp-content/plugins) overwriting the existing DAP-WP-LiveLinks folder.
=> Download latest version of DAP from your members’ area on our site, unzip it and upload it to the root folder on your site overwriting the existing contents of “dap” folder.
Do NOT delete the “dap” folder.
After uploading the files, log in to the DAP admin dashboard to complete the upgrade.
2. New DAP Installation
You can use the DAP Easy Installer plugin (or use regular FTP) to install DAP.
————————————————————————
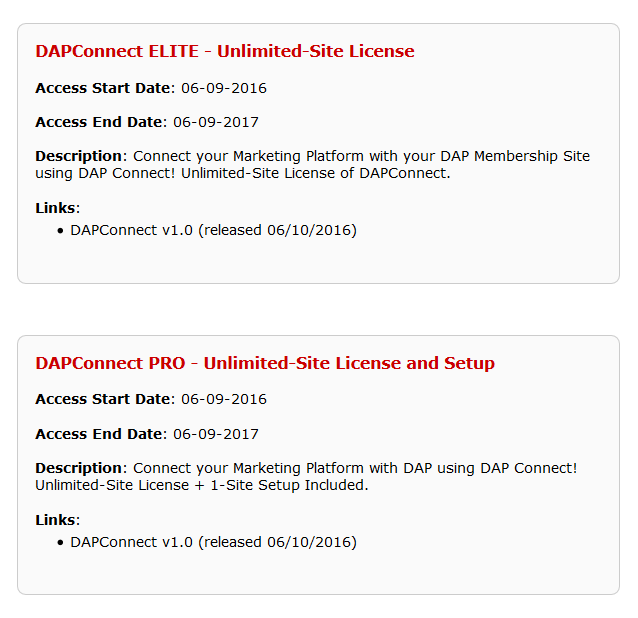
STEP 2: Install DAPConnect
Download latest version of DAPConnect zip file from yourmembers’ area.
2. Extract the contents of the zip file.
Upload the dap folder to the “root” folder of your site overwriting the contents of your existing dap folder.
That’s it.
Zapier Integration
DAPConnect fully supports Zapier integration. You can connect your favorite ZAPs with DAP in no time. But with DAPConnect, you can integrate your marketing platforms with DAP – with or without Zapier!
Let me take you inside the world of DAPConnect!
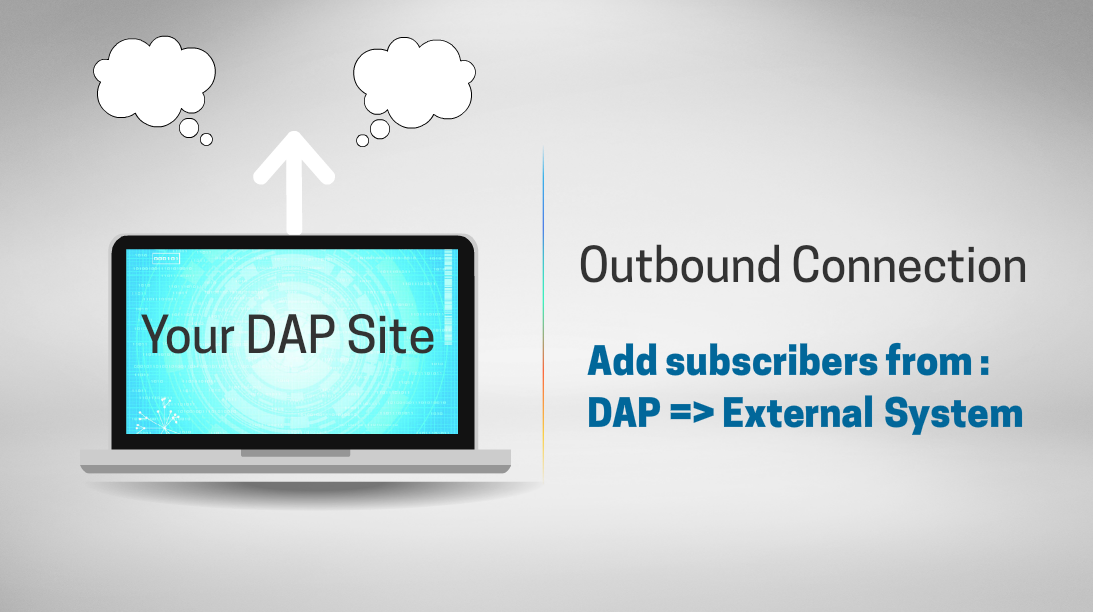
There are 2 ways in which you would want to connect external systems to DAP.
Inbound Connection:
Your subscribers are added to the external system first and you want them added to DAP automatically and in real time.
Outbound Connection:
Your subscribers are added to DAP first and you want them added to the platform of your choice automatically and in real time.
DAPConnect will allow you to do both.
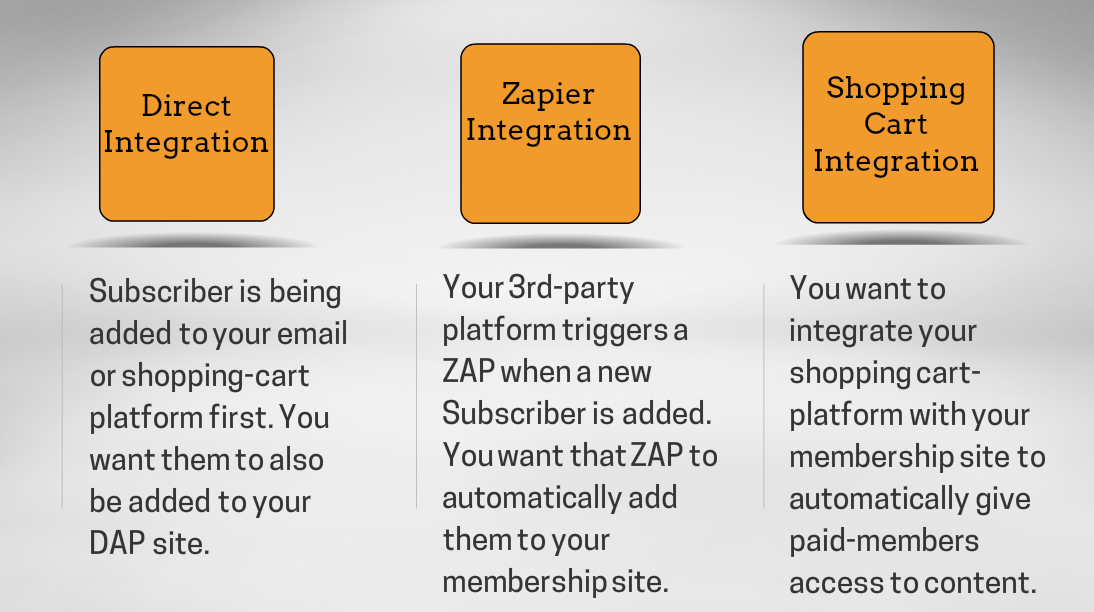
Types of Inbound Integration
There are 3 different ways in which you can achieve this integration.
1. Direct Integration from an external system to DAP
For e.g. – Your favorite Email Platform => DAP
Checkout this video for more details on the integration.
Map the field names that your marketing platform is sending to the field names that DAP can understand. Please see the section below to find out “how-to figure out the field names that your marketing platform sends in the HTTP Post Notification”.
2. Zapier Integration
Zapier’s allows you to connect your apps. You pick two different apps, and when something happens in one app—say, when you receive a new message in your email app—it automatically does something in the other app. For e.g. it’ll send you a SMS about your email or save that message to your notes app. You can do almost anything automatically when your apps work with Zapier.
Now you can use the power of Zapier to automate your DAP powered membership site in many different ways.
You can use existing ZAPs and integrate it with DAP. Setup action triggers to notify DAPConnect whenever a new subscriber event is triggered in one of your ZAPs.
For ex:
ConvertKit is a very popular email marketing platform and it has a “new subscriber” ZAP. You can setup an action trigger to notify DAP whenever a new subscriber is added to your ConvertKit list. This way the subscriber will be added to your DAP powered membership site automatically.
More and more marketing platforms are building Zapier support as this allows their customers to connect their favorite platforms. And now… you can connect your favorite platforms with DAP using Zapier!
Zapier Integration Steps
STEP 1: Setup the DAPConnect URL as your Action URL in Zapier
Map the field names that your marketing platform is sending to the field names that DAP can understand. Please see the section below to find out “how-to figure out the field names that your marketing platform sends in the HTTP Post Notification”.
How to Figure Out the Field Names in the HTTP Request
1. Use the DAP Log
You can find the field names that your marketing platform sends out in the DAP Admin => System => Logs. Please follow these steps to enable logging.
Set DAP Admin => Setup -> Config -> Log Level to “Log All Activity”
Now signup using the Signup Form you generated in your Marketing Platform.
Check the contents of the DAP log to find out the field names that your marketing platform is sending out in the HTTP POST Request.
Now visit DAP Admin => Setup => Data Mapping Page and set up data mapping. The goal of data mapping is to map the field names that you get from your marketing platform to the names that DAP understands
Watch this video to see how to figure out the field names that your marketing platform sends to 3rd party systems like DAP.
You can use an app like requestbin.com to inspect the field names in the request header.
RequestBin gives you a URL that will collect requests made to it and let you inspect them in a human-friendly way.
Use RequestBin to find the field names that your marketing platform is sending and also the format in which the field names are being sent.
requestbin.com doesn’t try to interpret the payloads, it just prints them to your screen as it receives them, making it easy to see what is going on.
Please follow these steps:
Just click the “Create a requestbin.com” button on their homepage and copy the link in the top bar.
Instead of using the DAPConnect URL (http://YOURSITE.com/dap/dapconnect.php), generate a requestbin.com URL and enter that in your marketing platform (wherever it allows you to enter http post or webhook URL).
Now signup using your sign up form. It”ll trigger a notification to the requestbin.com URL that you entered in the settings. After you do that, simply refresh your requestbin.com page and take a look.
You’ll find the field names and format in which the data is being sent by your marketing platform.
To receive NEW user registration notification, enter a string in that textbox in this format in the Plugin Notification upon User “Add” field.:
dapconnect:[PROTOCOL]:[URL Of Your Script]:[SendTransactionDetails]
PROTOCOL] : http or https
[URL Of Your Script] : Enter the URL of your script that should receive the http post from DAPConnect. It could be your ZAP URL or URL of your php script that can process the HTTP request from DAPConnect.
For e.g. YOURSITE.com/processresponse.php
NOTE: Do not use http or https in front of the domain name
[SendTransactionDetails] : Y or N (set to Y if you want dap connect to send out order details)
To receive notification when a user loses access to a product in DAP, enter a string in that textbox in this format in the Plugin Notification upon User “Remove” field:
dapconnect:[PROTOCOL]:[URL Of Your Script]
[PROTOCOL] : http or https
[URL Of Your Script] : Enter the URL of your script that should receive the http post from DAPConnect. It could be your ZAP URL or URL of your php script that can process the HTTP request from DAPConnect.
For e.g. YOURSITE.com/processresponse.php
NOTE: Do not use http or https in front of the domain name
[SendTransactionDetails] : Y or N (set to Y if you want dap connect to send out order details)
Just configure the URL to which the data should be sent and DAP connect will do the rest.
DAPConnect Webhook Format:
‘first_name’ => First Name
’email’ => Email Id
‘action’ => “REGISTRATION” OR “CANCELLATION”
‘txn_id’ => Transaction Number
‘txn_type’=> Transaction Type
‘productId’ => DAP Product Id
‘orderDetails’ => [ARRAY] – only sent for a new purchase order of a paid product
‘fields’ => [ARRAY]
Format of the ‘fields’ Array:
‘last_name’ => Last Name
‘address1’ => Address1
‘city’ => City
‘state’ => State
‘zip’ => Zipcode
‘country’ => Country
Format of the ‘orderDetails’ Array:
‘txn_id’ => Transaction Number
‘txn_type’=> Transaction Type
‘payment_status’ => Payment Status
‘currency’ => Payment Currency
‘mc_gross’ => Payment Amount
‘payer_email’ => $tr->getPayer_email();
‘payment_processor’ => Payment Processor
‘item_number’ => Product Id
‘coupon_id’ => Coupon Id
Now… DAP connect can ONLY send out the data to the configured URL. After that it’s up to you in terms of how you want to process it. You need to write your own webhook handler to process that data, or use ZAP to send it to another app or take different action based on order type etc.
You can process the data and take whatever action you need. DAP will send out all “new subscriber” details to the configured URL – including FREE and PAID subscriber details.
If you are currently using the OLD version of DAP Shopping Cart Plugin (1.11 or less) and want to upgrade to DAP Shopping Cart version 2.0 on your site, then take a backup of your existing version and then please follow these steps to upgrade to new version:
1) FTP to your site
2) Download the latest version of DAP Shopping Cart from your members area on our WickedCoolPlugin.com site. Extract the contents of the zip file. You will end up with a dapshoppingcart folder on your desktop.
3) Rename the existing dapshoppingcart plugin folder (under /wp-content/plugins) to say dapshoppingcart-OLD. This way you can revert back to this version quickly if there are any issues with the new version.
4) Now upload the new version to /wp-content/plugins folder. You should end up with dapshoppingcart folder under /wp-content/plugins.
5) Make sure the new version is active in WP Admin => Plugins.
6) Now add a NEW WP page, and in the ‘visual editor’ tab, you will find a ‘SC’ icon. Click on it to create a new checkout page. Make sure to select ‘template2’ as it’s the new responsive template.
Save the page as say – checkout-new. Basically make sure to give it a different name then the current checkout page.
7) Now visit DAP Admin => Payments => Generate Buy Button => Click on DAP Shopping Cart tab.
8) Generate a Payment link or Button. Make sure to enter the URL of this new checkout page in the checkout page url field (STEP 2 of button generation).
9) Publish the button on a test page or visit the link directly in a browser, and the new checkout page should show up!
10) Test your existing payment button. It should continue to point to the old template and continue to work. Make sure to test it.
11) If you are happy with the new checkput template and have tested it, you can then make this your primary checkout page!
If you select “Allow Both CC and Paypal” option in the step 2 of button generation process, then on the checkout page you will find 2 options:
1. Pay with CC
2. Checkout with Paypal
The Pay-with-CC button on the DAP Cart Checkout page can be configured to lead users through a 1-click Upsell Funnel.
The “Checkout with Paypal” button on the DAP Cart Checkout page can’t do 1-Click Upsells but you can configure it to lead buyers to an upsell page with a ‘regular checkout with paypal’ button. If they click on it, it can send them to paypal to login and pay. It won’t be 1-click though. The user’s will be out of the DAP cart flow at this point. But that’s fine as the dap cart completes each individual transaction before sending users to the next page.
You could use our Paypal Upsell Tree Plugin for 2-click upsells with paypal, but this plugin is not integrated with DAP Shopping Cart. If you want to use this plugin, you will need 2 separate button on the sales page – pay with CC OR pay with Paypal instead of an integrated checkout option on the checkout page.
See – http://wickedcoolplugins.com/doc/paypal-upsell-tree-documentation/
DAP 4.7.1 has full fledged integration with Samcart.
Checkout this video for more details on the integration.
Minimum Requirements
You need to be on DAP 4.7.1 or above to use this integration.
Integration Steps
Integration between DAP and Samcart is pretty easy.
Step 1: The Product Name in Samcart should EXACTLY match the Product Name in DAP.
Step 2: The API Key in Samcart Settings -> Membership Portal Integration -> DigitalAccessPass should EXACTLY match the secret key set in DAP Setup -> Config -> Secret Key field. You can make up ANY value for the API Key. For ex, you can just set it to COOLBEANS.
Just make sure to set the DAP Secret key in DAP setup -> Config to that same value as the API key in Samcart.
Step 3: The Samcart Products Page -> Notify Page URL should be set to :
http://YOURSITE.com/dap/dap-samcart.php (Replace YOURSITE.com with the name of your site)
If you are integrating subscription products, make sure to read the last section in this article about ‘Subscription Product Integration’.
That’s it!
Automated Cancellations & Refunds
DAP supports automated cancellations and refunds with Samcart. When you process a refund or subscription cancellation in Samcart, then the product access in DAP is automatically revoked.
Make sure that on the DAP Products page, under the “Cancellation & Expiration” tab, you specify exactly what should happen when a user cancels their subscription.
Possible choices are: “No Action“, “Remove From Product” and “Set End Day To Previous Day“.
IMPORTANT: Subscription Product Integration
DAP uses pay-as-you-go-model for subscription products but currently Samcart does not send an IPN (payment notification) upon each subscription payment.
Here’s the workaround.
Typically if it’s a subscription product, you need to define the product as a recurring product in DAP and set the subscription/recurring cycle in DAP.
This way, upon the first payment, the users access to product is extended by the ‘initial’ subscription cycle.
Say it’s a 30 day cycle, then the users will receive only 30 days access to product after the first payment. After the 30 day period, if the next subscription payment goes through successfully, DAP receives the recurring payment notification and automatically extends user’s access to product by another 30 days.
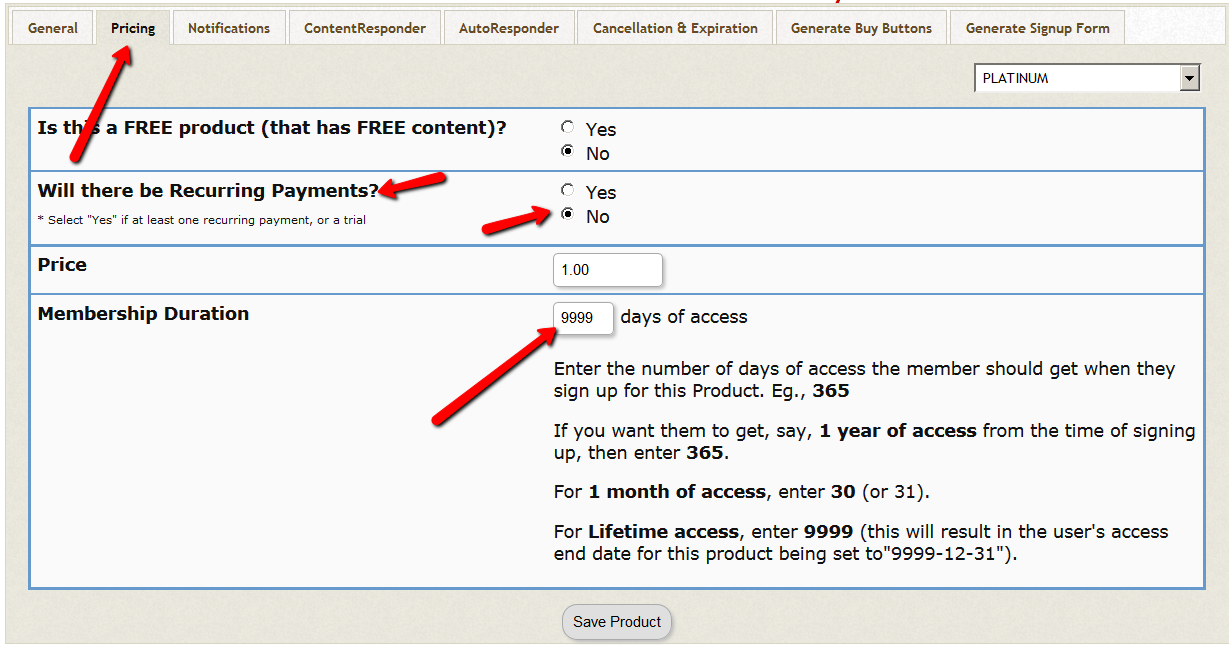
But because DAP does not receive the subscription notification from Samcart, the workaround is to set up your recurring product as a “one-time product” in DAP Products Page => Pricing tab.
Set the ”membership duration” to 9999 days.
This way the users will receive full access (instead of monthly access) right after the first payment.
The users will still be charged the subscription amount every recurring cycle automatically by Samcart, so it won’t matter that in DAP the product is setup as a non-recurring/ one-time product.
You can control actual content access by using ‘content dripping’. This way even though the users have full access to product, they cannot access the actual content under the product until their membership life matches the drip timer.
For e.g. if content is set to drip day 32, then they cannot fast forward and access it on day 1 of membership. They will have to wait until day 32 of their membership to the product to be eligible for that content.
If they cancel or request refund, DAP will automatically remove their access to product. Make sure to read the ‘automated cancellations & refunds’ section in this document.
Maropost is an email marketing platform that contains everything you need to launch email campaigns that reach a deep level of engagement with customers.
Maropost optimizes and automates email campaign management, producing tangible results and creating a larger ROI.
DAP integrates with Maropost. This integration is part of DAP 4.7 (or above).
Integration Steps
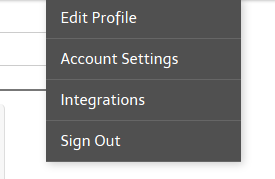
1) Login to your Maropost account => click on the dropdown in the top right corner next to your name => click on Integrations
2) On the integrations page, click on the ‘API KEY” tab. Make a note of the API listed there.
Say it is set to 86kjhkj270ng96959oglbb678kvd.
3) You will find your Maropost Account ID in the browser URL after you login.
Something like this:
http://app.maropost.com/accounts/<ACCOUNTID>
Make a note of your Maropost Account ID. Say it is 122.
4) Select your campaign and in the browser (URL), you will find the campaign ID.
5) Login to your DAP Admin Dashboard => Products / Levels page => Select the product that you want to Integrate with Maropost Campaign => Click on the Notifications tab => In the Plugin Notify Add and Plugin Notify Remove section, add a string in this format:
maropost:API KEY:ACCOUNT ID:CAMPAIGN ID
All fields are delimited with a colon (:).
For ex : maropost:86kjhkj270ng96959oglbb678kvd:122:86523
That’s it.
How does the integration work?
1) Registration
When a user registers to a FREE or PAID product in DAP, if the product is integrated with a Maropost campaign as described above, then DAP will automatically add the subscriber to the Maropost campaign.
2) Cancellation
When a user loses access to product (when you click on ‘Remove’ in DAP users->manage page to remove user’s access to product), if the product is integrated with a Maropost campaign (dap products page => notifications tab => plugin notify remove), then DAP will automatically remove the subscriber from the Maropost campaign.
DAP now integrates with an affiliate network called Clicksure.
The integration is very straightforward and will work for one-off as well as subscription products.
Set the IPN URL in your Clicksure account to point to http://YOURSITE.com/dap/dap-clicksure.com?productId=DAPPRODUCTID
Here productId needs to be the DAP product id.
For e.g. http://YOURSITE.com/dap/dap-clicksure.com?productId=1
DAP can process the following transaction types from Clicksure:
SALE, REBILL, REFUND and CANCEL.
Upon SALE, DAP automatically CREATES a membership account for the buyer and gives the buyer access to the purchased product.
Upon REBILL, DAP automatically EXTENDS user’s access to the subscription product in DAP.
Upon REFUND, DAP automatically REVERSES the payment transaction (earnings etc) and removes user’s access to product.
Upon CANCEL, DAP automatically EXPIRES user’s access to product. The access end date is reset to ‘yesterday’. For e.g. say today is 10/21/14, upon cancel the access end date is reset to 10/20/14.
In DAP 4.7, we have integrated DAP with Ultracart.
What is Ultracart?
UltraCart is a premier shopping cart and e-commerce management platform. UltraCart is a sophisticated, top-tier e-commerce platform for online sales of products, digital content and subscriptions.
UltraCart integrates with your entire ecommerce business, including shopping cart, payment processing, marketing & affiliate management, shipping systems, product fulfillment, and accounting systems.
If you want to use UC as your ecommerce platform and DAP as your membership plaform, you will be able to do that using this integration between UC => DAP.
Integration steps
1) Login to your UltraCart Dashboard.
2) Visit Configuration → XML Postback page and set the IPN URL to point to http://YOURSITE.com/dap/dap-ultracart.php
3) Make sure Product Name in DAP EXACTLY matches the product name in UltraCart.
That’s it.
How does the integration work?
When a purchase is completed using Ultracart payment button, DAP will automatically create a membership account for the user and send out welcome email that you configure in DAP Products page -> Notifications tab.
DAP supports integration of one-time as well as subscription products with Ultracart.
When a user purchases a subscription product, DAP will automatically give user access to the product for the ‘recurring cycle’ number of days. You can define the recurring cycle in DAP Products page -> Pricing tab.
If it is set to say 30 days, the users will initially receive 30 days of access to product upon purchase.
After each recurring/subscription payment, dap will receive notification from Ultracart and automatically extend user’s access to product by ‘subsequent recurring cycle’ that you set in DAP Products page -> Pricing tab.