How to setup your Member Login Page
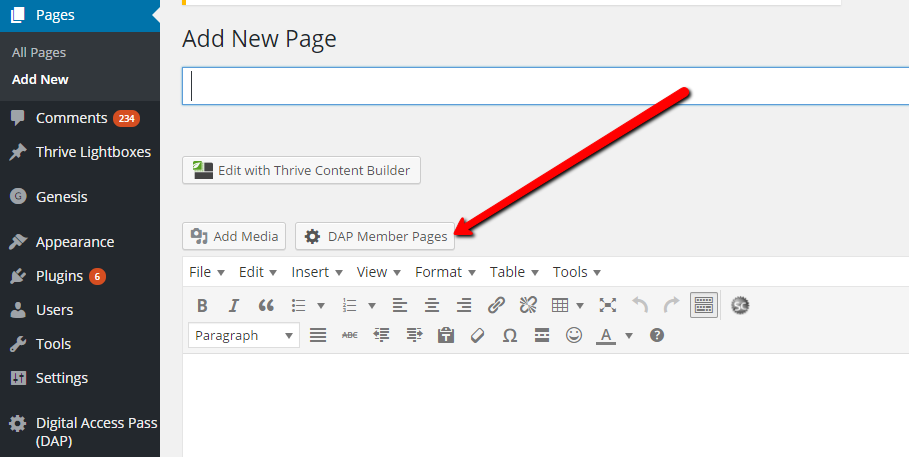
STEP 1: Add a new page in WordPress.
Say you call it Login.
STEP 2: You’ll find a “DAP Member Pages” button on the page.
Click on it to get started.
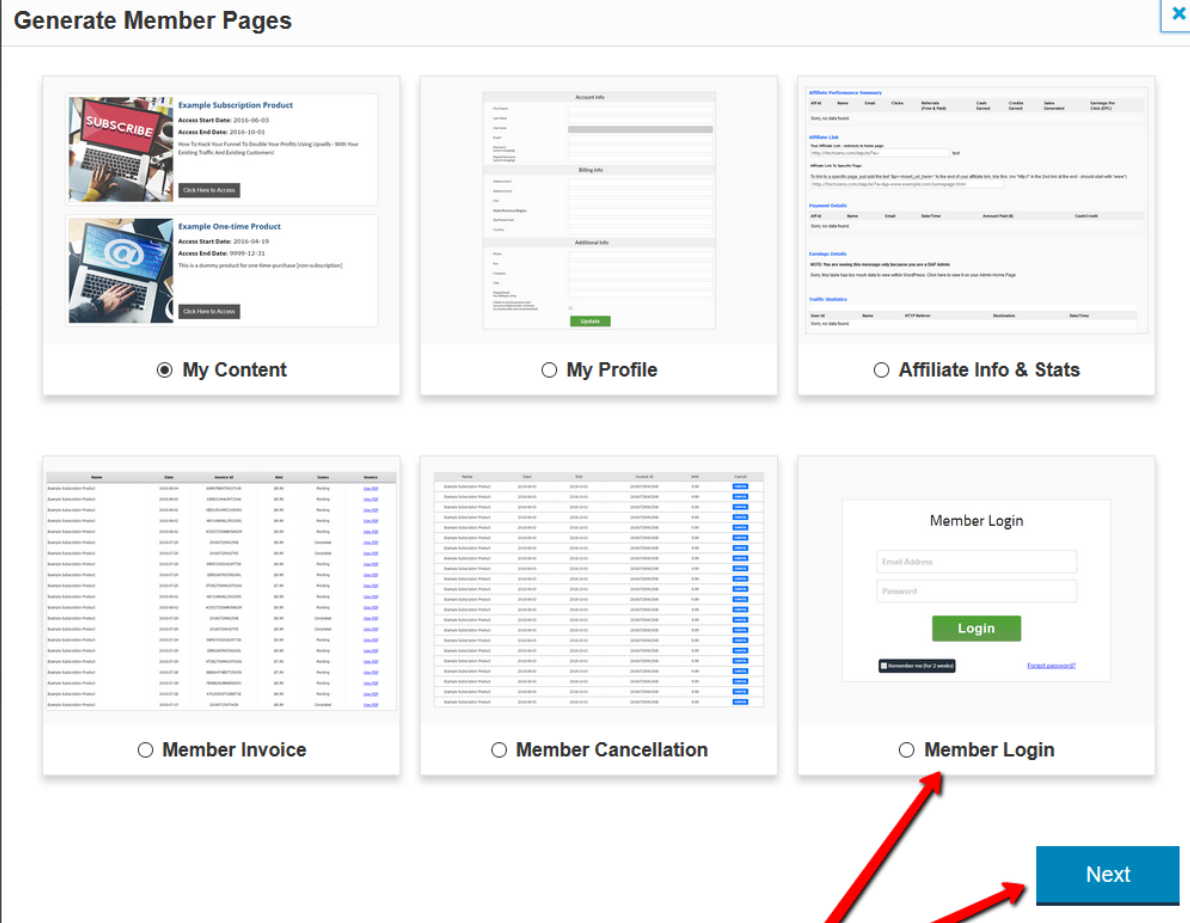
STEP 3: Select Member Login and click on Next
STEP 4: Generate Login Shortcode
When you select “Member Login” option and click on the Next button, it’ll bring up a login shortcode generator.
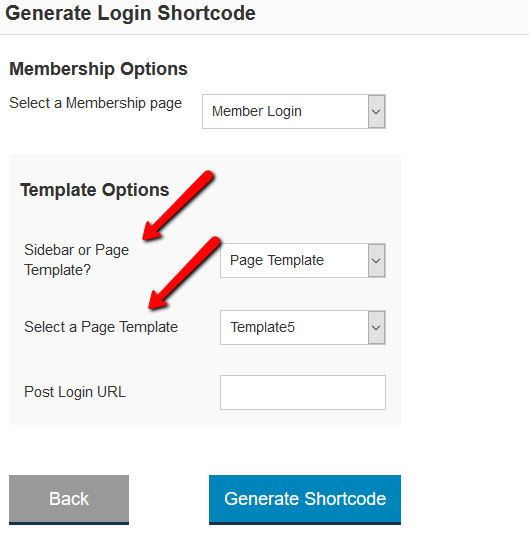
Configure Post-Login URL
If you configure a post-login URL, DAP will redirect users to that page upon login.
For e.g.
[DAPLoginForm template="template2" redirect="/mylandingpage"]
(DAP will redirect users to /mylandpage when they login.)
If you don’t set a shortcode level redirect, DAP will use the post-login redirect URL set in DAP setup >> config page or in the DAP products page.
Select a Page or Sidebar login template.
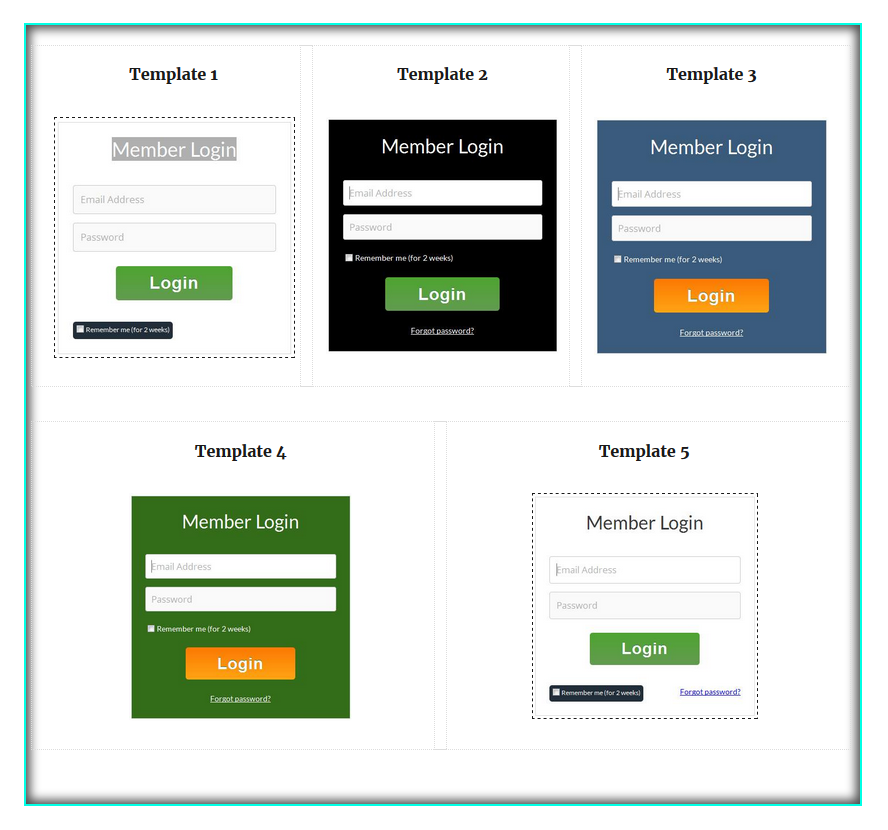
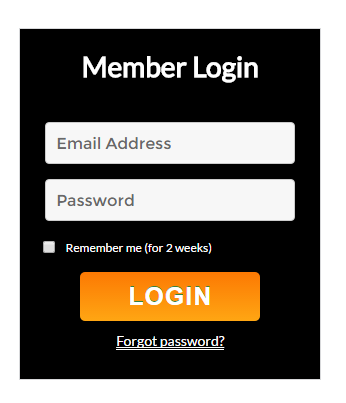
Here are the available Page Login Templates:
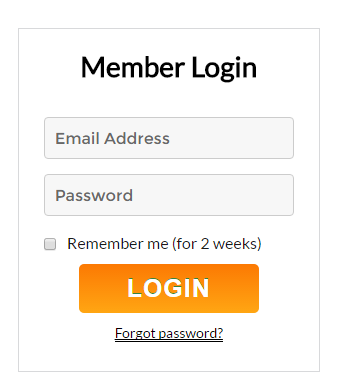
Here are the available Sidebar Login Templates:
SIDEBAR TEMPLATE 1 SIDEBAR TEMPLATE 2:
Old Shortcode: %%LOGIN_FORM%%
The new shortcode is a replacement for the old %%LOGIN_FORM%% shortcode. Simply upgrading LiveLinks on your site will not automatically install the new shortcode or login template.
You must replace the old shortcode – %%LOGIN_FORM%% – with the new one, in order to see the new login templates in action.
The old shortcode will still be valid, and your old login form will still work even after you upgrade DAP.
If you need to switch back to the old code at any time, it will still work just fine. But replace it with the new shortcode as the new templates are mobile-responsive.
Multiple Login Pages
Due to the new feature of setting a post-login URL right in the shortcode itself (via the redirect tag), you can now have multiple login pages on different parts of your web site. If you don’t specify a redirect tag, then the default post-login rules will apply. However, you can now override the default rules for specific login forms on specific pages, using the new shortcode. This is especially useful if you have a content hub where you have multiple WordPress installations on the same domain, for different niches (or different sub-niches).
Page & Sidebar Templates
We are releasing 5 pre-built login page templates and 2 sidebar templates. See video above for demo of all 7 templates.
5 PAGE TEMPLATES
You can use template1, template2, template3, template4 or template5 in the shortcode.
2 SIDEBAR TEMPLATES
[DAPLoginForm template="sidebar1"]
[DAPLoginForm template="sidebar2"]
Login Widget
To have the DAP login form show up in your web site’s sidebar, simply add the sidebar template shortcode to a text widget and add the widget to your sidebar.
[DAPLoginForm template="sidebar1"]
OR
[DAPLoginForm template="sidebar2"]
Login Form Customization Options
You will find the login template files under the /wp-content/plugins/DAP-WP-LiveLinks/includes/login/templates/ folder.
Updating the Templates:
Say you are using template1 and want to update the HTML of that template.
Just make a copy of /wp-content/plugins/DAP-WP-LiveLinks/includes/login/templates/template1/template1.html to /wp-content/plugins/DAP-WP-LiveLinks/includes/login/templates/template1/customtemplate1.html.
Make the updates to the custom HTML file and upload back to the template1 folder. Do not remove any merge tags from the template.
Updating the CSS:
To update the CSS of a template, make a copy of /wp-content/plugins/DAP-WP-LiveLinks/includes/login/templates/template1/style.css to /wp-content/plugins/DAP-WP-LiveLinks/includes/login/templates/template1/customstyle.css.
Make the updates to the custom CSS file and upload back to the template1 folder.
Login Form Width:
If you wish to change the login form’s width, you can update it in the style.css (look for width: 400px in style.css). Of course, don’t change the default file, as it will be overwritten in a future release. So always make a custom copy of your own, and make the changes to that file.
Bring Your Own Template
You will probably not have a need to create your own template as there are 7 responsive pre-built templates that you can cust0mize, but if you want to create one, please follow these steps.
Create a new template under /wp-content/plugins/DAP-WP-LiveLinks/includes/login/templates.
Say you call it ‘mytemplate‘.
Then copy over the style.css and template1.html from template1 folder to this mytemplate folder.
Rename template1.html to mytemplate.html. Leave the name style.css as is.
Now make the updates to mytemplate.html and style.css and upload the mytemplate folder (and the files under it) to /wp-content/plugins/DAP-WP-LiveLinks/includes/login/templates/ folder.
Now you can reference this template in the shortcode:
[DAPLoginForm template="mytemplate"]
That’s it.