7

Warrior Plus / WSO Pro Integration


How it works

When a user completes purchase of your WSO, WSOPro will send payment notification to DAP to the IPN URL configured in your WSO Pro Product Settings (details below).

DAP will then automatically create the membership account, allow user access to the product and send out the thank-you email configured under the DAP products page => Notification tab with the login details.

But your users do NOT have to wait for the welcome email.  DAP will also display the membership credentials (login url, username and password) on the final landing page after WSO Purchase is complete to the buyers.

Integration Steps

1. Make sure product name in DAP eXactly matches the product name in WSO Pro.

setproductname

2. Set the IPN (Notification) and Keygen URL in your Warrior Plus Vendors => Products => ADVANCED INTEGRATION section.


dapsetting

Notification URL : http://yoursite.com/dap/dap-wsopro.php
Replace yoursite.com with the name of your website.

It will allow DAP to create a membership account for the buyers after successful WSO Pro purchase.

Keygen URL : http://yoursite.com/dap/dap-wsokeygen.php
Replace yoursite.com with the name of your website.

It will allow WSO Pro to display the DAP Membership Login Credentials (Login URL, Email / Password) to the buyers on the final post-purchase landing page.

3.  Configure a “Welcome Email” Subject & Body in the DAP Products page => Notifications tab with the right merge tags to send out login credentials to the buyers.

dapproduct


That’s it.

To test, complete a purchase like your users would, and see if the membership account gets created in your DAP Admin => Users => Manage page. See if the login credentials are displayed on the final landing page after purchase. You should also receive a welcome email with the login credentials.

37

WooCommerce Integration

DAP v4.7 has full-fledged and seamless integration with WooCommerce.

Watch this video for more details:

Minimum Requirements

1) You need to be on DAP 4.7 or above

2) Download, install and activate the free WooCommerce plugin from WooThemes.com.

3) If you wish to sell recurring subscriptions via WooCommerce, then you’ll need to purchase their “WooCommerce Subscriptions” extension which is a paid extension, and starts at $149 for a single site license (please check their site for latest pricing details).

Why should i use WooCommerce?

If you are selling primarily digital products, then you probably won’t need WooCommerce. The DAP Shopping Cart (it’s FREE with your DAP purchase) itself is very powerful, supports a wide range of payment processors, and also supports 1-Click Upsells, Member’s-area Upsells (DAP Pay) and Coupons.

However, if you are selling physical products, need an eCommerce store and store front, WordPress themes that come integrated with a store, need physical-product features like color, quantity, state and sales taxes, quantity discounts, VAT, size, etc – then WooCommerce is the answer!

1-Step Integration

Integrating DAP and WooCommerce couldn’t be simpler.  Just 1 simple step.

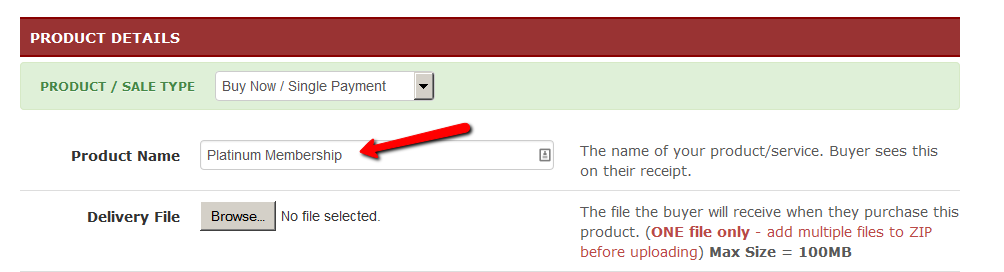
Step 1: Make sure Product Names match between DAP and WooCommerce.

If you are integrating subscription products with WC, make sure to read the last section in this article about ‘Subscription Product Integration’.

That’s it!

One-Off and Subscription/Recurring Product Integration

1 . Pick Any Payment Processor that WC supports

You can pick ANY payment processor of your choice and integrate it directly with WC (Ofcourse you can only pick a payment processor that WC supports).

No matter what type of payment processor you choose to use with WooCommerce, DAP can handle automatic membership account creation for all of your WooCommerce buyers.

2. Physical products, one-time or subscription products

You can  sell – physical products, one-time or subscriptions using WC, and as long as you have same name product in DAP (and in the same domain), DAP will automatically create a membership account.

3.  AddToCart or BuyNow Button

Your users can purchase 1 item or add multiple items to the cart and purchase them together – even if they’re different types of products – like 2 one-time products and 1 subscription product. DAP has a built-in hook into WooCommerce, and can instantly create user accounts and give access to all of the products that the user has just purchased.

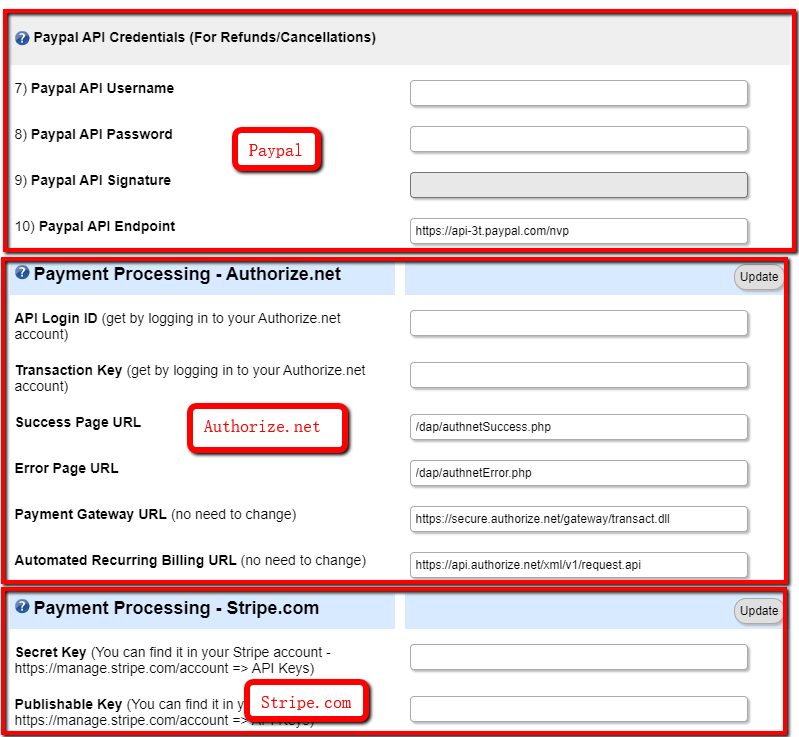
Automated Cancellations & Refunds

DAP supports automated cancellations and refunds with WooCommerce. When you process a refund or subscription cancellation in WooCommerce, then their access in DAP is also automatically revoked.

Make sure that on the DAP Products page, under the “Cancellation & Expiration” tab, you specify exactly what should happen when a user cancels their subscription.

Possible choices are: “No Action“, “Remove From Product” and “Set End Day To Previous Day“.

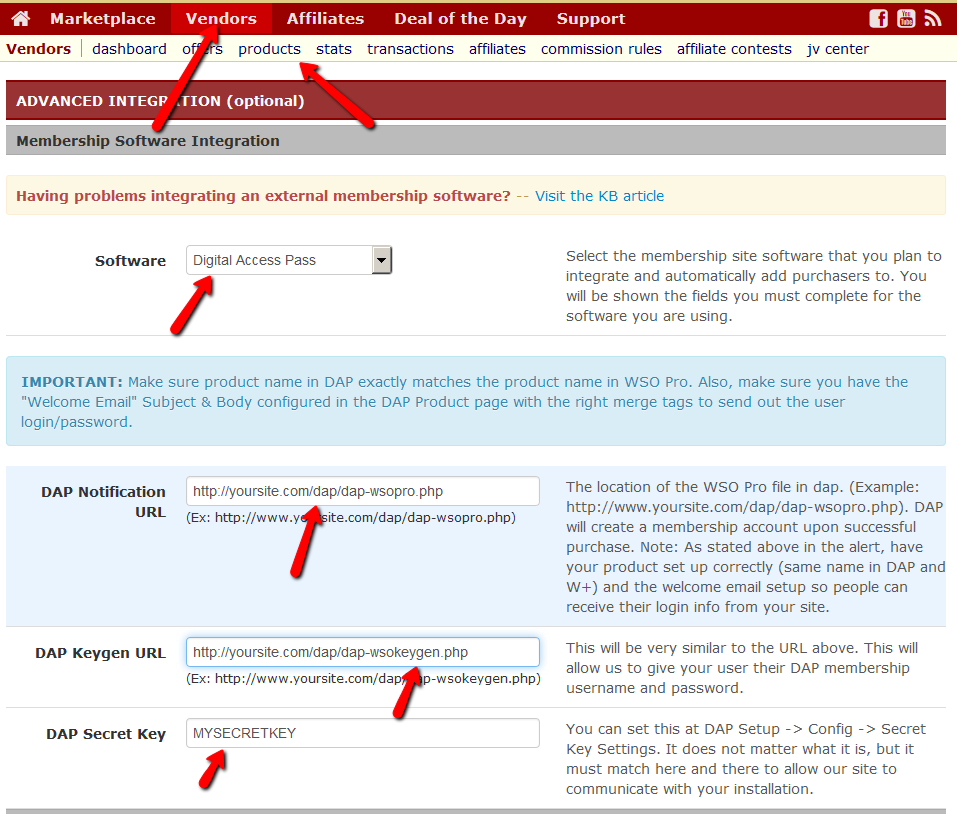
IMPORTANT:  Subscription Product Integration

WooCommerce does not send notification upon each subscription payment. Even if they do, their documentation is lacking in this area and their support responds with the standard – ‘we do not answer API questions’.  Not helpful at all :(.

But we always find a way to integrate third party systems with DAP if there is a demand from our users for the integration.

Here’s the workaround.

Typically if it’s a subscription product, you need to define the product as a recurring product in DAP and set the subscription/recurring cycle in DAP. This way, upon the first payment, the users get access to just the 1st subscription cycle. Say it’s a 30 day cycle, then the users receive only 30 day access to product. After the 30 day period, if the next subscription payment goes through successfully, DAP will receive the payment notification and then automatically extend user’s access to product.  DAP uses pay-as-you-go-model for subscription products.

But because DAP does not receive the subscription notification from WC, if you want to give users automatic access to subscription product in DAP, set up the product as a one-time product in DAP Products Page => Pricing tab.

Set the ”membership duration” to 9999 days. 

recurring

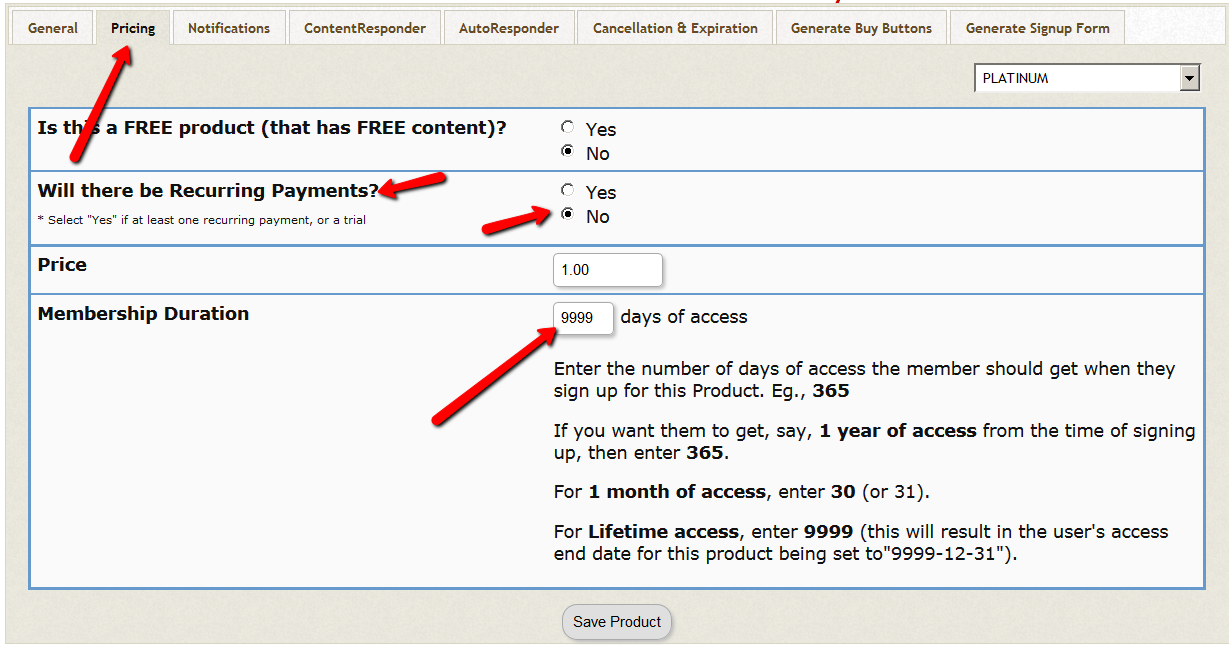
This way the users will receive full access (instead of monthly access) right after the first payment.

The users will still be charged the subscription amount every recurring cycle automatically by WC, so it won’t matter that in DAP the product is setup as a non-recurring/ one-time product.

You can control actual content access using ‘content dripping’. This way even though the users have full access to product, they cannot access the actual content under the product until their membership life matches the drip timer. 

For e.g. if content is set to drip day 32, then they cannot fast forward and access it on day 1 of membership. They will have to wait until day 32 of their membership to the product to be eligible for that content.

If they cancel or request refund, DAP will automatically remove their access to product.  Make sure to read the section in this article on ‘automated cancellations & refunds’.

Testing

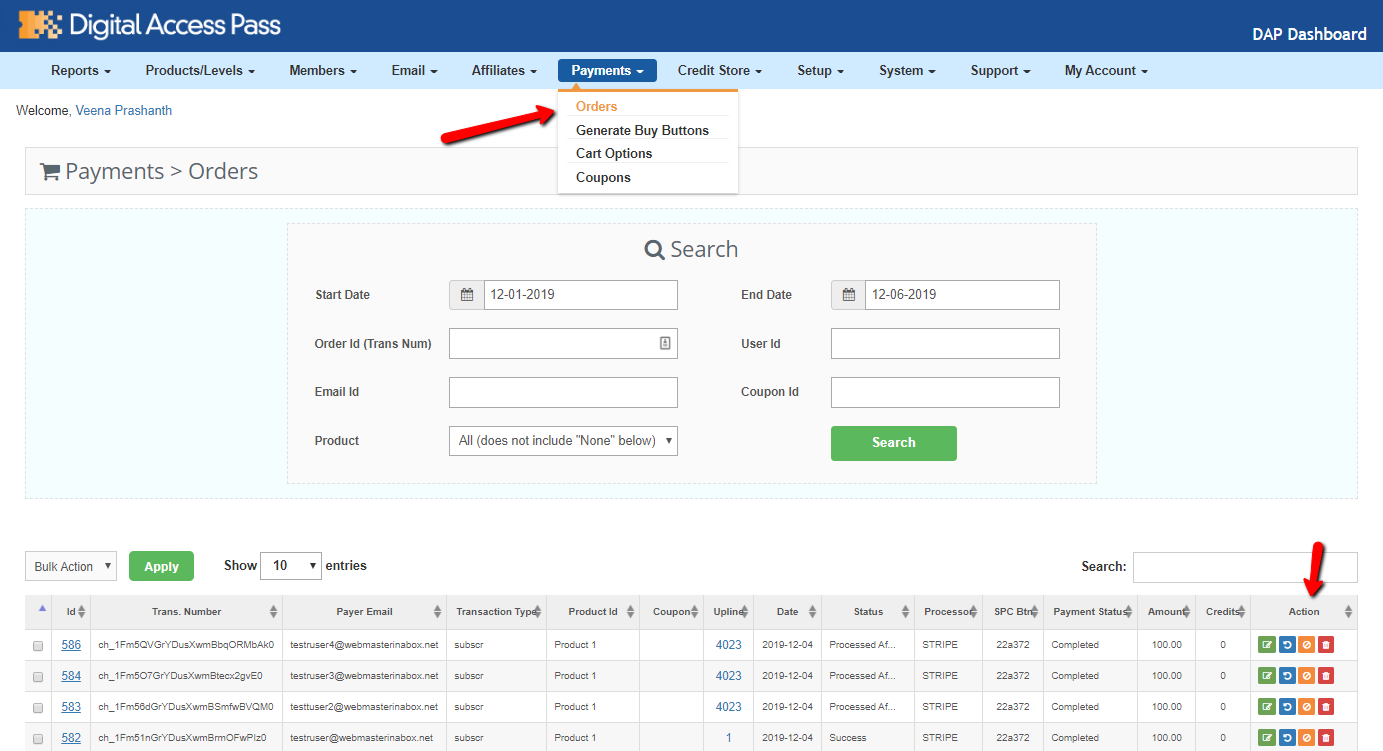
DAP can ONLY process ORDERS that are marked as ‘complete’ in WooCommerce.

DAP cannot process ‘pending’ orders.

If it’s a physical product and status does not get marked as complete automatically, then DAP will process the order only when the status changes to ‘complete’.

For virtual / downloadable digital products, dap will process order right after successful payment (as long as the order gets marked as completed in WC).

After purchase via WC, you will notice that a membership account for the buyer will automatically get created in DAP Users=>Manage page as long as :

1) the product name in WC exactly matches a product name in DAP

2) order status in WC is marked as complete

3) you are on DAP 4.7+


5

DAP Pay With Stripe

1-click Members Area Upsell With Stripe

With DAP Pay, you can present new offers to members right within the member’s area. And these aren’t just for upsells.

You can use DAP Pay to sell new products, product renewals, or even membership renewals and upgrades. And you can publish these special buy buttons on ANY member page. And even if someone has already been a member for weeks or months, they can still purchase your new product or membership upgrade with just 1 single Click, without having to re-enter all of their credit card or billing information.

Please NOTE:  DAP Pay ONLY supports ‘Stripe’ currently.

Watch this video to find out more.

Say a member does not have access to product ID = 3 in DAP.  And say you want the users that do not already have access to ‘productId=4’ to see a buy button in their members area. And the buy button should not lead to a checkout page. The click of the buy button will automatically complete purchase. No checkout page required.

You can use the following shortcode to display a payment button:

Please NOTE: replace all occurrences of YOURSITE.com in the shortcode with the name of your site :

[DAP  hasNoAccessTo="4" isLoggedIn="Y" errMsgTemplate=""]
<h2>If user is eligible for a 1-click purchase (the user must have a previous purchase using Stripe to be eligible for 1-click buy for future products using Stripe), show a 1-click Buy Button that leads to the sales page</h2>

[DAP-1ClickBuy productid=4 payment_gateway="stripe" eligibleimage='<img class="size-thumbnail wp-image-1424 alignleft" alt="Unlock-99" src="http://YOURSITE.com/dap/images/buynow-1click.png"/>' noteligibleimage='<img class="size-thumbnail wp-image-1424 alignleft" alt="Unlock-99" src="http://YOURSITE.com/dap/images/add-to-cart-bigger.png" width="150" height="150" />' not1clickeligibleurl="/salespage"]

[/DAP]

You can use the following shortcode to display a payment link

[DAP hasNoAccessTo="4" isLoggedIn="Y" errMsgTemplate=""]
<h2>If user is eligible for a 1-click purchase (the user must have a previous purchase using Stripe to be eligible for 1-click buy for future products using Stripe), then show a LINK (click here) that leads to the sales page</h2>

[DAP-1ClickBuy productid=4 payment_gateway="stripe" eligibleimage='' noteligibleimage='<img class="size-thumbnail wp-image-1424 alignleft" alt="Unlock-99" src="http://YOURSITE.com/dap/images/add-to-cart-bigger.png"/>' noteligiblelinkmsg='Click Here to Get Access' not1clickeligibleurl="/salespage"]

[/DAP]


2

Username Generation

Username Generation Rules

If you are on DAP version 4.7 (or above),  you can define how you want the username to be generated for your members.

It’s configurable.

Please watch the video here for more details.

DAP will use the options you select for username generation instead of defaulting it to firstname + lastname.

This will apply to Free Registration as well as Paid Products. DAP will use the generated username to sync to WP and to the FREE WP based forums like BBPress, Buddypress, Mingle, SimplePress etc.

Here are some of the use cases :

1) Pick A Username

Say you do NOT want the ‘username’ to be automatically generated by DAP  because of privacy concerns.  You want to allow your users to ‘Pick’ their own username in their DAP Profile.

Visit DAP Admin => Setup => Config => Username Generation Rules => Set OPTION 1 to “Allow Users To Pick a Username in their DAP Profile (do not auto-generate)”

(do not default the username, allow users to pick a username)

pickyourown

Also set DAP Setup -> Config -> WordPress Related -> Sync Only if Username Exists in DAP  = YES  (Only sync to WP if users pick a username in dap profile)

Syncing will ONLY occur after users pick a username in their dap profile page

usernamexistssync


2) Automatically generate a username

You can use 3 options in DAP Setup -> config -> Username Generation Rules to allow DAP to auto-generate a username as shown in the image below.

DAP will try the option1 first to generate username for WP sync.

If option1 results in a username that already exists, then DAP will try option 2.

If that also results in conflict, then DAP will try  option 3.

usernamegen

Each option can be set to one of the following:

Set to ‘firstname + lastname’
Set to ‘first part of email (before @)’
Set to ‘firstname + lastname + 3 digit random number’  (to prevent username conflict)
Set to ‘random alphanumeric string (8 chars)’

Whether the users signup to a free product or purchase a paid product, DAP will apply these username generation rules and then sync to WP using the generated username instead of defaulting username to ‘first+last name’.


Testing

1) Visit DAP Admin => Add Users Page => Select product -> Add a NEW user with just first name and email.

OR

Complete a NEW purchase like your users would from your sales page.

OR

Complete a FREE Signup using the DAP FREE Signup Form on your site.

2) Now visit DAP Admin -> Users->Manage page -> Click on the newly created user’s name -> It will bring up the Edit Users page -> see what the ‘USERNAME’ field is set to.

3) It should be set based on your settings in the DAP Admin -> Setup -> Config -> Username generation rules page.

26

Active Campaign

Please see this blog post for detailed video on Active Campaign Integration with DAP.

If you want to integrate DAP product => AC list,  then here’s the integration string that you need to enter in the DAP products page -> Notifications tab -> Plugin Notification Add / Remove section:

1)  Add user to ActiveCampaign List

DAP will send name, email, phone to Active Campaign.

activecampaign:accountname.api-us1.com:Your Active Campaign API Key:LIST ID

For e.g.
activecampaign:digipass.api-us1.com:dda9d8jlkld8hjd8ksjhfd0shs6jm8273:1

2)  Custom fields

If you have defined custom fields for address1, address2, city, state, zip, country in active campaign, then you can use the following string to send these address fields from DAP => AC.

activecampaign:accountname.api-us1.com:Your Active Campaign API Key:LIST ID:Field ID of address1 in AC|Field ID of address2 in AC|Field ID of city in AC|Field ID of state in AC|Field ID of zip in AC|Field ID of country in AC

For e.g.
activecampaign:digipass.api-us1.com:dda9d8jlkld8hjd8ksjhfd0shs6jm8273:1:10|11|12|13|14|15

3) Add Tag

Here’s the format:

activecampaign:accountname.api-us1.com:Your Active Campaign API Key:LIST ID:Field ID of address1 in AC|Field ID of address2 in AC|Field ID of city in AC|Field ID of state in AC|Field ID of zip in AC|Field ID of country in AC:TAG ID

For e.g.
activecampaign:digipass.api-us1.com:dda9d8jlkld8hjd8ksjhfd0shs6jm8273:1:10|11|12|13|14|15:TAG ID

If you don’t want to send custom fields, you can leave it empty.

For e.g.

activecampaign:digipass.api-us1.com:dda9d8jlkld8hjd8ksjhfd0shs6jm8273:1::TAG ID

2

Email Delivery Issues

If you use your Webhost Email SMTP server to send out emails but constantly end up with email delivery issues or AWeber subscription issues, this article is for you!

A couple of small tweaks to your settings can improve email deliverability significantly.

When you send an envelope in the postal mail, you specify a return address. This can be used by the postmaster to return the package back to you if the recipient does not exist or refuses your mail.  A Postage Return Address is comparable to the SMTP Return-Path Header in an email.

Every e-mail message has a hidden field called the “Return-Path” address (sometimes called a “bounce address” or “envelope sender address”). This should be the address a message really came from, and it’s the address to which any undeliverable message notices (“bounces”) are sent.

The problem is on some Webhosts (like bluehost for example), the envelope-sender address (return-path) is constructed using the web-hosting account username and hostname. It’s not a real email address.

If you want to know what your webhost servers are sending in the email header, just update the DAP Products => Notifications => 3rd Party Notifications Ids to send an email to say your gmail address. Now if you add any new user to DAP, you will receive a ‘New User Signup’ email notification in your gmail account. Check the email header of that received email. It will be something like this:

emailheader

As you can see above, the return-path is set to the webhost name (username@dreamhost.com) instead of the domain name.

Most mail servers (like Aweber) attempt to confirm the return address provided is a real one for security reasons and if it’s not a real address, the email is considered forged and is rejected.

But the good news is there is a way to force the SMTP servers to insert a valid and correct return path in the email header bypassing the default.

Here are the steps:

1. Update dap-config.php file

Say that your website domain is example.com. And say that the Email Outgoing Server Name is mail.example.com.

Then just ftp to your site and edit the /dap/dap-config.php file. Enter the following towards the top of dap-config.php file (after the php start tag):

ini_set(“SMTP”, “mail.example.com”);
ini_set(“sendmail_from”, “admin@example.com”);

dapconfigsetting

–  If you are not sure what your SMTP server name is, you can check with your Webhost or you will find it in your Webhost CPanel -> Email Account -> Settings.

–  The sendmail_from should be set to an email address hosted on your domain and it should be a real email address. For ex – admin@example.com for example.com domain.

2. SMTP Auth

Configure DAP to use SMTP authentication to enforce the setting of authenticated and correct “Return-Path” in the headers.

Please NOTE :
If you use an external SMTP server like Amazon SES / Auth SMTP etc (configured in DAP Email -> SMTP page.), you  can skip this.
The tweaks mentioned below is only applicable to the DAP owners who use their Local Web Host SMTP server for sending emails.

It’s simple.  In your Webhost CPanel -> Email Account -> select your email account that you will use to send emails (for ex – admin@example.com) and find the email account settings.

You need to find the following info for your email account that’s hosted on your webhost. If you do not know how to find it, please contact your Webhost and they can help.

Username: admin@example.com
Password: Use the email account’s password.
Outgoing Server: SSLhost.example.com

  • SMTP: Port 465

NON-SSL

mail.example.com

  • SMTP: Port 26
Incoming Server:


Now visit the DAP Admin -> Email -> SMTP Page and create a NEW SMTP server setting and activate it as shown below (click  to see enlarged image):

smtpsettings

Remember to de-activate the default ‘Local Web Host’ server so only the new SMTP server will be used to send out emails.

This will enforce SMTP Authentication and setting of the right return path in the email header.

That’s it.

These simple tweaks should help improve email deliverability.

Please note that DAP is NOT an email server. While DAP can trigger the sending of email and the tweaks above will enable setting of right header parameters, it’s upto your webhost to actually deliver the emails.

Read this article for more on email issues.


1

Gravity Form Integration

We would like to thank Jordan Khan (DAP user) for his contributions in helping with this integration document and for testing this integration.

Gravity Forms / DAP integration for custom free sign up forms.

1. Create Custom Fields in DAP

2. Create form with gravity forms plugin

3. Get field IDs for every form field (Generated by Gravity forms)
• To view field IDs, go to Forms > Notifications
• Scroll down to the notification email section and select form fields in the drop down menu on the upper right side of the text box.

• Select each field and take note of the number after the double colons when it appears in the text box

4. Insert Gravity Forms “gform_after_submission” function to themes functions.php file.
Reference Documentation: http://www.gravityhelp.com/documentation/page/Gform_after_submission

Important notes:
• Point Post Url to file “http://www.YouDomain.com/dap/signup_submit.php”
• Specify the DAP product ID for Form with ‘productID’ => ‘x’,
• Match DAP profile fields with the corresponding form field IDs (Obtained from Step 3)
• Include “custom_” in front of all custom fields created in DAP.

That’s it.

CCBill Integration

DAP now fully integrates with CCBill for Payment Processing and User Management.

Steps below:

1. Setup the DAP Admin -> Setup -> Config section

ccbill-dap-config

2. Generate Payment Link / Button

Visit DAP Admin -> Payments -> Generate Buy Buttons Page.

ccbill-button-gen

3. Publish the Payment Link / button on your Sales Page

Enter the generated button code or payment link in the step 2 above in your Sales page.

4. CCBill -> Account Info -> Subaccount Admin -> Select Webhook Setup in the left sidebar.

Set up the webhook to allow ccbill to notify DAP of all payment events.

The webhook URL should be:

http://YOURSITE.com/dap/dap-ccbill.php

ccbill-webhook

DAP can process these CCBill events :

NewSaleSuccess, RenewalSuccess, Refund, Cancellation, ChargeBack, Expiration, Void, Return

Upon renewal, ccbill will notify DAP via this webhook url and dap will automatically extend user’s access to the product using the subscription cycle settings in DAP Products page -> Pricing tab.

5. CCBill -> Account Info -> Subaccount Admin -> Select Basic Account Setup -> Set Approval / Denial URL / Landing Page

CCBill will automatically send users to the approval page upon successful payment. Set the approval url to http://YOURSITE.com/dap/dap-ccbill.php. Your end users will not see the dap-ccbill.php script. It’s an intermediate script that will first complete the processing in DAP and then forward users to the final landing page. You can setup the final landing page (payment success redirect url) when you generate the payment button in step 3 above.

ccbill-approval-denial-url

6. CCBill -> Account Info -> Sub-Account Admin -> Select User Management -> It needs to be Turned ON.

ccbill-user-management

That’s it. You can now test the CCBill Integration with DAP !

2

Admin Options For Cancel & Refund

You can cancel/refund payments from within your DAP admin dashboard.


Please note: This will only work if you use SmartPayCart.com (SPC) to sell your products. You can cancel / refund transactions in Paypal, Stripe and Authorize.net.

1

Step 1 - Enter Credentials in DAP Admin >> Setup >> Config page.

Paypal: Enter your Paypal API Keys in DAP Admin >> Setup >> Config page >> Paypal Section.

See this on how to get username, password, signature from your Paypal account.

Authorize.net: Enter your Authnet Keys in DAP >> Setup >> Config page >> Authorize.net Section.

See this on how to get Login ID and Transaction Key from your Authnet account.

Stripe: Enter your Stripe Live Keys in DAP Admin >> Setup >> Config Page >> Stripe Section.

2

Step 2 - Define cancellation action in DAP products page >> cancellation & expiration tab.

  • Remove from Product:  DAP will instantly remove users access to product upon cancellation.
  • No Action: Users will continue to have access to the product until the end of the current billing cycle and then  automatically lose access.
  • Make it Current: if user's cancel their subscription, then the access end date will automatically expire at the end of the current billing cycle.  But if the users renew after a few months, instead of extending access from where users left off, DAP will bring the access date forward, make it current and then extend access from the current date.

3

Step 3 - Visit DAP Admin >> Payments >> Orders  Page

(Or find the member in DAP Admin >> Members >> Manage page and click on the order ID link. It'll bring you to the Edit Order page where you will find a "cancel" and "refund" button.

4

Step 4 - Find the order. Click on the "cancel" icon to cancel and "refund" icon under "Action" to refund purchase.


That's it! DAP will cancel/refund order in the payment processor and also negate the earnings so your admin report shows accurate numbers!

1 3 4 5 6 7 35