DAP Shopping Cart – AddToCart – Setup
If you are on DAP v4.4.3 or above, you can use the New DAP Shopping Cart Plugin! The document below explains how to setup the DAP Shopping Cart.
Setting up Add To Cart Payment Button
STEP 1: Create Cart Summary page.
- Go to WP Admin->Pages->Add New Page
- Add this shortcode on that page
This is how the cart summary page will look :
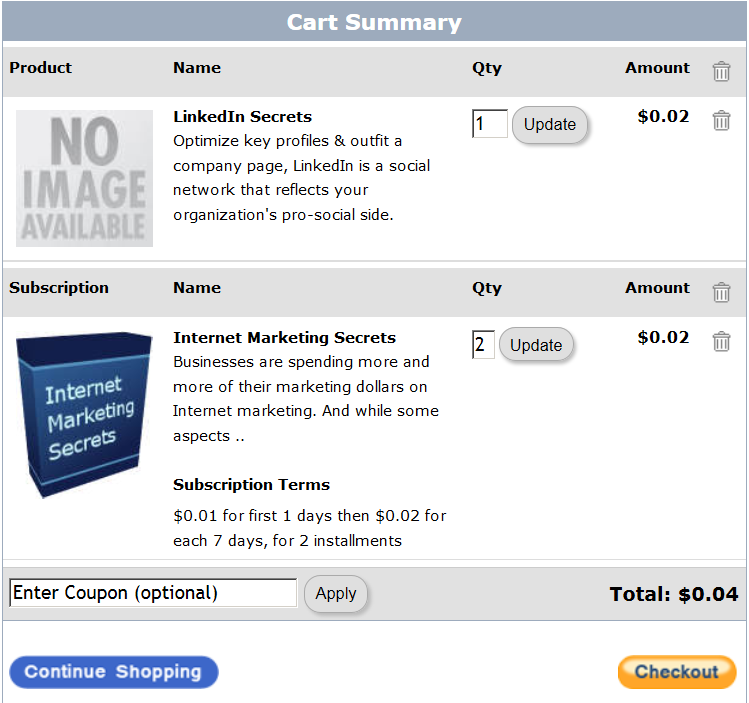
You can use the default values for the parameters in the shortcode above OR you can update any of these parameters in the shortcode:
Cancel Image (cancelimg), Continue Image (continueshopping), Checkout Image (checkoutimg), Cart Empty Message (cartemptymessage), Cart Empty Image (cartemptyimage), Update Cart Message (updatecartmsg), Update Cart Success Message (updatecartsuccessmsg) and Coupon Success Message (couponsuccessmsg).
Note: Currently only 1 template is supported, so please leave the template as template1.
- Save this page. Lets say you call this page cartsummary and lets say the URL of this cartsummary page is http://YOURSITE.com/cartsummary. Just make a note of this cartsummary page URL. You will need it when you setup payment buttons. If you access this page directly, you will get a EMPTY cart message. It should only be accessed via a payment button (add to cart button) as described in step 2 below.
STEP 2: Create Payment Button
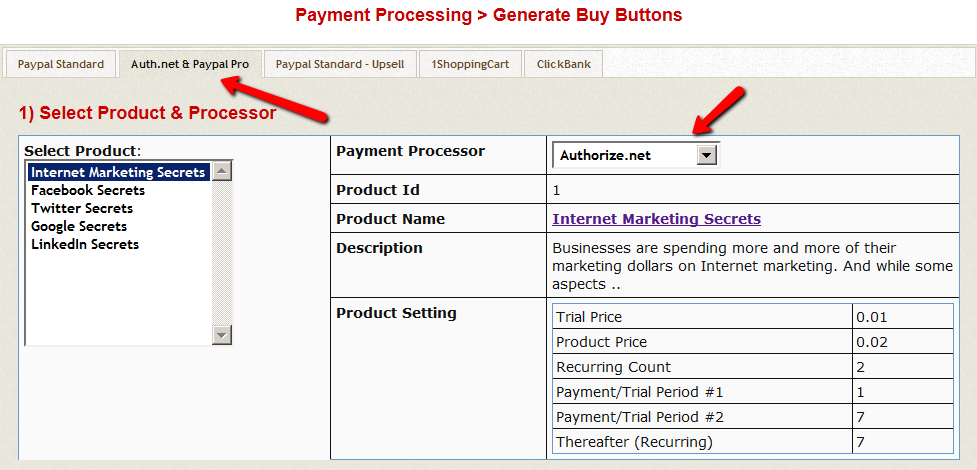
Go to DAP admin -> Payment Processing > Generate Buy Buttons -> Authnet & Paypal PRO tab -> do the following on this page
1. Select Product.
2. Select Payment Processor.
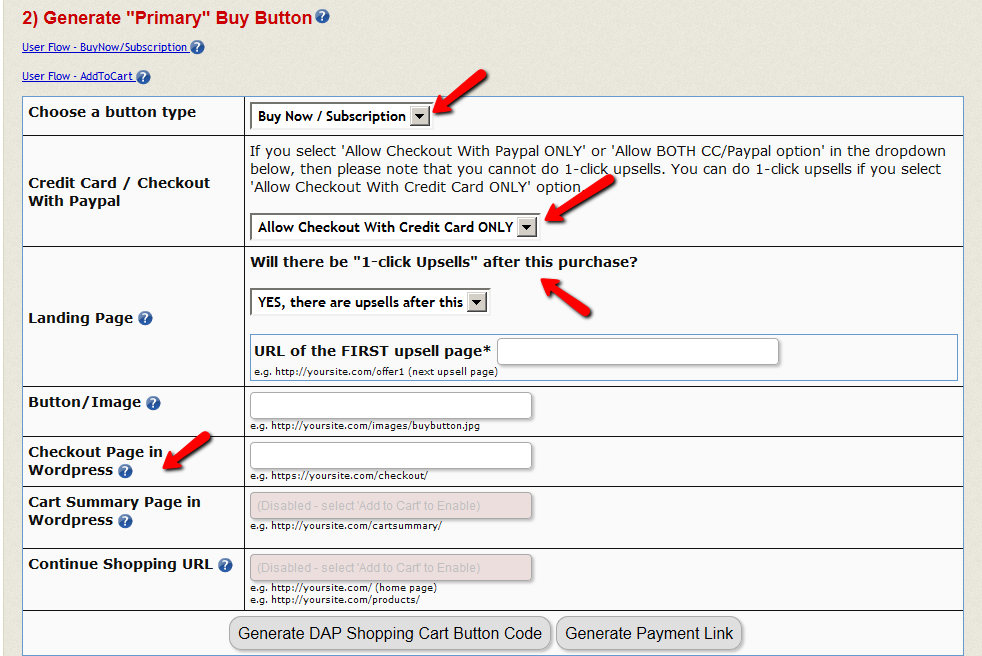
3. Choose a button type (BuyNow/Subscription, AddToCart).
4. Configure payment method. 5. Set the . If you are going to send the users to an upsell page after they click on checkout/buynow, then set the landing page URL to point to your upsell page. Say the upsell page is called http://YOURSITE.com/upsell1. You can set the landing page url to /upsell1. If no upsells, then you can set this to point to a thank you page.
Set the Checkout page in WordPress to http://YOURSITE.com/buynow (check STEP 1 in this document for how to create buynow page). If you do not have a WP based Checkout page, you can set it to : http://YOURSITE.com/wp-content/plugins/dapshoppingcart/buynow.php.
Set the to http://YOURSITE.com/cartsummary (check STEP 1 in this document for how to create cartsummary page). If you do not have a WP based Cart Summary page, you can set it to : http://YOURSITE.com/wp-content/plugins/dapshoppingcart/cartSummary.php. Set the Continue Shopping to point to the page where you have more Add To Cart buttons.
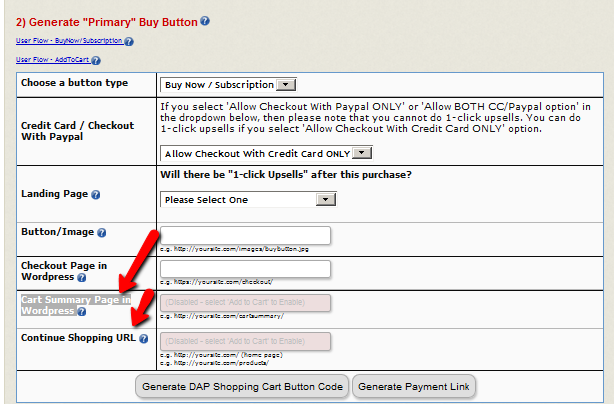
6. Now you can generate a AddToCart Payment Button or a Payment Link.
PLEASE NOTE : The buynow/checkout page must be on HTTPs/SSL. Your entire site does not need to be SSL enabled but the checkout/buy now page where Credit Card is collected MUST BE on https for SECURITY reasons. If you ONLY configure ‘Checkout With Paypal’ to show up on Checkout Page, then you DO NOT need https. You only need to have HTTPs enabled checkout page if you offer Credit Card checkout option. Your web host can enable HTTPs for your site. The exact cost of SSL is web host dependent. Please check the pricing details with your web host.
TESTING: If you are waiting on your web host to enable SSL but want to start testing the CART, you can look for ‘https’ in the button code and update all occurrences of https with http for testing. Please remember to change back to https before you go LIVE with the button.
STEP 3: Upsells – Create Upsell Button
* If you want to offer upsells, please ONLY use the Credit Card payment option on the checkout page. Do not offer ‘Checkout with Paypal’. Upsells will not work with Paypal Standard checkout.
* Say your first upsell page URL is http://YOURSITE.com/firstupsell. Use the URL of the FIRST upsell page (/firstupsell) as the ‘LANDING PAGE URL’ when you generate your MAIN/INITIAL button for the sales page. This way, when the users click on the main payment button, the user’s payment will be processed, and instead of users getting redirected to the thank you page, they will land on the FIRST upsell page.
* You need to have 2 buttons on the upsell page:
Add To Order (Yes, I want to add this to my purchase) / No, Thanks (No, I will skip this wonderful offer)
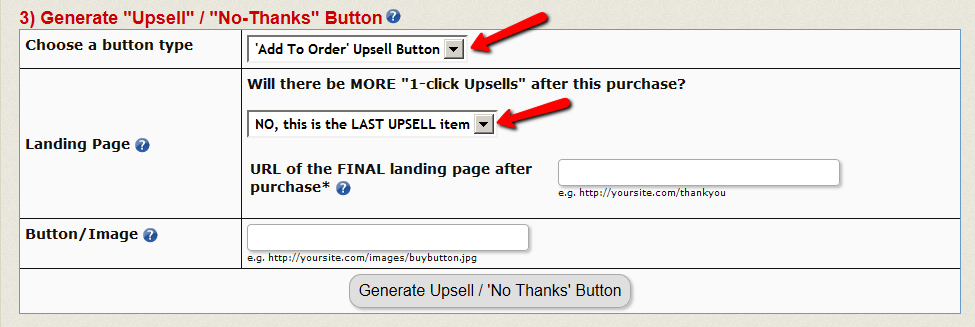
* You can generate the UPSELL / DOWNSELL buttons for all your upsell / downsell offers in the DAP admin -> Payment Processing > Generate Buy Buttons -> Authnet & Paypal PRO tab. Make SURE to select the RIGHT product in the button generation page BEFORE you generate button.
STEP 4: CART OPTIONS
Last STEP in your checkout page configuration process.
– Go to DAP admin -> Payment Processing > Cart Options page.
You will find several checkout page customization options on this page including options for ‘Choose a Password (pre-registration)’, ‘Require Billing Info for Paypal’, ‘Custom fields’ etc. You can enable options as needed for your site for the product you are trying to sell. Remember to first select the product in the select box on the left before picking options.

This concludes the AddToCart setup. Your shopping cart is now ready to be tested!