How to use DAP to deliver your Lead Magnet

You can use your DAP membership site in many different ways.
You can use it to deliver just your lead magnet (for email list building) or to deliver a mix of free and paid products/services.
Profitable membership sites use a strategic combination of free and paid offers to build a targeted list of email subscribers, maximize average transaction value and customer lifetime value. You could launch your DAP membership site with just a lead magnet offer. This way you can start building your email list right away instead of waiting until your paid product is ready. You can add your paid products into the mix later.
DAP allows you to create an opt-in form to directly sign-up users to your Free Product/List. Your users can sign up by entering just their First Name & Email Id. They'll be added to your members list in DAP. After they signup, they'll receive access to your free (but protected) content. You can also use DAP's built-in auto-responder feature to drip out emails to the users of your free product (or you can connect DAP to a 3rd party email marketing platform)
On one of my own sites, I use DAP to deliver just the lead magnet. I don't sell any other products on that site currently. You can check it out here.
Here are the steps to use DAP to deliver your lead magnet:
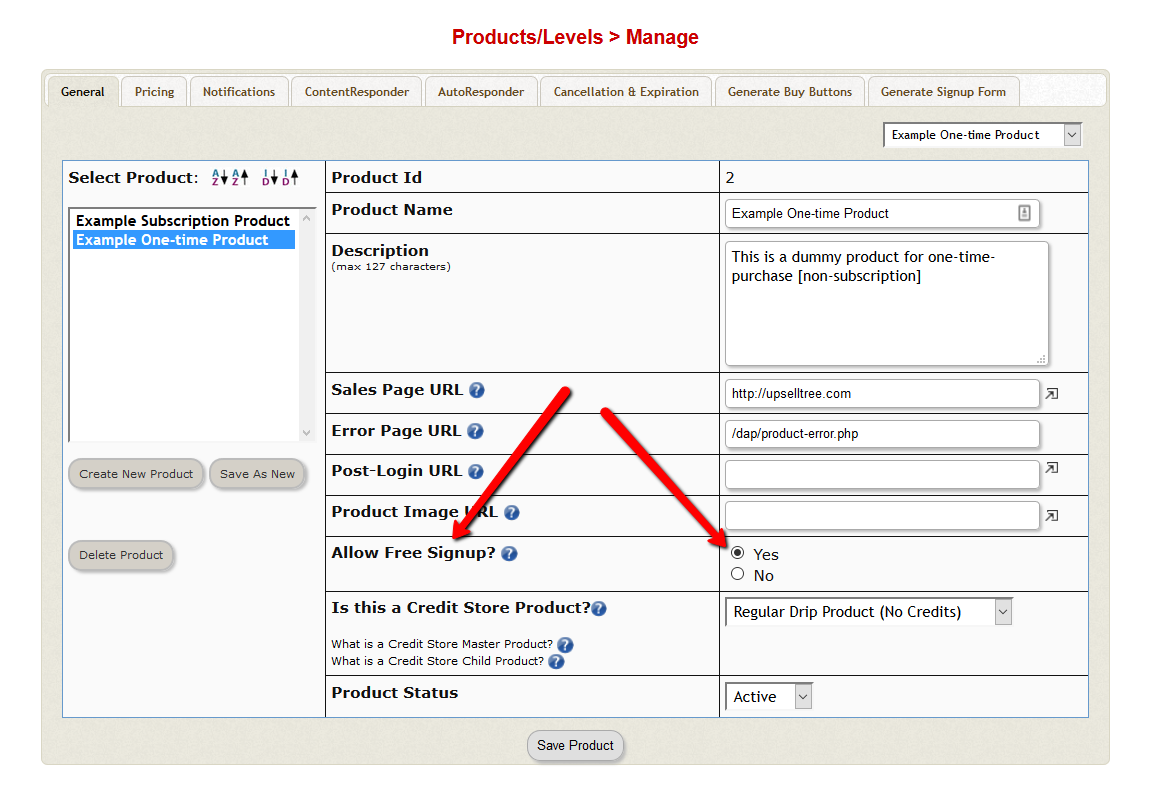
Define your Free Product
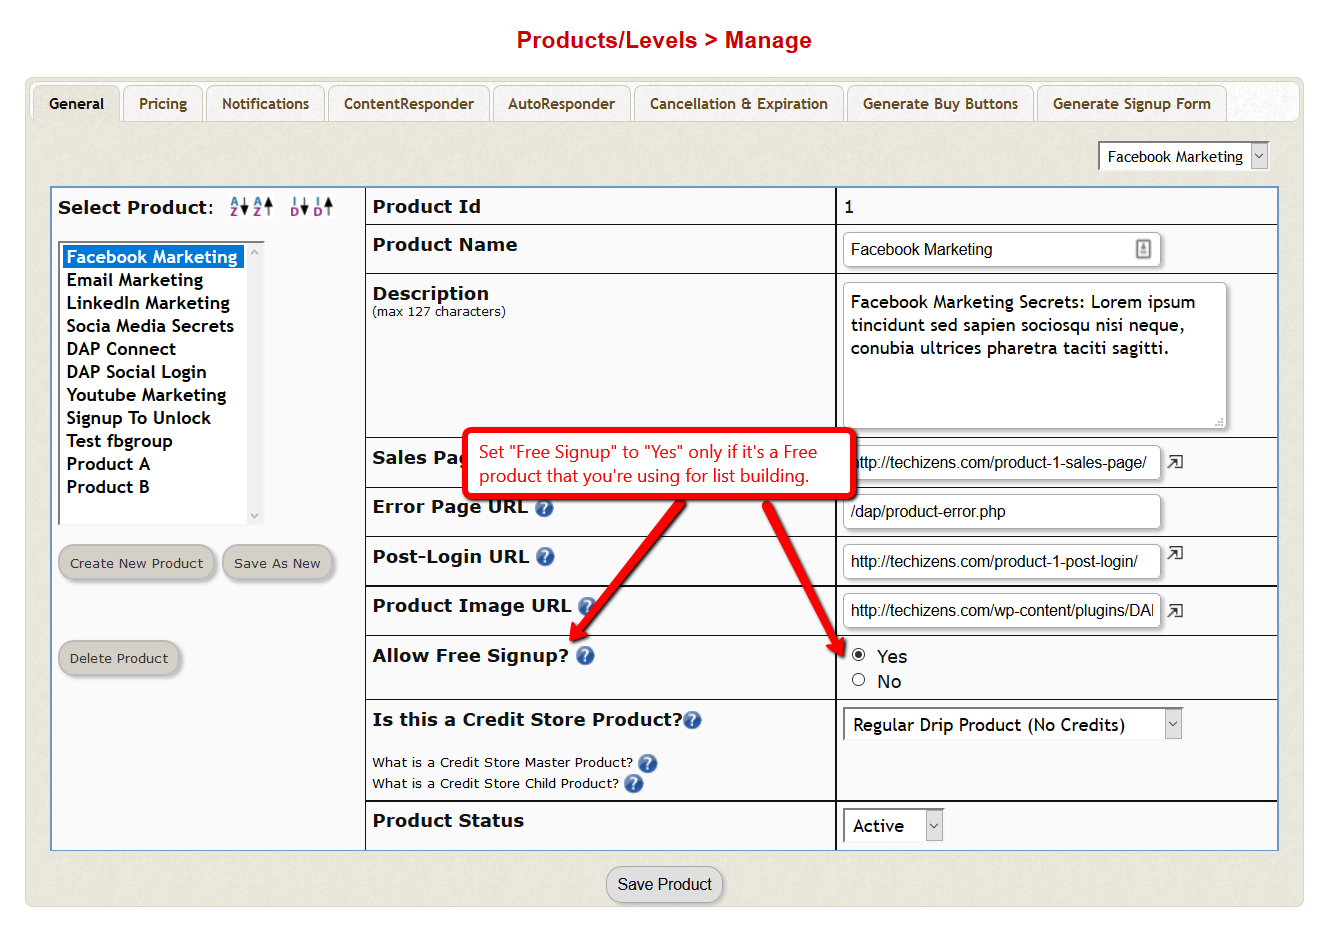
In the DAP Admin Menu, go to Products/Levels => Manage page. Define your product and designate it as 'Free'. You can leave "post-login url" field empty if you want to use a global post-login URL (that you can set in DAP Admin => Setup => Config page) that applies to all of your products. Your users will be redirected to this page when they login.
Same goes for Sales Page URL and Error-Page URL. If you leave these fields empty, DAP will use the global setting from DAP Admin => Setup => Config page for these fields.
Set "Allow Free Signup" to "Yes" otherwise DAP will not allow free registrations/opt-ins to this product.
Set Access Duration
Visit Products/Levels => Manage page => Pricing tab and enter the number of days of access the member should get when they sign up for this Product. If you want them to receive full and forever access, set "Membership Duration" to 9999.

Define Single or Double-Opt-in
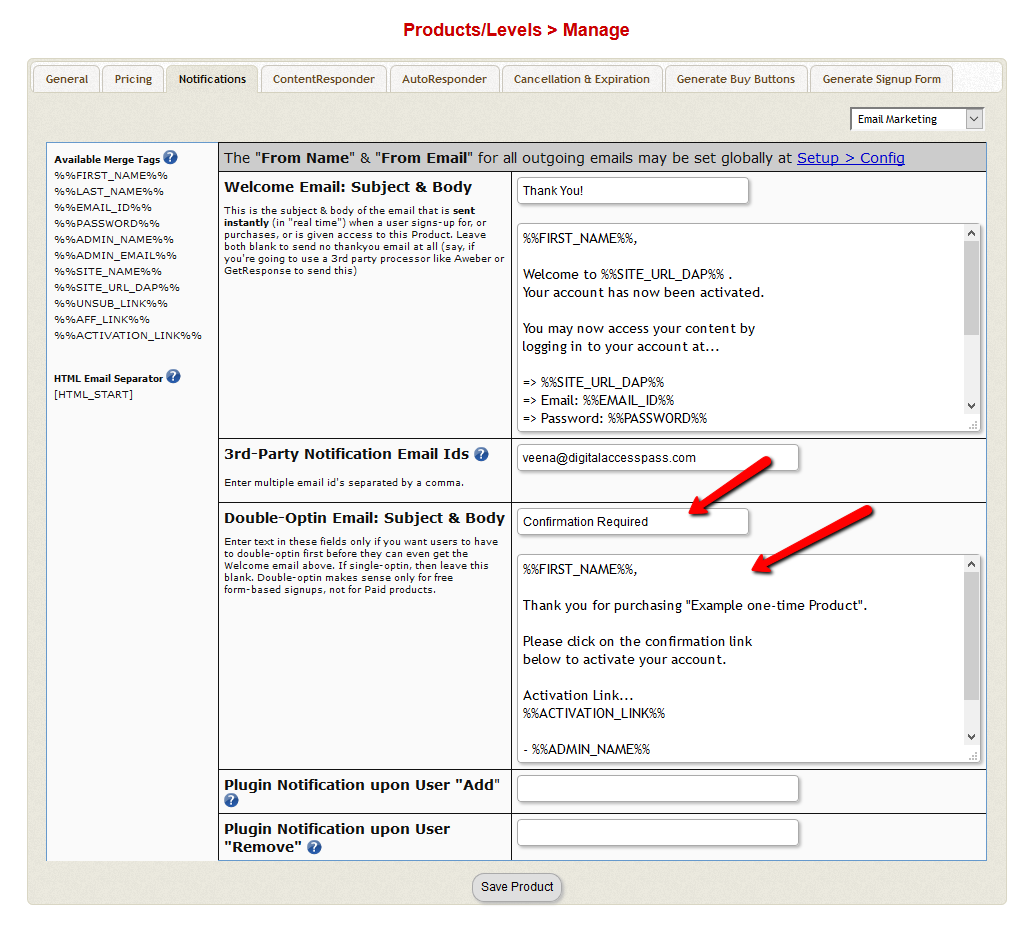
If you want your users to opt-in to your list by clicking on a confirmation link before they can access your free content, then set up your double-opt-in email content in the Double-Optin Email: Subject & Body field.
If you want your registered users to receive access to your content right after they signup, without having to wait for a confirmation email and opting-in, then leave the Double-Optin Email: Subject & Body field empty. It'll make your list (product) a single-opt-in list. DAP will auto-login your members upon registration only if your product/list is set up as a single-opt-in list. Please be aware that this will likely increase spam signups as users can use any junk email to signup and don't have to verify it to receive content access.
You can setup your double-opt-in email in DAP Products Page => Notifications tab.
Set up your Welcome Email
Setup your Welcome email in DAP Products Page => Notifications tab => Welcome Email Subject & Body field. Use this email to send your members their login credentials (email, password etc).

If it's a double-opt-in product/list, then the double-opt-in email gets sent first. Only after the users click on the confirmation link in the double-opt-in email, and complete the opt-in process, the welcome email gets sent.
If it's a single-opt-in list, the welcome email gets sent right after they enter name/email and hit the signup button. The users are also automatically logged-in to their membership area upon registration.
You can control/configure where the users get sent upon registration in the signup form (I'll cover that in the next step).
You can fully customize the contents of your welcome email in DAP products page -> Notifications tab -> Welcome Email field. You can use the 'personalization tags' to send your members their login email/password.
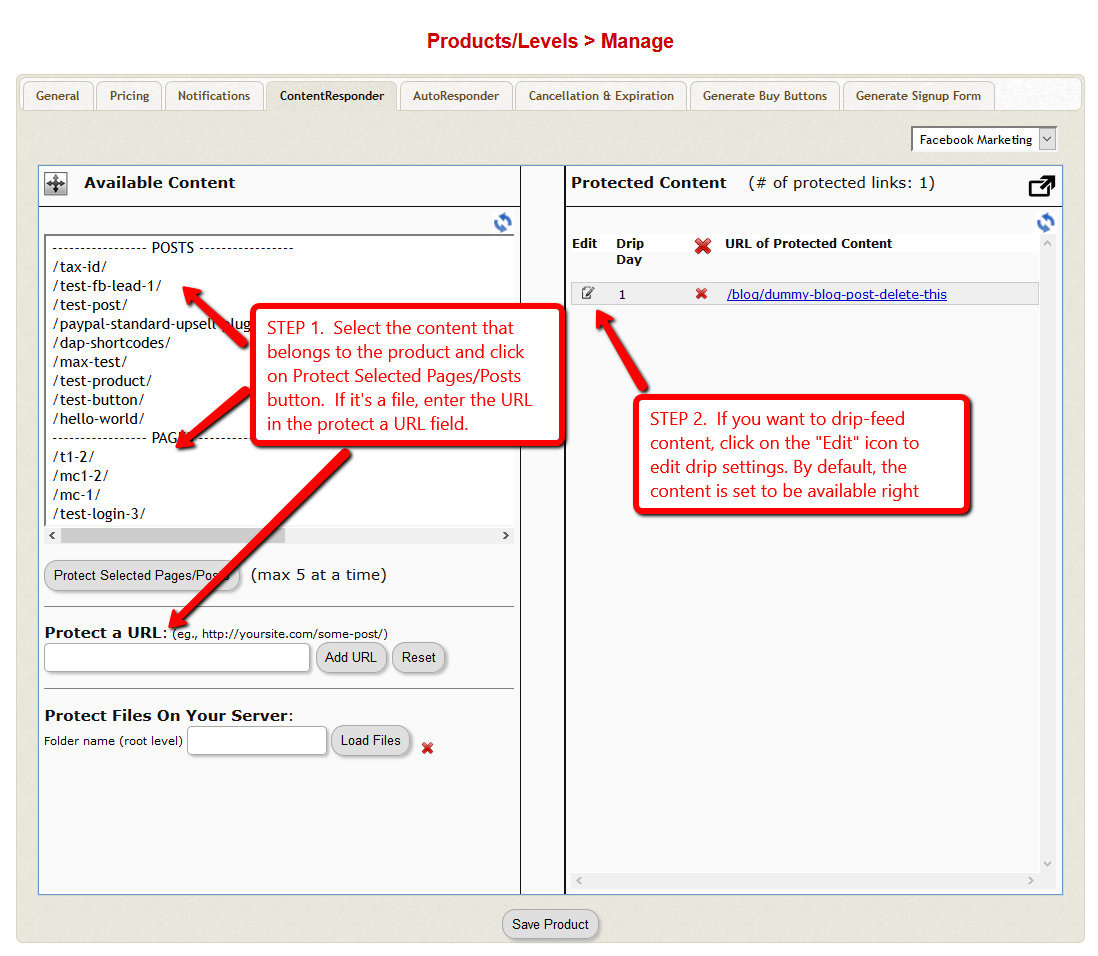
Assign Content to the Product
Visit the DAP Products Page => Content Responder tab and setup the pieces of content that make up your free product. It could be WordPress pages, posts, downloadables files etc.
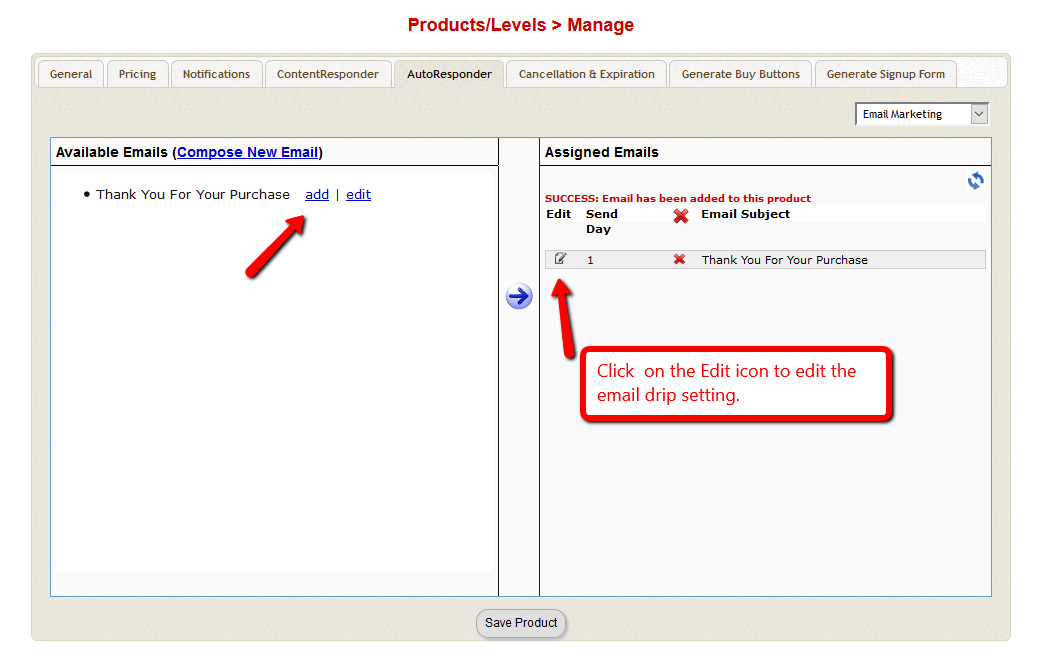
Set up your Auto-Responder Emails
Visit the DAP Products Page => Email Autoresponder tab and setup the emails that you want dripped to the users of your free product. These emails are NOT sent out instantly. These emails get sent when the DAP Hourly Cron job runs at the top of the hour.
So if a user signs up at say 10:15 AM, they will receive the autoresponder emails that you've set to drip "Day 1" at 11:00 AM. Say they sign up on 9/1/16, they'll receive day-1 email at the top of the hour when cron runs and day-2 email at midnight (start of day 2). DAP uses your 'server time' to drip emails.
Generate Free Sign-up Form and Publish
Visit the DAP Products Page => Generate Signup Form tab and generate your 'Free' Signup form here. Publish this signup form on your opt-in page to allow your prospects to signup and gain access to your free content.
Use 3rd-party Signup Form
If your WordPress theme comes with nice opt-in forms and you want to use that instead of a DAP generated signup form, then see if your theme allows you to enter "custom signup form code" in their settings. If yes, just copy the DAP generated signup form code in there and it'll automatically integrate your signup form with DAP.
Integrate DAP with other Email Platforms
If you want to integrate DAP with 3rd party email marketing platforms like AWeber, Mailchimp, GetResponse, ConvertKit, ActiveCampaign etc, you can do so in DAP Products page => Notifications tab => Plugin notification section. I won't be covering the integration details here. We've separate documentation that covers DAP integration with each of these platforms in detail.