Dripping Content
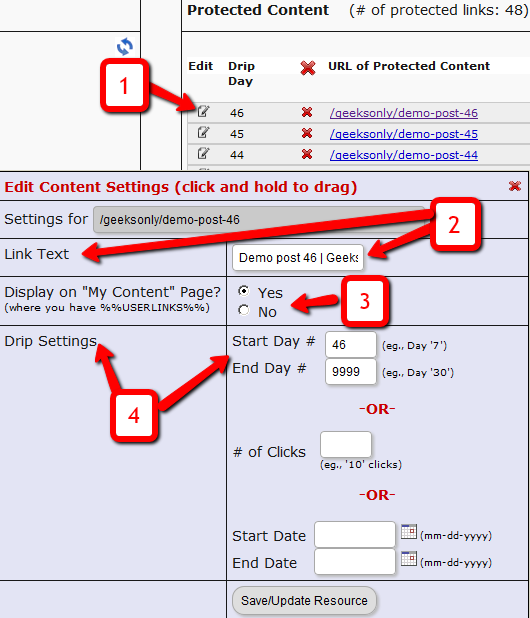
Once you have protected content by adding it from left-to-right on the “ContentResponder” tab of the Products > Manage page, you can set the dripping day/date and link display text and other drip options, by launching the “Drip Settings” popup (see “1” below) by clicking on the “Edit” icon next to the content you wish to drip.
By default, when you add any content (WP page/post or file), it is set to drip on day #1 by default. Which effectively means “no dripping” – and that the content is available to the member from day 1 of their purchase/signup.
1. Shows the “Edit” icon on the “ContentResponder” tab, and clicking it will bring up the “Drip Settings” popup (that shows 2, 3 & 4).
2. On the drip settings popup, the “Link Text” refers to the display text of the link that will be shown to the member on the “My Content” page.
3. If you wish to protect a link, but just NOT show it in the list of links on the “My Content” page, then set this to “No”.
4. Drip Settings: In DAP, you can drip content by Day, Date or restrict access by # of Clicks. You can only choose one method (eg., you cannot drip by day and date at the same time).

