Authorize.net Integration
DAP Cart => Authorize.net integration
If you have an authorize.net merchant account, then please read this document on how to setup the DAP Shopping Cart integration with Authorize.net:
1) Login to your Authorize.net account. Click on ACCOUNT.
2) Click on API Login ID and Transaction Key. Make a note of the API Login Id and Transaction Key.
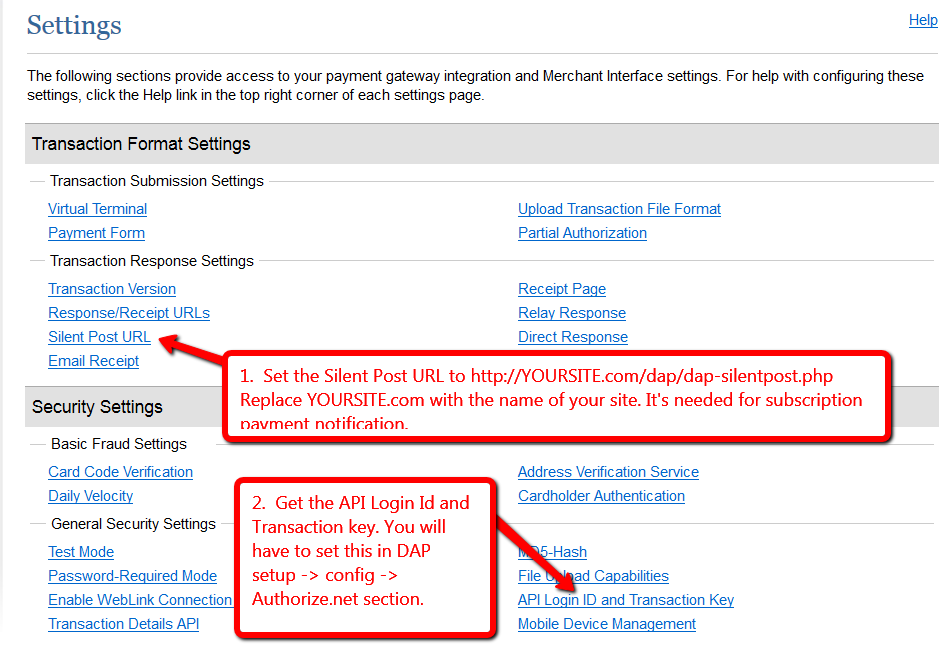
3) Set the Silent Post URL in your authorize.net account to http://YOURSITE.com/dap/dap-silentpost.php
NOTE: Replace YOURSITE.com above with the actual name of your site.
The Silent Post setting is required for DAP to process ‘recurring payment notification’ from Authorize.net. This allows DAP to automatically ‘extend’ user’s access to subscription/recurring product upon successful subscription payment.
4) Login to your DAP Admin Dashboard -> go to Setup -> Config -> Payment Processing – Authorize.net section. And enter the Authnet API key and login Id that you got from Authorize.net above (step #2).
| API Login ID (get by logging in to your Authorize.net account) | |
| Transaction Key (get by logging in to your Authorize.net account) |
5) Create the Product that you want to sell in DAP products page. Set the pricing and recurring options for the product in DAP products page -> price & recurring tab.
6) Set the ‘welcome’ email in DAP products page -> Notifications tab.
7) Set the content that you want to protect/drip under this product in DAP Products page -> Content Responder tab.
Now read this document to complete the rest of the DAP cart setup on your site.