How to create a Credit Storefront page?
1. Login to WP admin dashboard.
2. Click on Pages -> Add New.
3. Click on Visual tab.
4. You will notice a CS Editor Icon as shown below:
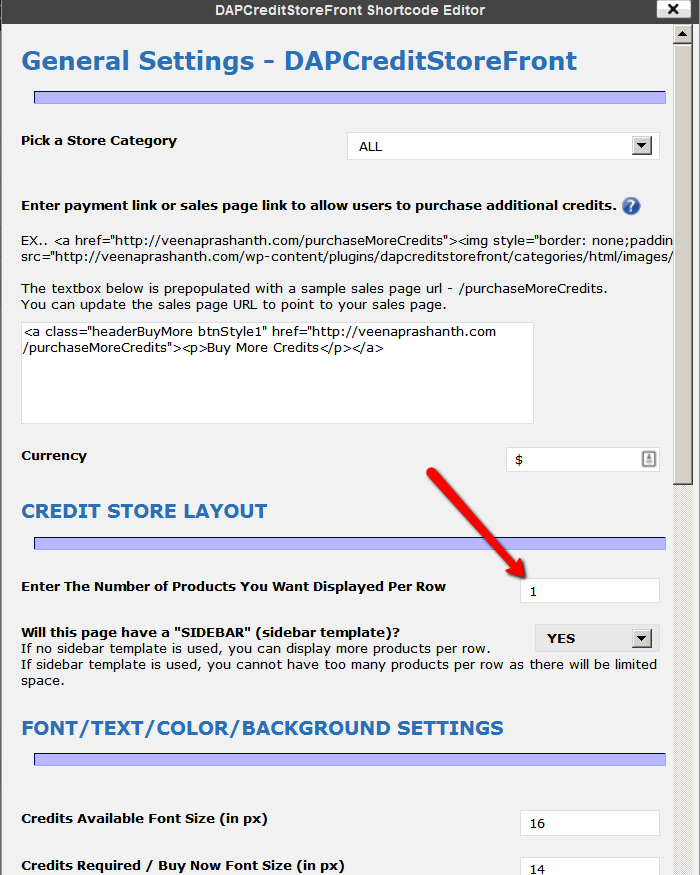
5. Click on CS editor icon and fill up the form to create a storefront page.
– Enter The Number of Products You Want Displayed Per Row
Please NOTE: Currently the ONLY valid values are 1, 2 or 3.
If you allow content level credits for any products in the display category, then you cannot use multiple products per row layout. You will have to user 1 product per row.
– You will also notice various customization options for text color, background color, font, width etc that you can configure if needed or you can just use the defaults.
– Pick a store category for the storefront page: If you select the “ALL” option, then all the child products associated with the categories will be displayed in the storefront page.
– Enter payment link or sales page link to allow users to purchase additional credits: Enter the link to your sales page url or the buy button LINK for the master product.
When a user clicks on the payment link, they can complete payment and accumulate more credits.
OR
You can ENTER sales page URL to send users to a page where they can find multiple payment buttons/links for credits purchase (for ex – 10-credits, 100-credits etc). The ‘buy credits’ image will automatically appear on the store page. When a user clicks on the image, they will get redirected to the sales page to purchase additional credits.
Users need to be logged in to their membership to access the credit storefront page. Otherwise dap will not know who the user is.
7. After you pick all the options and click on INSERT button, you will notice the [DAPCreditStoreFront]…[/DAPCreditStoreFront] shortcode. Save the WP page that has the shortcode. And now when you open the page in a browser, it will show all the products you have set up as ‘redeemable products’.
If you have setup the store already and want to make some updates to the settings, you can select everything from the start tag ([DAPCreditStoreFront] ) to the end tag ([/DAPCreditStoreFront] ) and click on CS icon and it will remember the previous settings.

