How to display different menus to
logged-in & logged-out users
Want to display different WordPress Menus to your logged-in and logged-out members? Just follow these steps!
Watch this short (3-min) video to see how to implement this!
Step 1: Create 2 Different Menus
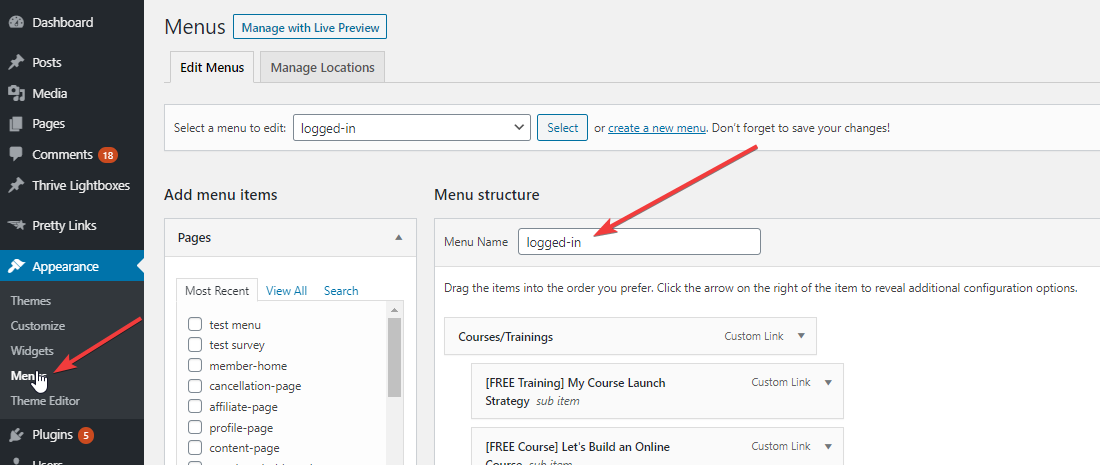
Visit your WordPress Admin >> Appearance >> Menu.
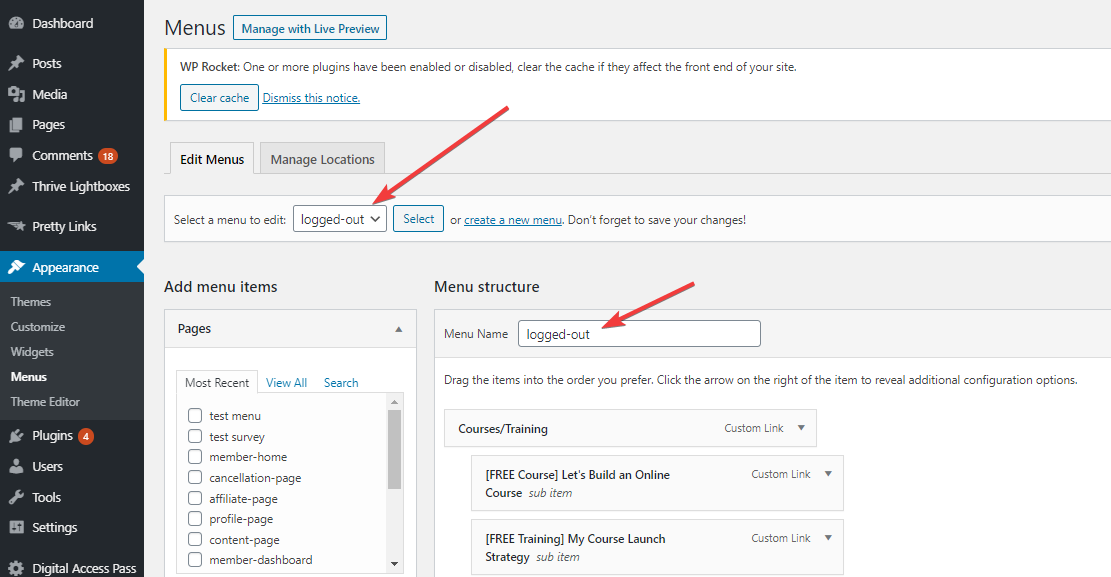
Create 2 different menus in WordPress - one for logged-in members and another one for logged-out members.
Let's say you call the one for logged-in users - "Members".

And the one for logged out members - "logged-out".

Step 2: Configure menu in DAP
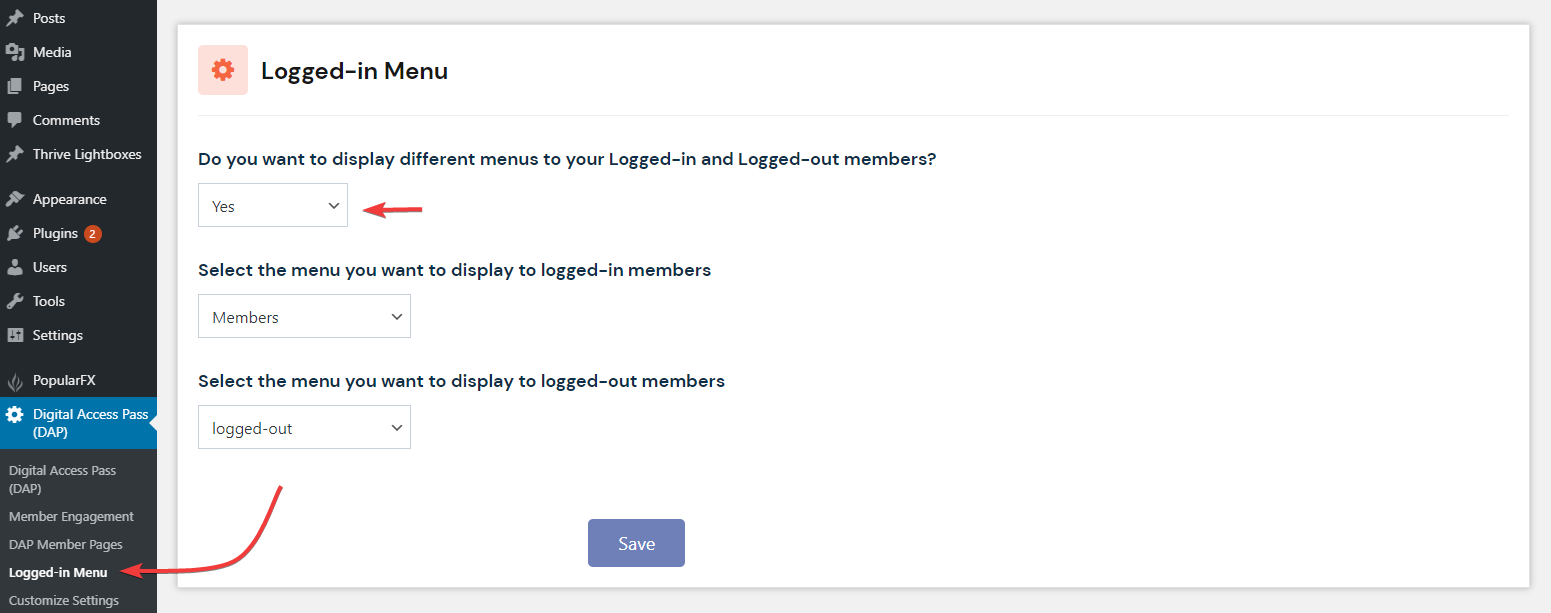
1. Visit DAP >> Logged-In Menu page.

2. Select your logged-in and logged-out menu.
3. Save the settings.
Please NOTE: if you want DAP to only control the menu displayed to the logged-in members but not the one displayed to the not-logged-in members, just select the logged-in menu on this page. Don't select any logged-out menu.
Step 3: Test to make sure it's working
Visit a page where you have activated WordPress menu.
If you are logged-in to DAP, it should show the logged-in menu regardless of the menu you have activated on the page.
If you are not logged-in to DAP, it should show the logged-out menu regardless of the menu you have activated on the page.
Membership Site in 30 Minutes!
Looking to build a membership site but feeling stressed about everything you need to do from content creation to the actual implementation, and not sure where to start?
Recently, we tested Digital Access Pass (DAP) on a new webhosting platform. We were able to fully setup and configure a DAP-powered membership site, with beautiful, elegant member-facing pages, in just 15 minutes!
Watch this video for a behind-the-scenes look at how to build a brand new membership site - with free products, paid products, membership levels, online courses, etc., quickly in just 30 minutes!
My Online Course Launch Strategy
The 3 main challenges that most people face when it comes to building and launching an online course:
1. No list or small list.
2. Busy schedule.
3. Don't know how to put it all together, organize and deliver.
So I decided to create a FREE training video to show you the exact steps I follow to build my list, create and organize my course content, and the order in which I execute in every phase - from idea, planning, audience building, content creation, implementation to the actual launch.
No Audience? No List? No problem!
FREE: Let's Build an Online Course
A-Z Blueprint: For Creating And Delivering A Wildly Successful Online Course!
In this FREE course, I've broken down the entire course creation process, from how to build an audience to how to create and launch a course, into easy-to-understand and implement steps.
Once your complete the course, you'll be able to build your own course confidently, without any stress or overwhelm!
Signup below to get instant access.
Need help with planning
and implementation?
Done for YOU!
DAP is easy-to-use and setup. However, we also offer FREE 3 hours of one-on-one concierge calls with DAP's Elite License (Monthly / Annual). We share our screen on the call so you can actually see and learn with us.
The 3 hours of time can be used for membership site planning, brainstorm strategy and implementation.
So if you need a little extra help and don't have the time to figure it all out, we highly recommend the DAP Elite Package. Click on the button below to get started with the DAP Elite License. With all the plugins and extra help included in this package, there is no better investment for your business than this!
