Integrating DAP with Paypal Standard
This doc applies to Paypal Standard only.
(Click here for integration with Paypal Website Payments Pro)
You do not have to log in to your Paypal account to generate your buy buttons. You can do it from within the DAP Admin Dashboard.
1) Enabling Instant Payment Notification (IPN) within your Paypal account.
a) Log in to your Paypal account and click on the “Profile” link in the menu, then on the next page, click “My selling tools.”
b) Under “Getting paid and managing risk” section, click “Update” beside “Instant payment notifications”
c) If IPN is already enabled, and you already have a URL in that field, then skip ahead to Step 2.
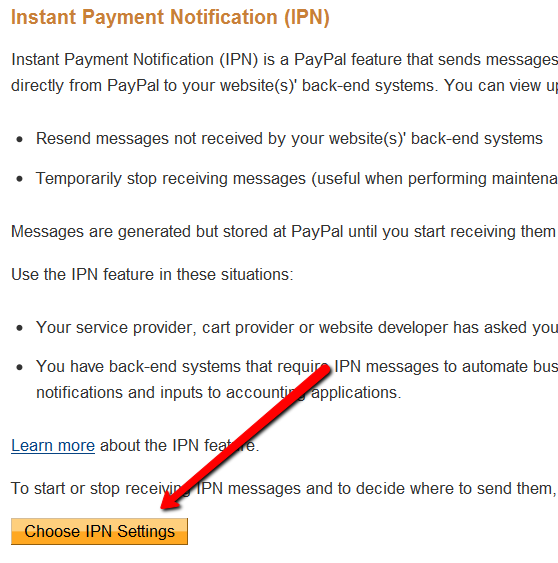
Else, if IPN is not already enabled, then click on “Choose IPN Settings”

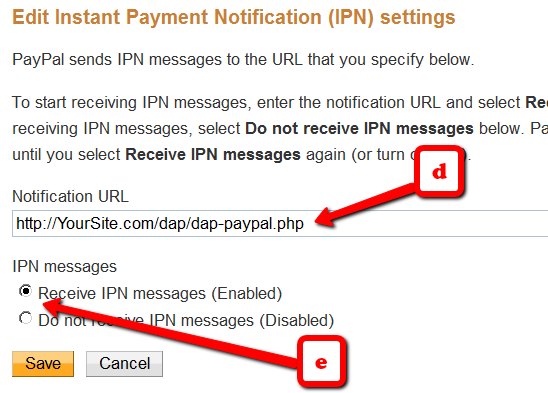
d) On the next screen, in the Notification URL field, enter…
http://YourSite.com/dap/dap-paypal.php
Don’t forget to replace “YourSite.com” with your actual web site’s domain name.
e) Make sure “Receive IPN Messages” is selected.
f) Click on “Save”.
2) Enable “Auto-Return” and “Payment Data Transfer”
- Log in to your Paypal account.
- Go to Profile.
- Click on Website Payment Preferences
- Turn Auto Return to On (see image below)
- Set Return URL to http://YourSite.com/dap/dap-thankyou.php
- Scroll down further to the Payment Data Transfer (optional) section
- Set Payment Data Transfer to On
- Scroll all the way to the bottom of the page, and then Save the changes.
- Now come back to this same page just like you did before (Profile > Website Payment Preferences)
- This time, simply scroll down to the Payment Data Transfer (optional) section
- Now you will see a long, ugly string of text next to the Identity Token field (see image below). Copy that string.
- Go back to DAP Dashboard > Setup > Config > Payment Processing > Paypal Identity Token field, and enter this string there, and save it.
3) Config settings
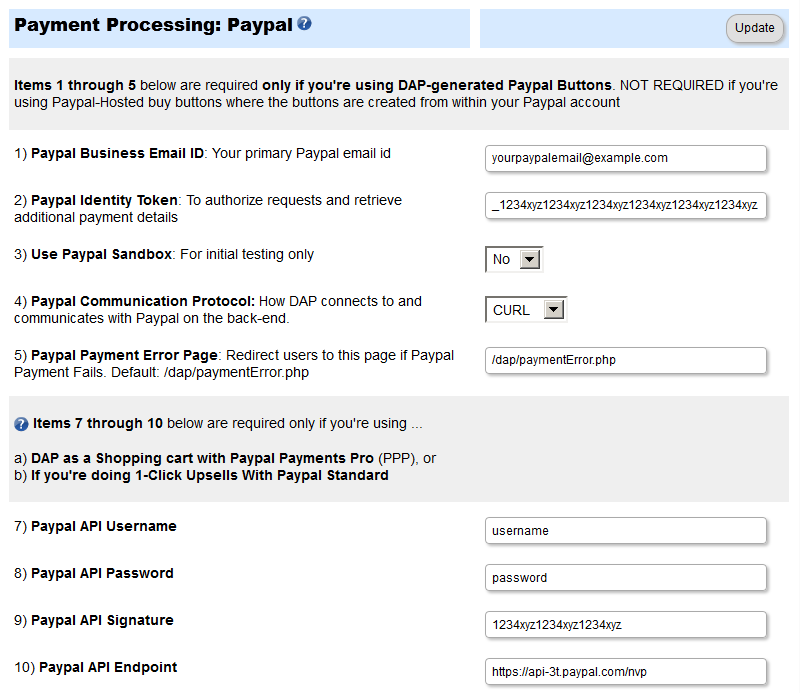
Go to “Setup > Config“.
Click on the Paypal link in the sub-menu at the top.
The current page will then skip to the “Payment Processing: Paypal” section about half-way down the page.
Fill out items 1 through 5 only.
(items 7-10 are required only if you’re using Paypal Website Payments Pro, or doing Upsells with Paypal Standard)
4) Generate Buy Button from within DAP
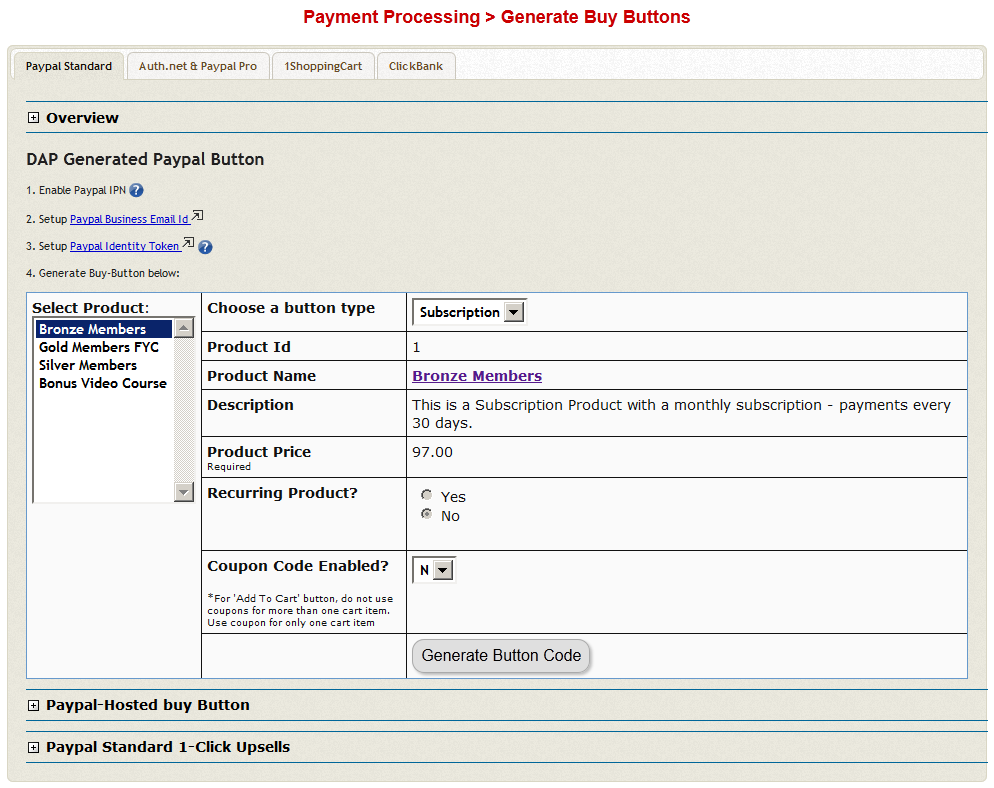
On the main DAP Admin menu, go to Payment Processing > Generate Buy Buttons page, then switch to Paypal Standard tab
Choose product for which you wish to generate the buy button, and then click on “Generate Button Code” button.
5) Publish generated buy-button code on your Sales page.
That’s it!
Sales Flow
Here’s how the flow works now:
- Prospect clicks on buy-button your sales page and is taken to a Paypal checkout page at Paypal.com
- They purchase your product and complete the payment
- They are initially redirected to the “Auto Return” url from Step 2 above
- DAP captures customer email, name, product name, etc
- DAP creates member account for buyer on your system, and gives them access to the product, will send out the Welcome-Email from the product page, etc
- It auto-logs them in to your membership site – no need for member to wait for Welcome email just to get their login information (that email is sent anyway, and will be waiting for them in their inbox)
- DAP now needs to know where to redirect the user to.
a) If Product-level Logged-In URL is set in DAP for this Product that they just purchased, then it redirects them to that URL
b) If no Product-level Logged-In URL is set, OR if the buyer has access to more than 1 product (if they had previously purchased another one of your products, for example), then it uses the Global “Logged-In URL” setting from: Setup > Config > Advanced > URL to which user is redirected to right after login
2) DAP Generated Buttons For Paypal
With DAP 4.0, we have added support for DAP generated buttons for Paypal. You no longer have to generate buttons within Paypal.


