Customizing Error Messages On Protected Pages
When an unauthorized visitor tries to access a protected page or post, you can choose from among two things that can happen:
1) Display an “In-Page Error Message“: They can be presented with an error message that shows a “lock” image. You can show the standard DAP version, or you can customize this message and add your own text.
-OR-
2) Redirect to Error Page: They can be redirected to any other page of your choice (WordPress page or post, or a completely non-WP page)
1. Display “In-Page” Error Message
“In-Page” basically means that this message will be shown on the same page that the user is trying to access (to which they do not have access). So basically, the content of the very post or page they’re trying to access, will be replaced by this “In-Page” error message.
The default error messages shown by DAP are as follows.
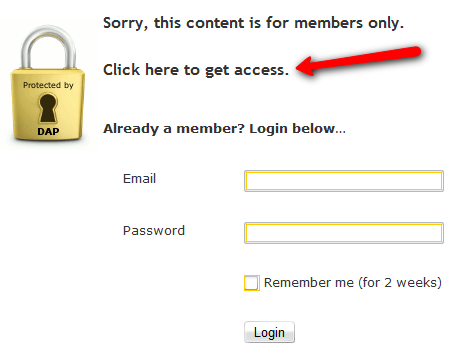
A) If a visitor is NOT logged in, then they will see…
(Image A)
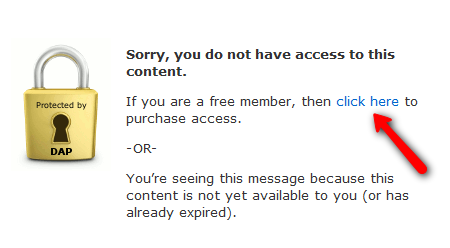
B) If a visitor IS logged in, then they will see…
(Image B)
If you see Image A above, there is a line of text that says: “Click here to get access”.
And in Image B above, there is a line of text that says: “If you are a free member, then click here to purchase access”.
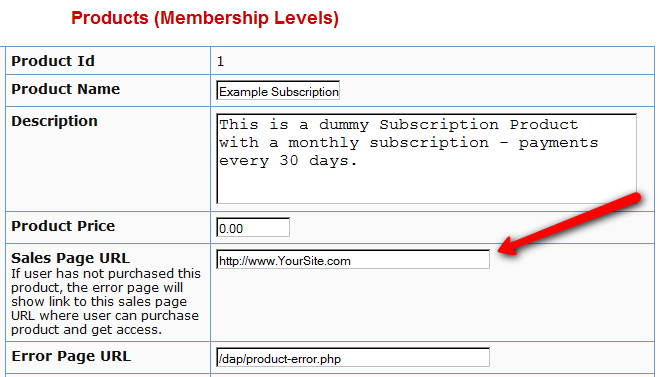
In both cases, the text “click here” is actually a link. And by default, that link will point to whatever you put in the “Sales Page URL” in your DAP Product (to which the above post/page is part of). See Image C below.
(Image C)
Displaying Custom Error Message
If you wish to customize the above standard error messages, then here’s what you need to do:
- Go to /dap/inc/ folder. There are two files there:error-loggedin.php , and
error-notloggedin.php - Make a copy of both files on your computer, and add the text ‘custom‘ to the front of each of the file names of the newly copied files. So the new files are now called: customerror-loggedin.php , and
customerror-notloggedin.php
- Open customerror-loggedin.php and customerror-notloggedin.php and modify them as you please, change the text, formatting, font size, color, etc.
- Upload the new files to the same folder – /dap/inc/ – as the original error files.That’s it. DAP will then ignore the old error files, and start displaying your new “custom” error messages.
2. Redirect to Error Page
Instead of showing an error page (default or custom, from (1) above) you can also redirect the un-authorized user to a completely new page/post of your choice.
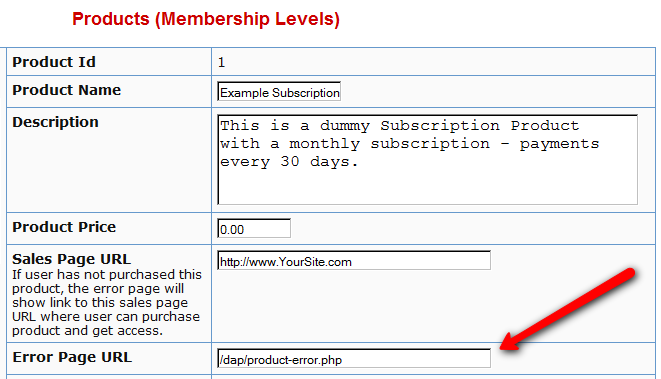
If you see Image D below, you will see that on the DAP Products page, there is a field called “Error Page URL“.
By default, this is pointing to /dap/product-error.php
(Image D)
Change this to any link you want. Examples…
http://YourSite.com/myerrorpage.html , or
http://YourSite.com/myerrorpage/
Whatever you put in the above field (Error Page URL) is what page the user will be redirected to, when they access a page that they don’t have access to (either because they have not logged in, or because they are logged in, but don’t have access to it yet).


