DAP Supports Login Xpress with 1ShoppingCart (What is Login Xpress?)
The documentation below will show you how to setup 1ShoppingCart and DAP, so that your buyers can be automatically logged in to your "Member's Area" upon completion of their purchase.
Note About Processing Recurring Orders via 1SC
If you only sell ONE-TIME products at this time, then the Login Xpress flow below is all you will need to setup as far DAP & 1SC integration is concerned.
If you are selling RECURRING products via 1SC , but DO NOT WANT your users to be automatically logged in to the "Members' Area" right after their purchase, and you prefer sending them their membership login info (email & password) via email, then you DO NOT need to read this post any further - simply head over to this post: 1ShoppingCart Recurring Payment Processing via Email
But if you sell RECURRING products via 1SC and you DO WANT also want your users to be automatically logged in to the "Members' Area" right after their purchase, then continue reading this post for Login Xpress setup. After setting up Login Xpress, you will also need to set up the email parsing of orders to allow DAP to process RECURRING payment notifications from 1SC as described here.
Login Xpress Setup
1) Set up your sales page as you would normally do when accepting payment through 1ShoppingCart. The only thing you need to make sure is to use the exact same "Product Name" in your cart as well as within DAP. So, if you set up a product called "My Membership Site" within DAP, then use the same name "My Membership Site" as your 1SC product name.
2) Login to your 1ShoppingCart admin account
Go to Products > Manage Products.
Edit the Product you are setting up.
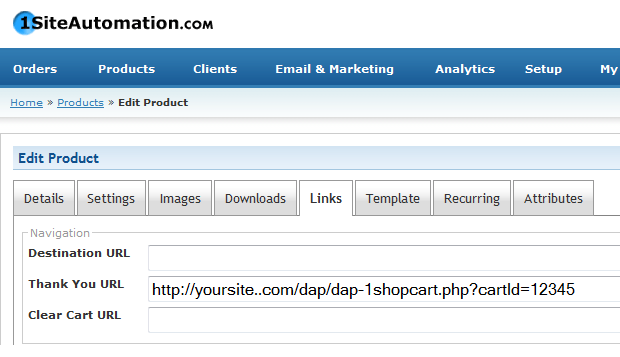
Go to the "Links" tab of that Product.
Set up the Thank You URL to point to a DAP script on your site, as shown below:
http://YourSite.com/dap/dap-1shopcart.php?cartId=SecretKey
Note: YourSite.com should be replaced by the name of your site SecretKey should be set to the same value that you set in DAP Dashboard > Setup > Config > Payment Processing > Secret Authorization Key used when interfacing with external systems.
DAP Secret Key Setup
![]()
3) Now open a brand new browser session where you are not logged in as DAP admin.
Complete a test purchase using an user email that is not already in your DAP
. If the integration worked correctly, then a new user account will automatically get created in DAP, and the user will also be automatically logged in to DAP.
After auto-login, DAP will redirect the users to whatever you configured in DAP under :
DAP Dashboard > Setup > Config > Advanced > URL to which the user is redirected to upon login.