DigitalAccessPass.com Documentation
DAP Easy Installer - How to Install/upgrade DAP
New Installation / Upgrade
Please Note: If you are new to DAP, or if you are a DAP Platinum or Elite member, we offer DAP installation service for FREE. Please open a support ticket and we’ll install it for you.
STEP 1:
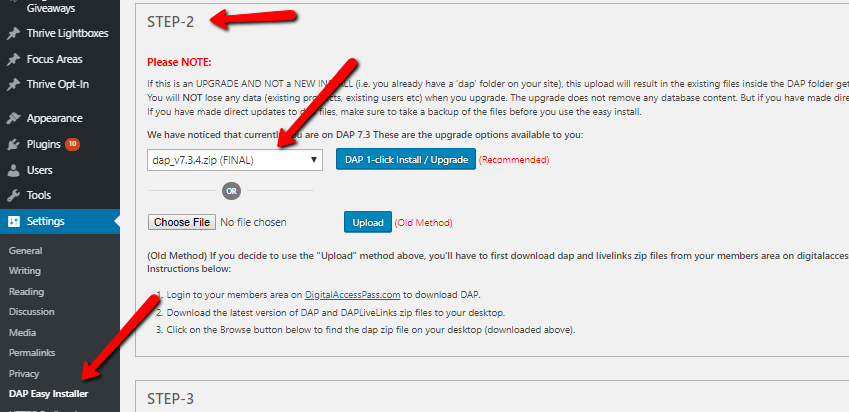
STEP 2:
What if you don't get the success message or get a license or another error?
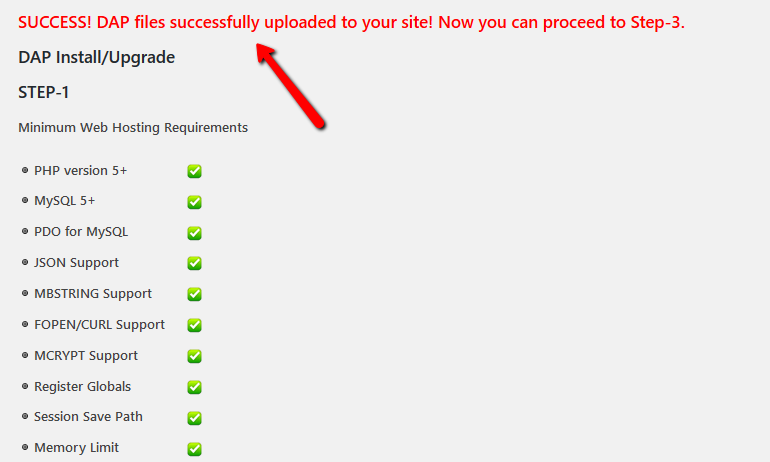
If you see the success message, go to the next step.
If not, then unfortunately you’ll have to use “FTP” or “File Manager” (in your webhost cpanel) to upload files. On some servers, the file upload does not work due to permission issues or file/folder ownership issues. You can’t use easy installer on these servers. Click here for detailed instructions.
Please Note: If you are new to DAP, or if you are a DAP Platinum/Elite member, we offer DAP installation for FREE. Please open a support ticket and we’ll install it for you.
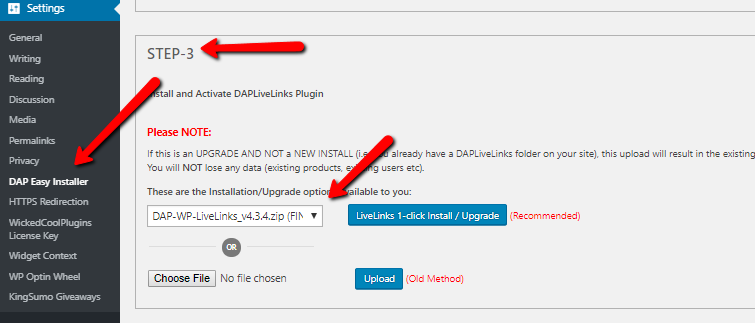
STEP 3:
What if you don't get the success message or get a license or another error?
If you see the success message, go to the next step.
If not, then unfortunately you’ll have to use “FTP” or “File Manager” (in your webhost cpanel) to upload files. On some servers, the file upload does not work due to permission issues or file/folder ownership issues. You can’t use easy installer on these servers. Click here for detailed instructions.
Please Note: If you are a NEW DAP member or if you’re a DAP Platinum/Monthly member, we offer DAP installation for FREE. Please open a support ticket and we’ll install it for you.
What Next after LiveLinks plugin is activated?
After the installation is complete, you’ll find a new DigitalAccessPass link in the left sidebar of your WordPress admin panel. Click on that to access your DAP Admin Dashboard.
You’ll have to enter your DAP license key in DAP Admin Dashboard => Setup => Config page -> License Key field to get started. You can get your DAP license key from your member’s area on our site.
Install Cron
Cron installation only required for new installs.
If you go back to the settings page, the step 4 will give you the entire ‘cron command’. Copy it and then login to your Webhost Cpanel -> Cron tab -> and enter this cron command.
Set it up to run once every hour at the top of the hour.
If you do not know how to find the cron tab, please contact your webhosting provider or open a support ticket and we will set it up it for you.
If you’re looking for the old way (using ftp or file manager) to install DAP, click here.
Please Note: If you are a NEW DAP member or if you’re a DAP Platinum/Monthly member, we offer DAP installation for FREE. Please open a support ticket and we’ll install it for you.
© 2021, Wicked Cool Plugins, Inc . All rights reserved.