1
Exporting Users
You can export DAP user/member data in CSV format, from the Users > Manage screen, as shown below.
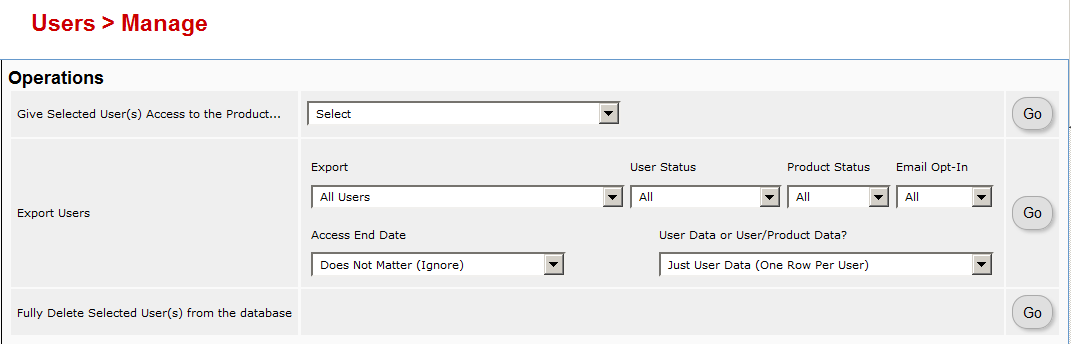
When you click on the “Go” button, you will see a pop-up appear that contains the exported data.
You may then copy it and save it to your desktop.
If you wish to bring that data into, say, an MS Excel spreadsheet, then save the file as a .csv file on your desktop, and then you will be able to import it into Excel.
4
Give Existing Users Access To A Product
This flow is only for giving access to an existing User to a Product. If you wish to add a new user manually to the system, then see this post.
- Go to the Users > Manage screen.
- Search for the user by email id (or last name, user id, etc)
- Once you have found their information, check the check box in the first column next to their user id
- Then using the drop-downs in the top-right section, give them access to the new Product
- They’re initially added as a “Free” user by default. You may mark them as “PAID” if you want to have access to the product just like an actual paying member would.

Product Error
Question:
I can’t add a new product. Here is what the error says
An error has occurred!
Error: Oops, an error occurred in the database. Please try again or contact site owner
Answer:
Pl run this script in a browser.
http://yoursite.com/dap/update.php
(Replace yoursite.com with the name of your site).
Ignore any database errors.
Then log back in to DAP. See if the error is gone.
Troubleshooting/FAQ SMTP Settings
Question: I am sending stuff out via AuthSMTP.com, do I still have to set my e-mail limit to something small or can I go big e.g. 15000 per hour?
You can go big.. DAP does not have any restriction.
But the cron might end up running for a long time and your host (especially if you are on shared hosting) might have a problem with that. Also make sure the hourly cron does not kick off if it finds that the old cron has not finished running yet. Usually webhosts have a feature where they lock the cron from running if the previous run of same cron has not completed.. but you might want to confirm with your host.
Troubleshooting Self Service Store (SSS)
Q1. I setup a master product and a child product and linked association per your video. User also has been granted credit, but no where on the page it shows the download links. Where does the user have to click to download the product ?
A1. If the user is NOT able to access content, then it’s because the user does NOT have access to the content. Whether it’s SSS delivered product or regular product, same rule applies.
All the products/content that the user has access to will be listed in the members home page.
(Read this on HowToCreateMemberHomePage – http://www.digitalaccesspass.com/doc/creating-member-affiliate-sections-within-wordpress ).
1) go to dap manage users page
2) select that user record and see what all product the user has access to
3) see if the user is marked as “FREE” or “PAID” user of the child products.
4) check if the user status and product status is set to A (active).
5) Check user’s access start and end date for the child products
6) if the user is marked as FREE user, then the user will NOT be able to access content that is marked as ‘available to paid users’ in the content protection area. So check that and make sure the user has access to the content.
2
Use GetResponse Webform to Sign-up Users
If you want to use the GetResponse webform (instead of DAP sign-up form) and if you want your users to be automatically logged into DAP when they confirm their getresponse subscription, then follow the steps below to integrate DAP with GetResponse.
1. Go to DAP admin panel -> manage products page.
2. Note down the product Id of the product to which you want to sign-up the users.
3. There is a file called dap-getresponse.php in your /dap folder. Make a copy of that file and call it dap-getresponse-productId.php. Replace productId with the product Id you noted in step 2.
If the productId = 2, then you will end up with a file called dap-getresponse-2.php.
4. Open this file (dap-getresponse-2.php), and change this line:
$default_product_id = 1; //Change this to any product id from DAP
So, in this example, change it to:
$default_product_id = 2; //Change this to any product id from DAP
Upload this file back to /dap folder on your site.
5. After a user completes signup, getresponse will redirect users to the dap script that will automatically create the membership account, send out the thankyou email with the loginId/Password and then redirect users to the login page. If you want the users to be redirected to a different page than login, then look for this line in the dap-getresponse-productId.php script:
$redirect = Dap_Config::get(“LOGIN_URL”); (line # 19)
By default, it points to the login page… you can change the redirect to point to the sales page.
For ex –
$redirect = “http://yoursite.com/mysalespage”;
Upload this file back to /dap folder on your site.
3. Now login to GetResponse. Go to Contacts- > Webform and setup the confirmation
http://screencast.com/t/ZTE0MDhhYTY
Click on the thankyou page dropdown and select ‘custom page’.
Set the thank you Page URL to http://<yoursite.com>/dap/dap-getresponse-<productId>.php
Replace <yoursite.com> with the name of your site. Replace <productId> with the product Id you noted in step 2.
4. Use the Getresponse web form for signing up customers (instead of dap direct signup form).
That’s it.
Everytime a users signs up via the getresponse web form to your site, they will automatically be added to DAP.
You can configure the welcome/thankyou message in DAP to send out the dap login id and password
OR
You can leave the welcome/thankyou message in DAP empty. Configure DAP to generate a default password (DAP Admin -> Setup -> config -> Advanced) as shown in the screencast below and set up an autoresponder in Aweber so when the users signup via the Aweber form, they can receive their dap id/password details via Aweber directly.
http://screencast.com/t/MjY0NGI3
7
Troubleshooting DAP/WordPress Sync
The problem: DAP users are not being “sync”ed to WordPress.
Here’s how to troubleshoot.
What are your sync options in DAP Admin -> Setup -> Config -> WordPress Related Section?
Do you allow all users to be sync’d or just paid users?
Do you allow users to be synced only when they pick a username?
If you allow all users to be sync’d and do not want to force your users to pick a username before dap syncs to WP, then use these settings:
Sync DAP User Data to WordPress “Y”
Sync Paid Users Only “N”
Sync Only if Username Exists in DAP “N”
To test:
1) Add a user manually to DAP via dap admin panel
2) Note down the user’s dap login id/password
3) Open a new browser where you are not logged in to DAP as admin
4) Now login to DAP again but this time as the user you created in step 1.
5) Now visit any part of your blog. DAP will now sync user to WP.
6) Login to WP admin panel. Click on Users in the left sidebar and see if the new user was created.
4
Plimus Integration
DAP supports integration with Plimus since 4.1.
You will find a script called dap-plimus.php under the dap folder.
Set the IPN (instant payment notification) url in Plimus to point to the dap URL –
http://yoursite.com/dap/dap-plimus.php
(NOTE: replace yoursite.com with the name of your site).
Make sure product name in DAP exactly matches the product name in Plimus.
Also, make sure you have a thank-you message configured in dap products page.
Here’s how it will work:
When a user completes purchase, Plimus will send payment notification to DAP.
DAP will automatically create the membership account, allow user access to the product and send out the thank-you email configured under the DAP product with the login details.
3
DAP-Generated Paypal Button – FAQ/Troubleshooting
NOTE: If you wish to set up your Paypal IPN URL to be broadcast to multiple sites, you may also consider our IPN Redirect plugin from WickedCoolPlugins.com
_____________________________________________
Question 1A: How can I share one Paypal account with multiple DAP and non-DAP sites?
-OR-
Question 1B: If I use “DAP” generated buy-buttons, and I have to set up the “auto-return URL” in Paypal, which is limited to just one URL. How can I use that if I’m selling from multiple web sites and using the same Paypal account?
Answer: You can share same Paypal account between multiple DAP and other non-DAP sites if you use DAP-generated Paypal buttons or Paypal-hosted buttons or a combination of both.
If you use DAP generated Paypal buttons:
DAP sends button-level return value to Paypal. By default, DAP sets the button level return to point to a DAP script on the site where you generated the button ( http://yoursite.com/dap/dap-thankyou.php ). Upon payment, the users are returned to that dap-thankyou.php. And then the dap-thankyou.php script creates the membership account , auto-logs in users to their membership area and redirects users upon login to whatever you have in DAP product-level or DAP global-level login redirect. So the users automatically land at the ‘DAP product-level or DAP global-level login redirect‘ upon successful payment.
If you want the users to be redirected to a different URL upon login, then you can add a redirect tag to dap generated button code:
<input type=”hidden” name=”redirect” value=”http://yoursite.com/thankyou” />
The auto-return needs to be set and pointed to some URL – any URL – otherwise Paypal will not be able to automatically return users back to your website upon payment for non-paypal hosted buttons. DAP does not care what you set it to – but if you do set it, then make sure that all the Paypal buttons you use (DAP-generated or Paypal-hosted) have their own auto-return value.
If you use a DAP-generated Paypal button, you do not have to worry about the auto-return URL, because DAP will set it and send it to Paypal at a button level. But if you use Paypal-hosted buttons, then make sure you set the button level ‘return’ value.
If you do not set the button level return value, then the Paypal profile -> global level auto-return will get used. So if your global auto-return (under Paypal -> Profile -> Website Payment Preferences) is set to some URL on Site B and say you use a Paypal button to sell something on SITE A but that paypal button does not have a return value set, then upon purchase, the users will get returned to the URL on SITE B and that is probably not what you want. so make sure you set the button level return value for paypal-hosted buttons.
Question 2:
I added DAP hosted buttons and did a test purchase. After purchase the user was redirected to the login page and but the user was NOT automatically logged in. The login page states: SUCCESS! Thank you for completing the purchase. Please check your email for further details. Have I setup something incorrect?
Answer:
What do you see in DAP Payments/Coupons -> Orders page for this transaction ?
Hit the search button in the orders page and it will bring up all orders.
Is the payment status “Pending” or is it “Complete” ?
If it’s pending, it could be why the user is not getting logged in. Click on the transaction Id hyperlink for that order and it will take you to the transactions page… here you can see what Paypal sent in the transaction blob.
See if Paypal sent Payment Status = pending. It yes, it can happen if the buyer didnot confirm their email in paypal.
But if payment status is complete, then do this.
Set DAP setup -> config -> log level to 5
Then go to dap system -> logs and Empty log content
Then rerun the paypal purchase and send us the log snippet.
Question 3: Users are not getting auto-logged in.
I see these errors in the dap log.
>> 2011-03-29 10:54:02:dap-thankyou: after fopen
2011-03-29 10:54:02:dap-thankyou.php: paypal communication failed <<
Answer: In dap-thankyou.php script, dap uses fopen to connect to paypal to retrieve purchase details and to auto-login users.
If it is failing, then there is probably a fopen connection issue between your host and paypal.
Try this:
In dap config -> payment processing -> Set “Use CURL to connect to Paypal” to FOPEN.
If you set it to fopen, the the IPN script (dap-paypal.php) will use FOPEN to talk to Paypal also. Otherwise it will use CURL.
If the dap-paypal.php (backend ipn script) works, the user account will get created successfully in DAP but for auto-login to work, the front-end script (dap-thankyou.php) needs to work. But for front-end dap-thankyou.php script to work, FOPEN needs to work on your server/host.
So to test if FOPEN is working, do this:
Set DAP setup -> config -> log level to 5
Then go to dap system -> logs and Empty log content
Make the backend IPN script also use FOPEN (by setting dap config -> “Use CURL to connect to Paypal” to FOPEN)
Now rerun purchase and see if you notice dap-paypal.php lines in there with fopen communication error in DAP Logs.
If yes, then the problem is that your host is preventing fopen communication with paypal.
If no, then open a ticket with us and we will look into it.
Question 4: How do I replace the DAP generated PP button with my own image?
Look for this line in the button code:
<input type=”image” src=”http://www.paypal.com/en_US/i/btn/btn_buynow_LG.gif” border=”0″ name=”submit” alt=”Make payments with PayPal – its fast, free and secure!” />
Replace the “src” tag with the path to your own image file.
Ex – <input type=”image” src=”/dap/images/myimage,gif” border=”0″ name=”submit” alt=”Make payments with PayPal – its fast, free and secure!” />
Question 5: How to redirect Paypal buyers to a custom URL after purchase?
Answer:
If you’re using buy button form code, then you can add a redirect tag to dap generated buy button code:
<input type=”hidden” name=”redirect” value=”http://yoursite.com/thankyou” />
If you are using a buy button link, then add the text below at the end of your link.
&redirect=http://yoursite.com/thankyou/
Like this:
http://YourSite.com/dap/paypalCoupon.php?cmd=_xclick-subscriptions&item_number=10¤cy_code=USD&redirect=http://yoursite.com/thankyou/
Or
http://YourSite.com/dap/paypalCoupon.php?cmd=_xclick-subscriptions&item_number=10¤cy_code=USD&redirect=/thankyou/
10
DAP Plugin Framework
How To Setup Notifications/Triggers From DAP to 3rd Party APIs
We have now created a plugin framework that will allow DAP to trigger calls to 3rd party services when a user is added to a product (subscription/registration event) or when a user loses access to product (unsubscribe/unregister event).
In fact, we used the same framework to develop DAP -> Mailchimp integration in DAP 4.1.
Here’s the steps :
1) If you want DAP to trigger calls to the APIs/methods you wrote upon an addUserToProduct event or removeUserFromProduct event in DAP, then in the DAP products page – > notify plugin field, use the following format to integrate the APIs/class files. You can integrate multiple systems with DAP using this framework.

Say you want to integrate classname1 (that has the necessary APIs to register/unregister users to 3rd party service like Mailchimp ) and classname 2 (that has the necessary APIs to register/unregister users to another 3rd party service like GetResponse), then use this format in the notify plugins field above.
classname1:VALUE 1 you want to pass to the api: VALUE 2 you want to pass to the api: VALUE 3 you want to pass to the api
If you want DAP to call multiple APIs/ Classes, then just create a comma seperated list of classes that DAP should notify.
classname1:VALUE 1 you want to pass to the api: VALUE 2 you want to pass to the api: VALUE 3 you want to pass to the api,
classname2:VALUE 1 you want to pass to the api: VALUE 2 you want to pass to the api,
classname3:VALUE 1 you want to pass to the api
Whatever values (VALUE1, VALUE2.. ) you put next to the class name (all values should be “:” separated), DAP will forward those params/values to your APIs when a user is added to product or user is removed from product.
To integrate say classname1 which consists of the methods/apis to talk to your 3rd party services, create a folder called classname1 under /dap/plugins folder. Then under the classname1 folder, create a php script called classname1.class.php (just the way you notice a folder called mailchimp and under mailchimp a class file called mailchimp.class.php).
So you will have something like this:
/dap/plugins/classname1/classname1.class.php
Here’s what you need to have in classname1.class.php ( skleton class implementation ) :
< ?php
class classname1 {
function classname1() // constructor
{ }
//======== USER REGISTRATION===========
// this function is called by dap when a user is added to a product
function register($userId, $productId, $params) {
logToFile(“classname1.class.php: register(): “, LOG_INFO_DAP);
$dapuser = Dap_User::loadUserById($userId);
$email = trim($dapuser->getEmail());
$username = trim($dapuser->getUser_name());
$firstname = trim($dapuser->getFirst_name());
$lastname = trim($dapuser->getLast_name());
$data = explode(“:”,$params);
}
function unregister($userId, $productId, $params)
{
logToFile(“classname1.class.php: register(): “, LOG_INFO_DAP);
$dapuser = Dap_User::loadUserById($userId);
$email = trim($dapuser->getEmail());
$data = explode(“:”,$params);
}
}
?>
NOTE:
You MUST have same name methods (called register() and unregister() ) and the exact method signature as you see above.
You can call other methods/functions from register/unregister and/or
You can call 3rd party APIs from register/unregister methods and/or
You can include other class files.
Whatever values you pass (VALUE1, VALUE2 etc) via notify plugin, you can access those values in these methods. The values are available in the $params array.
That’s it.
You can add a test user to a product in DAP (via dap admin -> add users) and see if things work as expected.